

The call that comes in most
Happy Valley does not have an old-house rot problem. It has a twenty-year problem. The city sits inside a bowl between Mount Scott and Scouters Mountain, and almost every lot in it, from the first subdivisions that went in during the 1990s to the ones still filling in today, was graded and built within living memory. The trim, fascia and caulk joints a builder installed back then are now old enough that the seal has given out, and water that used to run off a hillside cut has started finding its way into a wall instead. We trace that opening back to where it actually started, cut the wood past anything soft, and rebuild what is underneath before a single new board goes back on.
Licensed and insured. Oregon CCB #262707
On anything sent before 5pm
We match or beat most written estimates
Remodels completed
On a house built within the last fifteen to thirty years, rot does not start in a plank that has stood for a century. It starts at a seam somebody caulked once and never looked at again. These are the spots on a Happy Valley subdivision home where that seam tends to let go first:
The joints a builder sealed once and called finished: corner trim where two pieces of fiber cement or vinyl siding meet, the fascia board running under the gutter line, window and door casing, and the caulk bead holding all of it together after fifteen or more years in the weather.
Decking that has gone soft underfoot, the joists and beams supporting it, and the ledger bolting the deck to the house, which is the connection that fails first on a deck built out over a graded, stepped backyard rather than flat ground. On the Ridgecrest side of the city, where a deck is often framed to catch a Mount Hood view off a hillside lot, that ledger is doing more work than it looks like, and it is usually the first thing we find soft.
Sill plates, rim joists, studs and post bases that sit low against a foundation cut into a hillside lot, pulling moisture out of fill soil that has not had decades to settle and drain the way older ground does. We find it most on the downhill side of a house, where the original grading sent water toward the wall instead of away from it.
Flashing above a window or door that was never lapped correctly when the subdivision went up, quietly feeding rain in behind the trim with every storm since. Once that cavity is wet, the newer fiber cement or vinyl siding closing it in traps the moisture rather than letting it breathe back out.
A supply line or shower pan installed to a builder’s standard spec, seeping for months without anyone noticing, softening the subfloor under a bathroom that is otherwise barely two decades old.
A couple of photos and a sentence on what has you wondering is plenty to start. Anything we see before the end of the business day gets answered before we close up shop, and on the occasion it is not a rot repair at all, we will tell you straight and point you to the right trade.
On rot work this is the only proof that means anything. A finished photo shows a wall. A pair shows what was behind it.
Drag the handle. Here is the shower bay from one of our projects, first opened up to show the water damage in the framing, then finished with new tile, a niche and a frameless glass panel.
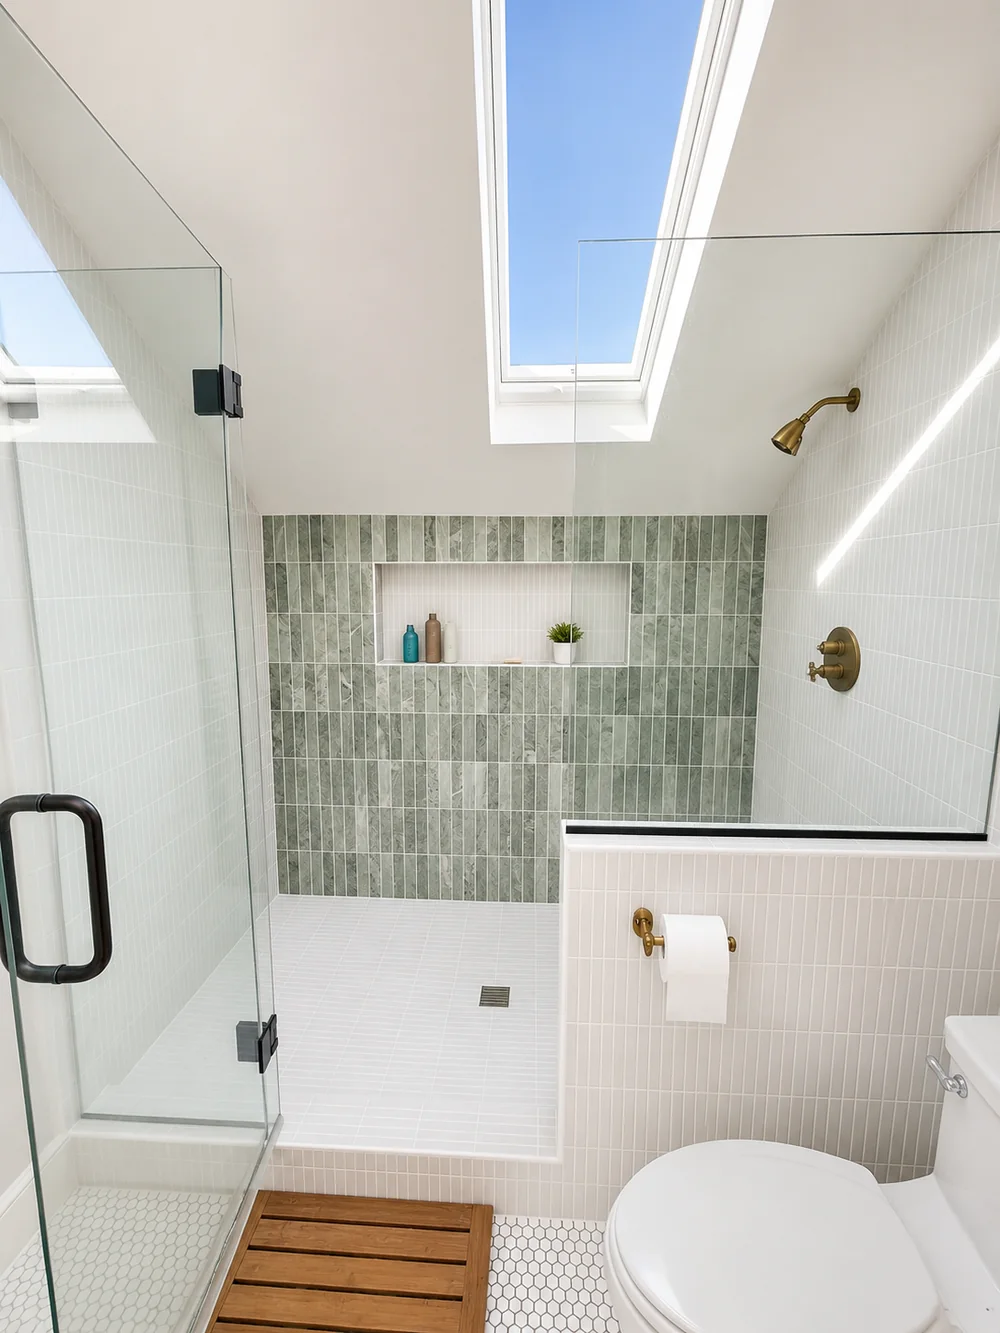
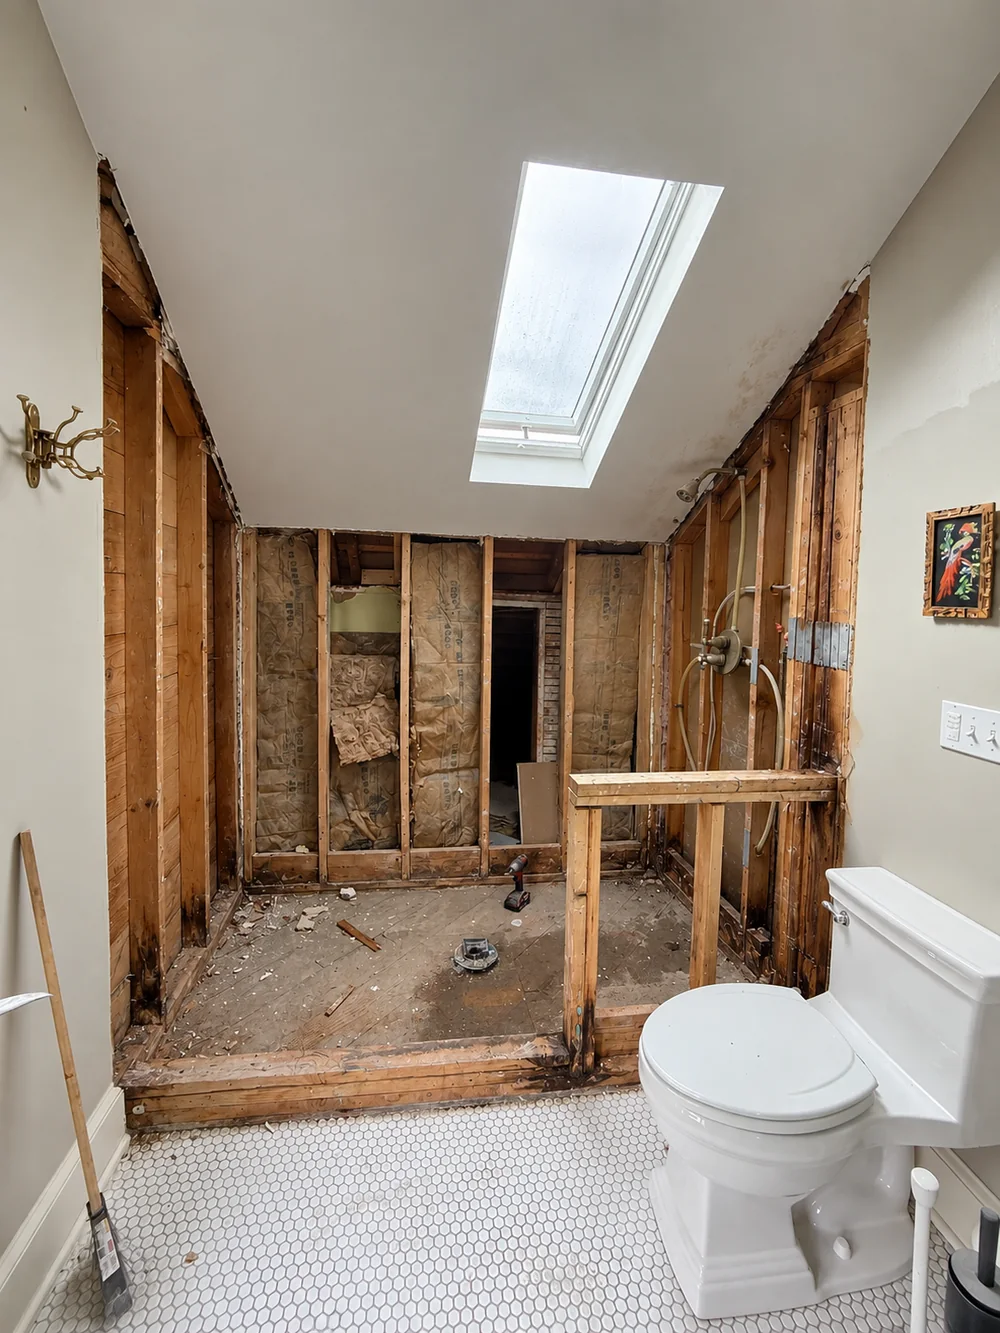 Before After
A soft patch of trim on a Happy Valley subdivision house tells you almost nothing about the size of the job behind it. Caulk fails at the seam first, and once it does, water follows whatever is underneath long before it ever reaches daylight again, so what you can press with a thumb from the driveway is the far edge of the damage, not the middle of it. On a wall framed into a graded hillside cut, where the fill soil below a foundation drains slower than the hillside ever did before it was built on, that hidden stretch can run well past what the visible stain suggests. A number written against a photograph is really a number written against a guess, and the guess shows up as a change order the afternoon the wall finally comes open.
That is why we look at the wall in person before any number goes on paper, standing where the problem actually is rather than guessing from a picture. The estimate ends up built in two parts: a firm total for the work we can already see needs doing, and a flagged allowance for whatever the opening itself turns up, one that waits for your yes before a single additional cut happens. Which part of the number is locked and which part is still a question is never left for you to guess, since the page spells it out.
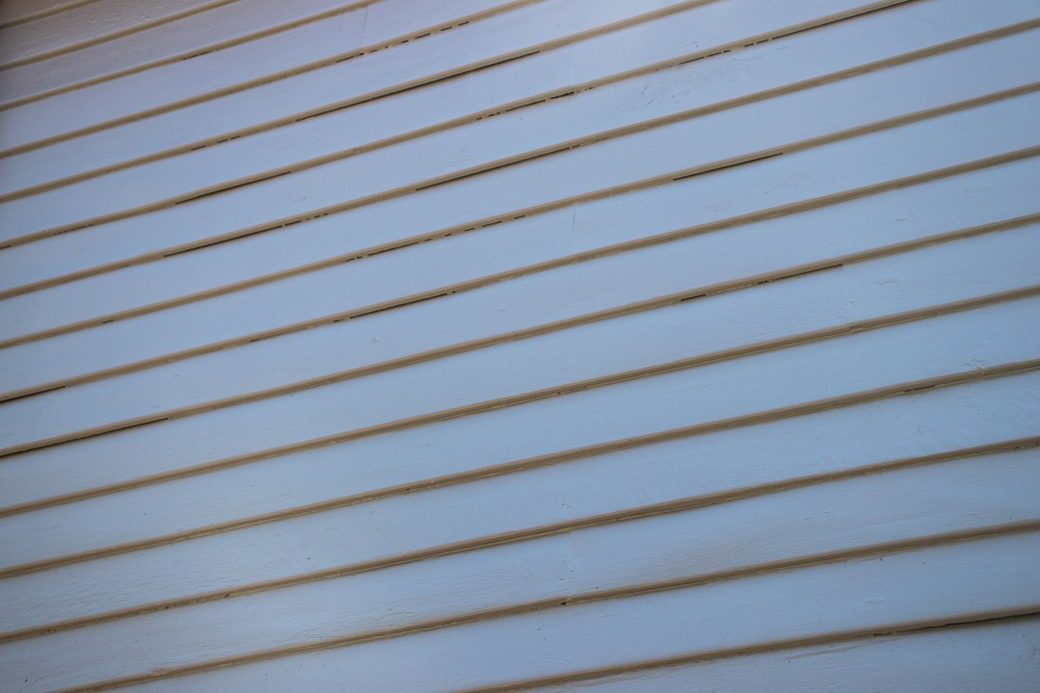
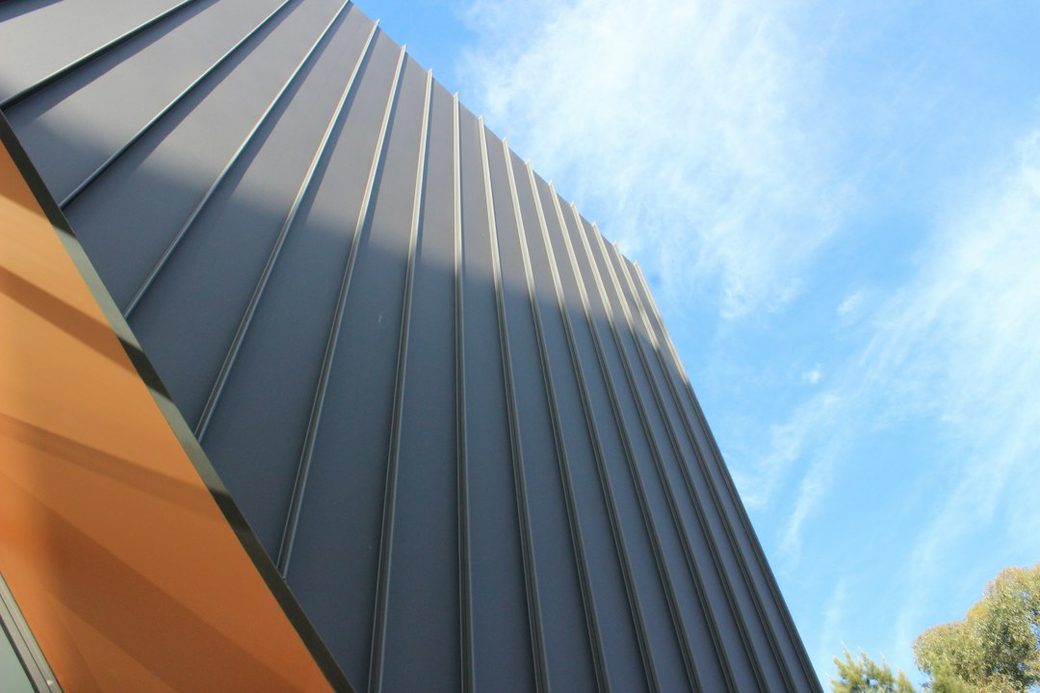
Most homes here went up within the last twenty to twenty-five years, graded into a hillside that drains differently lot to lot. Builder-grade caulk and flashing were never meant to be permanent, and on a newer house that’s usually the first thing to fail, not the framing underneath it.
Anyone can pull a soft board out in an afternoon. What actually protects this corner for the next fifteen to twenty years is which product we decide to install over it.
On a subdivision house, matching the original rarely means matching real wood. Most of Happy Valley’s housing stock went up with fiber cement lap siding or cellular vinyl trim run to a specific profile, so the first task is identifying which product and profile the builder used and sourcing the closest current match, since product lines change every few years and an exact discontinued profile sometimes has to be built up from flat stock to get the reveal to line up with the courses beside it.
Fiber cement itself does not rot, but the trim boards, fascia and window casing on many of these builds are still primed wood or finger-jointed pine underneath a factory coating, and that coating is exactly what is failing at fifteen to twenty-five years old. Where we replace that trim, we step up to cellular PVC or a true fiber cement board rather than putting primed pine back in the same failure point, because a corner board at the base, a water table, or casing under a window with no head flashing is going to see the same water a second time regardless of what we install.
Framing follows its own logic, apart from whatever we decide about trim. A piece landing on a foundation wall or sitting within a few inches of grade on a hillside cut always comes back pressure-treated, since a bare sill set against wet fill soil is precisely what doomed the original. Wherever we sister a joist or stand in a new post, it is Douglas fir, cut to shoulder the load the damaged piece was carrying, never just sized to patch the hole.
Fasteners matter here as much as anywhere else. The copper in current pressure-treated lumber corrodes plain galvanized steel quickly, so every screw and nail going into treated stock is stainless or hot-dipped galvanized instead. Skip that detail and the proof shows up within a season as rust-colored streaks bleeding down the face of a brand-new board.
Every new piece gets primed on all six faces, including the cut ends, before it goes up. Bare end grain is the thirstiest part of any board, soaking up far more moisture than a painted face ever will, and whether that sealing step gets done is a better sign of how long this repair holds than whatever is printed on the paint can.
Four questions settle how big a Happy Valley rot repair actually gets, and you can answer the first two yourself, on a weekend, with nothing more than a screwdriver.
First, figure out what the piece is actually doing. Fascia, a run of trim, the bottom edge of the siding: cut one of those out and the house does not notice, so that kind of repair stays simple and relatively cheap. Everything changes the moment a sill plate, rim joist, post footing or deck ledger is involved, because the building is physically resting on it. That triggers temporary shoring, framing lumber rated for the load it needs to carry, and paperwork filed through HV Works, the City of Happy Valley’s own online permitting system, with an inspection to follow. Wide openings or long spans on a sloped lot sometimes need a stamped engineering drawing before we can even start. None of that cost comes from the price of the board itself. It comes from safely getting a weight-bearing piece out of the wall without anything settling while we work.
Second, how far did it actually spread? Test along the board with a screwdriver every couple of inches, working outward from the obvious soft spot, until the tip meets solid resistance again, then keep testing a further twelve inches past that point. Rot travels inside the fiber well beyond anything the caulk line or the paint shows on the outside, and the number one reason a repair fails a second time is cutting back only as far as the damage is visible.
Third, does epoxy actually apply here? Once in a while, yes, and we say so plainly when it does. A quality consolidant can rescue a trim profile that the original builder’s supplier no longer carries, provided the decay sits in a shallow pocket rather than running clean through the piece. It has no business anywhere load-bearing, and reaching for it is never a shortcut around opening the wall. A contractor who offers to trowel epoxy into a soft sill plate is quietly setting up your second repair.
Fourth, and the one that actually decides whether the fix holds, is what sits above or beside the damage. On a lot graded into the slope between Mount Scott and Scouters Mountain, the usual culprit is a downspout dumping straight against the foundation instead of carrying water to the yard drain, a swale on the uphill side that was never cut deep enough, or a deck ledger with no cap flashing lapped over its top edge. We track that source down and seal it before a single new board goes in, priced on the same estimate as the repair itself, because fresh lumber installed under a leak that is still active just gets paid for twice.
Nobody can hand you a number before we see the wall, because what drives the price is simply how much rot turned out to be back there, not anything we can predict from the street. Here is what we do know walking in. A short run of trim or a few soft deck boards is inexpensive to fix on its own. The math changes once a sill plate, a rim joist or a post base is involved, because now the house is actually leaning on that piece, and pulling it safely means temporary shoring plus an inspection before we can close the wall back up. More than anything else, the real cost driver is time: a caulk joint that failed two years ago costs far less to fix than the same joint ignored for ten, which is the whole case for calling now rather than next spring.
Material is almost never the expensive part of a rot bill, which surprises most homeowners. The money goes into reaching the work and putting it back the way it was: building safe staging on a lot that may step down from the street in two or three graded tiers, pulling enough siding off to actually see behind the damage, holding a load on temporary posts while a bad piece comes out, and then closing the wall so there is nothing left to see. A repair squeezed into the narrow side yard between two closely built subdivision homes will always cost more than the same repair on a lot with open access on every side, simply because there is less room to set up.
Rank where your dollars actually go and labor leads by a wide margin. After that comes everything that seals the repair for good: the flashing, the house wrap, the siding, then primer and a finish coat, with the lumber itself further down the list than most people guess, and a permit plus inspection only entering the picture when the work is structural. Every fixture that has to come down and go back up along the way, a downspout, a porch light, a stretch of railing, gets its own line on the invoice, so you can see exactly how much of the number is wood and how much is everything around it.
Already holding a number from another contractor? Hand it over along with your photos. We match or beat most written estimates by 10%, in writing.
10%
Send it over along with a picture or two of what is worrying you, and we will weigh it against our own number. We answer every message that reaches us the same business day.
Most of a rot repair stays in the yard, not in your kitchen or your living room, so day-to-day life inside barely changes while we work. Here is generally how it unfolds.
Before a tool comes out, we spend time standing at the actual wall with you, marking the exact boundary of what gets removed with tape rather than guessing from the ground. On a lot that was cut and filled to level a hillside pad, finding a flat spot for the lumber stack and the dumpster sometimes means borrowing the driveway or working out curb space with a neighbor, so that gets settled before anything is scheduled. Anything within reach of that wall that could be damaged, whether it is a planter, a light fixture or a window box, gets carried somewhere safe first.
By midmorning the old siding and trim are off, and the studs are sitting exposed in the open air by lunchtime. That bare wall is the only real answer to how much of the estimate’s possible extent line turns out to be true, more reliable than any guess written down before we ever picked up a crowbar.
If the open wall turns out to hide more than the estimate accounted for, we call that same day, send photos along with the call, and wait. Nothing marked as a possibility on your paperwork gets touched until you tell us to proceed.
New lumber goes in first, then sheathing right over it, and nobody on the crew packs up until the flashing and the house wrap are both nailed down, because this is hillside ground and an uncovered stud bay left out overnight just gives runoff from above one more place to collect. If rain moves in faster than we can close up, we tarp the whole opening, run tape along every seam, and leave it dry until the front passes.
Fresh siding goes up panel by panel, trim gets reset around every opening, and we run a bead of clear sealant before brushing on the first protective coat. By the time we are done for the day, the wall photographs as finished from the curb, and that is usually the point where somebody walking a dog stops to ask for a business card.
Topcoat goes on last. Once the yard is swept and clear, you and I walk the repair together and check it against every line on the original estimate. Whatever we cut off, whatever rotted wood came out of the wall, and the dumpster itself, all of it rides away in the truck before we consider the job finished.
It depends on what the wall decides to show us, and I will not pretend otherwise at the walk. The things that actually set the schedule are how long a matching siding or trim profile takes to source for a subdivision home, whether the City of Happy Valley’s Building Division has to inspect a stage before we move to the next one, and how much the open wall adds once we are actually inside it. You get a window I believe in at the quote, and the day anything moves that window, you hear it from me with the reason.
If the repair touches anything that carries weight, a sill plate, a rim joist, a post base or a deck ledger, yes. That permit is filed with the City of Happy Valley’s Building Division, typically online through its HV Works permitting portal. We submit the application and meet the inspector ourselves, so none of the paperwork lands on you. A wide opening or a long clear span on a graded hillside lot occasionally calls for engineered, stamped plans, and we flag that at the quote if yours needs it.
On a subdivision home, the surprise is rarely rot in a second spot. It is usually a builder shortcut: insulation that was never actually installed behind a wall that looks finished, a nail gun that caught a vapor barrier, or trim fastened with the wrong hardware for pressure-treated lumber. Finding one does not reopen your whole estimate or stop the job. We price that single item on its own line, show it to you with a photo, and you decide yes or no while the rest of the schedule keeps moving.
Every production builder in Happy Valley ran a specific siding and trim line across an entire phase of a subdivision, so the first step is figuring out exactly which product is already on your walls before we order anything. Current stock from that same manufacturer is usually the closest match, and when a profile has aged out of production, we build a sample, hold it against the existing run in daylight, and get your sign-off before a single piece goes on the house. The leak gets solved underneath first. What shows from the sidewalk afterward is the part most homeowners never think to ask about until they realize they cannot find the repair.
David does, in person, not over a group text relayed through someone else. He owns Evergreen Remodeling, built your price himself, and lines up which trade shows up on which day. Any licensed trade we bring in still has to hit our schedule and our standard, and when the wall is open and a decision needs making, he is the one making it, not a project manager reading from his notes. However many people are on the truck that morning, one name is on the hook for the result, and it is the same one who walked your property the first day.
Yes, and most Happy Valley households choose to stay. We wall off whichever room is active behind a zippered dust barrier, keep the entry and hallway you use every day clear of debris, and sequence the trades so the kitchen and at least one bathroom are never both out of service on the same day. Daily start and stop times get agreed before the first morning, so the house is quiet and feels like yours again by evening.
Indoors, not at all, but rot repair is mostly exterior work, so the rain matters here more than it would for something like a kitchen. Once a wall is open, a storm rolling down off the grade above a hillside lot can do real damage fast, so we watch the forecast and book that stage for the driest run of days available. Happy Valley holds onto its wet season from roughly October into June, and whatever we open gets wrapped and taped before we leave for the day, whatever the forecast says that afternoon.
Not much. A few photos of the soft spot and a sentence on what you are seeing is enough to get started, and the rougher the note the better; we would rather see it than have it polished. Send it along before the end of the business day and you will have an answer before we close up. If another contractor already wrote you a number for the same repair, forward that too, since we match or beat most written estimates by 10%.
Evergreen runs out of 505 SE 184th Avenue on Vancouver’s east side. A Happy Valley job means a longer trip than most of our calls, over the Columbia on I-205 and then southeast across the whole width of the Portland metro to reach the far slope of Mount Scott, but it is a regular part of the week for this crew, not an exception we have to plan around. Coverage there spans the newer subdivision streets of Rock Creek and Jackson Hills, the view lots climbing toward Ridgecrest where some homes look straight at Mount Hood, the Southgate and West Mount Scott areas, and on into Pleasant Valley near the city’s western boundary. We hold an Oregon contractor license, CCB #262707, and file structural permits with the City of Happy Valley’s Building Division through HV Works, its own online system for permits and inspections.
Three of the 50 reviews on our Google profile, in the homeowners' own words.
David's work was terrific. Repaired a rotted out structural framing issue in a bathroom and replaced (and resized!) a window in the same space. He initially quoted a two day job but was able to finish in a single day. Dedicated! Will be using him again.
Joe H.Bathroom framing repair
We talked to 4 different contractors and only David, of Evergreen, took the time to climb up to our roof to check out the job. The others gave us bids based upon a photo. Evergreen was not the cheapest but the extent of the work they did was worth every penny.
Steve K.Roof and exterior work
Evergreen crew installed three skylights for us. Once we opened the ceiling there was more to do than expected and they handled it without drama. Clean work, fair price, and they cleaned up after themselves.
Foad M.Three skylights
Send photos and a short description. If it arrives before 5pm you get an answer the same day.
Already have a written estimate from someone else? Send that too. We match or beat most estimates by 10%.
Built for the wet side of the river.

Licensed and insured remodeling contractor serving Vancouver, WA and the Portland metro.
Oregon CCB #262707 · WA Lic. #EVERGRS757MCEvergreen Renewal Services LLC
505 SE 184th Ave Unit 320
Vancouver, WA 98683
© 2026 Evergreen Remodeling. Oregon CCB #262707 · WA Lic. #EVERGRS757MC. Evergreen Renewal Services LLC. All rights reserved.
Same day response on anything sent before 5pm.