

Happy Valley grew up inside a natural bowl between Mount Scott and Scouters Mountain, so very few backyards here sit flat. Most lots were graded and stepped into that slope before the first house went up, and the deck that came with it usually follows the grade in stages rather than sitting level in one plane. Those builder decks are old enough now, fifteen to twenty-five years in plenty of cases, that the footings and the grading beneath them are worth a second look. We build and rebuild decks and patio covers around that stepped terrain as the starting point, not an afterthought.
Licensed and insured. Oregon CCB #262707
On anything sent before 5pm
We match or beat most written estimates
Remodels completed
We start underground with footings built for a stepped lot, then frame, deck, build the stairs and hang the rail, finishing in cedar or composite.
A frame that has held up gets a fresh surface screwed down over it. One that the slope’s drainage and the years have finally beaten gets pulled completely and rebuilt from new footings up.
Framed and flashed into the house rather than just propped up, a cover is what turns a patio from a three-month space into a year-round one.
We go after whatever is failing: the bolted connection at the house, the beams and posts carrying the load, or the footings they stand on, now adjusted if the original grading has shifted.
On a hillside lot the downhill edge of a deck can sit well past the 30-inch height above grade where code requires a guard. We remove the existing rail, check and reinforce every post where it joins the frame, then install new guards built to current code, rising 36 inches or more. The frame and boards stay, with nothing rebuilt.
The frame is the part you never see again once the boards go down. This is the same deck at both stages.
Drag the handle. Left, the deck framed: joists on the beam, nothing to walk on yet. Right, the same deck finished, with the timber cover over it and the steps down to the yard.
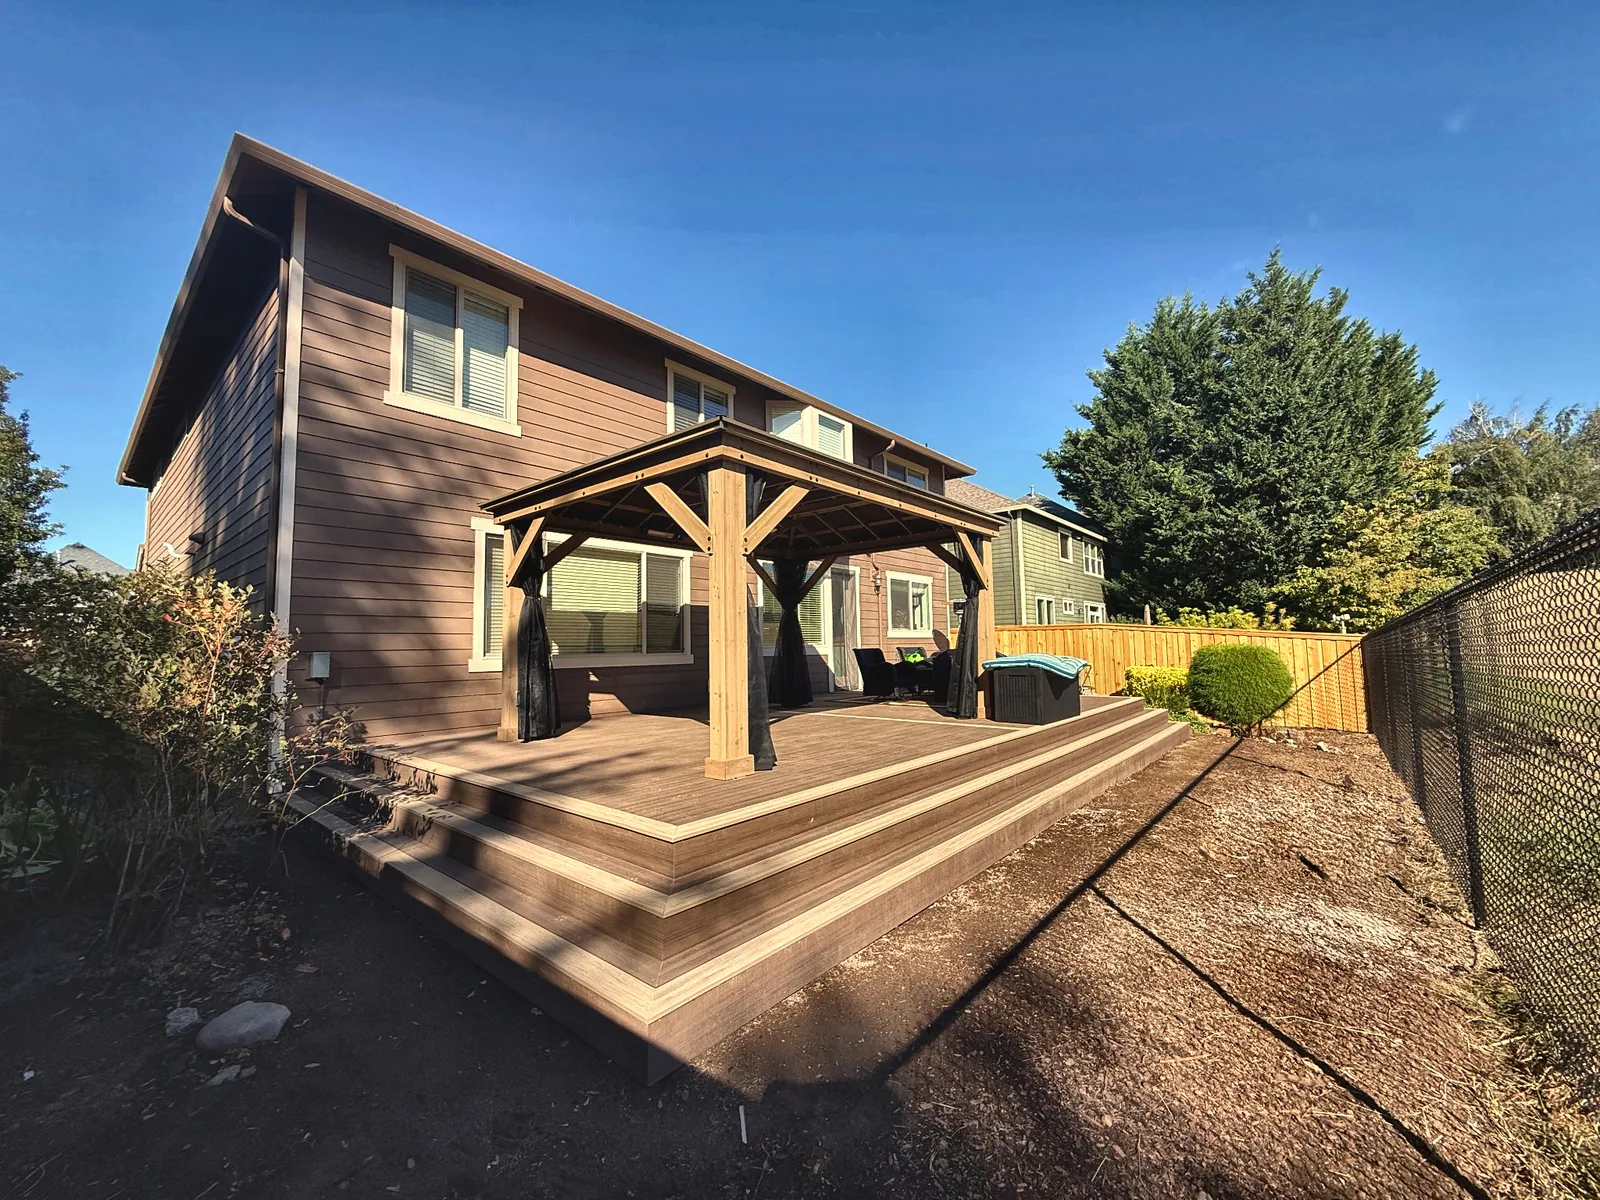
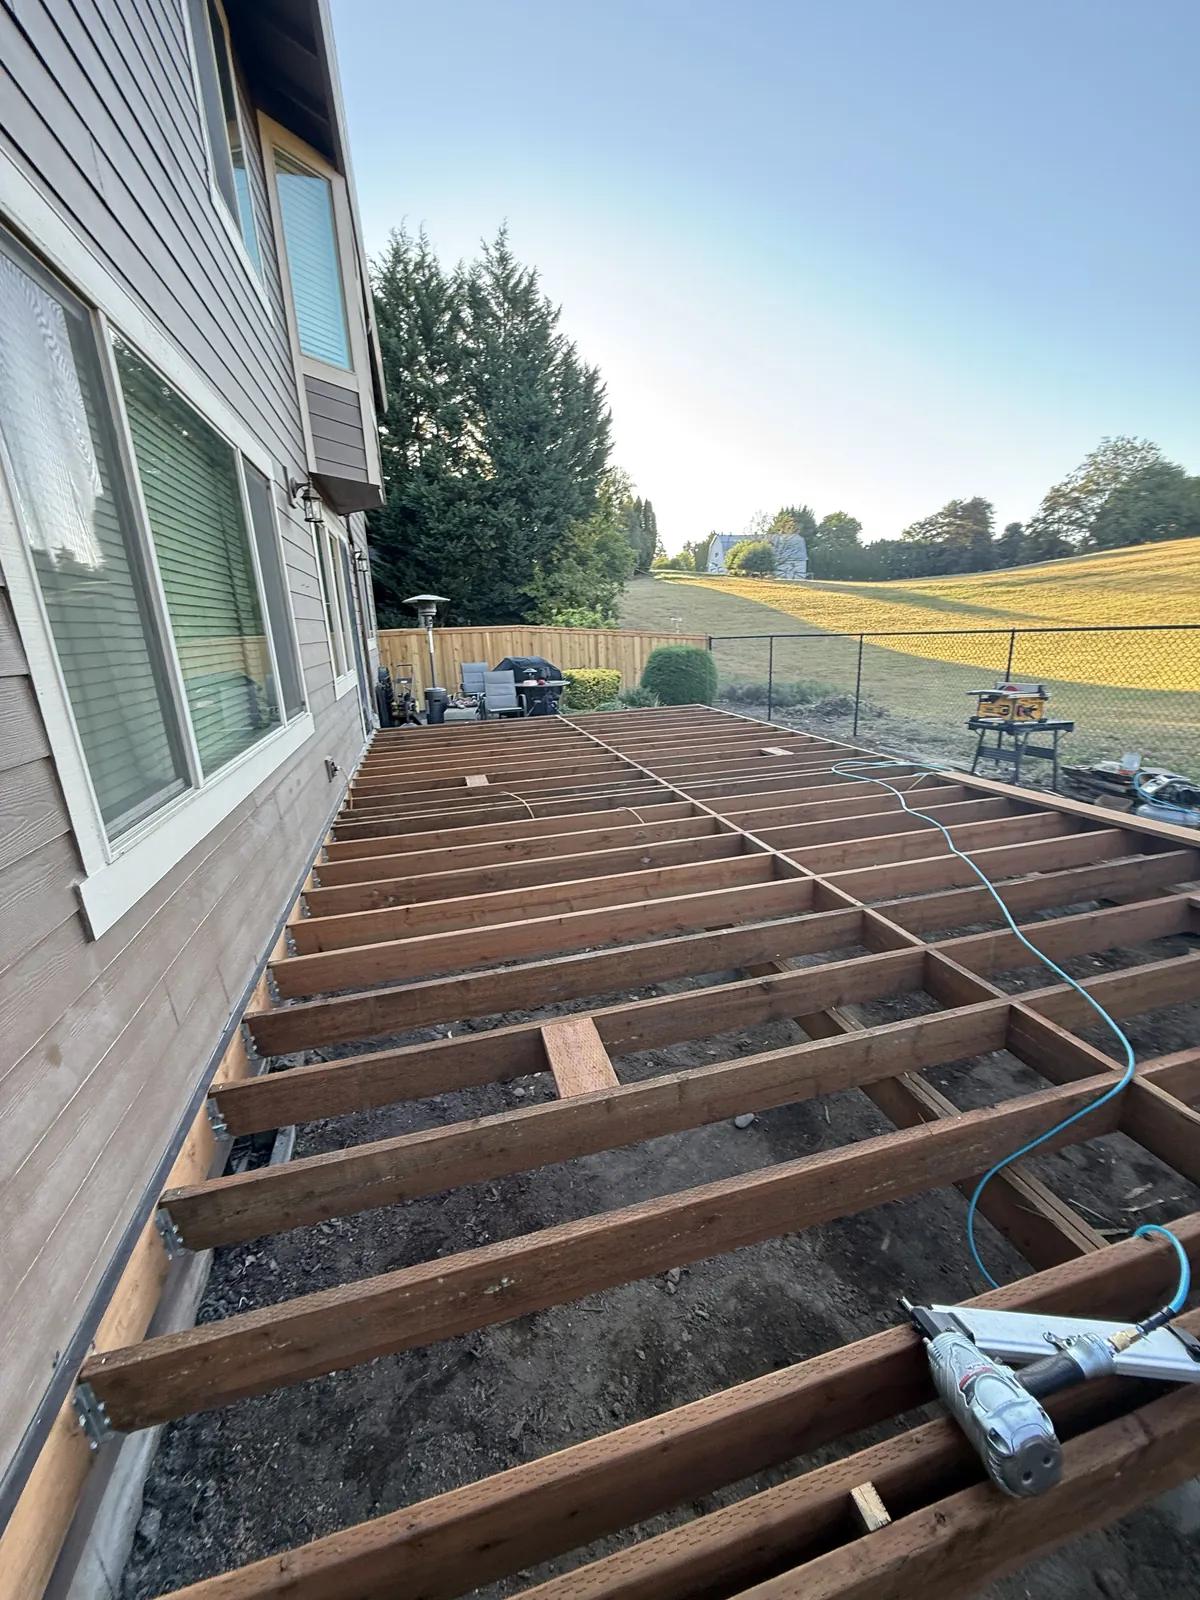 Before After
On most of the deck calls we get, the actual damage started at the ledger, the board lagged into the house that carries the deck’s whole weight back into the wall framing. It sits hidden behind the decking, so a flashing detail installed wrong on a tract home years ago lets water track in behind it without anyone noticing for a long time. On a lot graded and cut into the slope between Mount Scott and Scouters Mountain, that back wall often sits lower than the rest of the yard and holds runoff longer than people expect, which gives a poorly flashed ledger even more water to work with. The deck eases away from the house by fractions of an inch while the framing tucked behind the siding goes soft and dark the entire time. That is why we open the ledger first on any rebuild, and why a new build gets its flashing and bolts done to code without cutting a single corner, since nothing else framed into a deck can rot through completely while still looking fine from the yard.
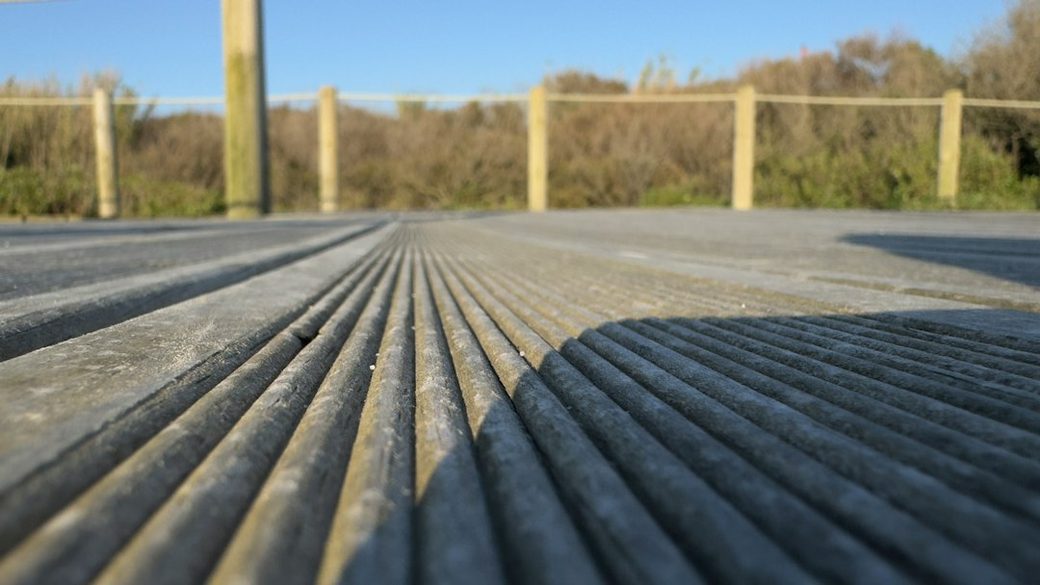
Here is where the real decisions happen, four of them in total, and the boards under your feet are honestly just one of the four.
On a graded lot, the footings come first in this conversation, even though they are the last thing anyone actually sees. A deck cut into the slope between Mount Scott and Scouters Mountain often needs footings at two or three different depths just to bring the frame level, and every one of them has to reach the depth the city’s permit calls for no matter how far up the hill it sits. We pour real concrete and set each post on a base that holds it clear of the pad, because a post left standing in runoff that pools at the base of a cut slope is usually what sends an otherwise sound-looking deck to the dumpster well before its time.
Above the footings, the frame is wood no matter what surface goes on top, and we build it in pressure-treated stock with every joist seated in a hanger rather than nailed through the end grain. Hangers and screws are hot-dipped galvanized or stainless, because the copper in treated lumber eats plain zinc, and a thinned-out hanger on a deck this young has usually failed from the fastener outward, not from the wood in. A strip of tape across the top of every joist is a small cost that keeps water off the one surface of the frame a graded, often shaded lot rarely lets dry out completely.
Only after that does the decking surface matter, even though it is the layer most homeowners ask about first. Pressure-treated fir costs the least and moves the most as it dries, wanting a season before any finish will hold and a wash and reseal on a real schedule after that. Cedar lies flatter and feels better underfoot for more money, though current stock runs heavier with sapwood than it used to, so its upkeep catches up with fir within a few years. Capped composite is the largest number on install day and nearly nothing afterward, no graying, no splinters, no sealer, though it will hold heat where a deck sits open to full sun on a cleared subdivision lot. The real comparison was never the price per board. It is whether you will actually keep up a wash-and-reseal routine, and most owners already know which kind they are.
Railing on a graded lot is often as much about what you are standing above as what you are looking at. Plain wood costs least and asks for the same care as the decking. Black powder-coated aluminum is where most owners land, narrow posts, no upkeep, and it disappears against the yard. Cable and glass open up a Mount Hood view completely on the Ridgecrest area lots that actually have one, and cost the most, carrying their own rules on post spacing and infill that a frame built for ordinary wood balusters may not meet. None of it moves the code figures: rail height and the gap allowed between balusters are fixed, not a matter of taste.
Two more decisions are cheaper settled now than bolted on later. A stair run down a graded lot usually needs more treads than people expect, and a wide, gentle run costs more than a narrow, steep one while being the difference between stairs people actually use and stairs people avoid entirely. Any wiring, a low-voltage line under the rail, an outlet, a fan if a cover goes overhead, is nearly free to rough-in while the frame sits open and a real headache to add once the boards are down.
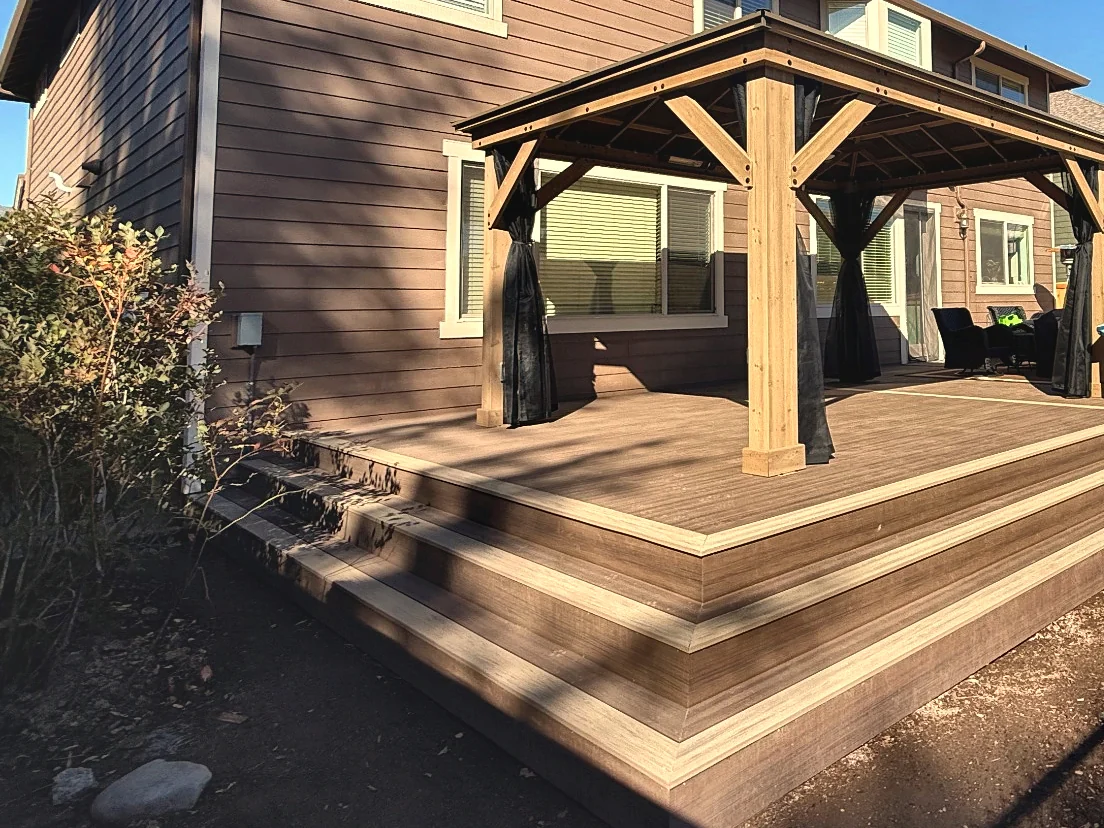
This photograph is one of our actual builds, and it happens to catch both halves of this page in a single frame: a deck raised off the ground, and a covered section of it that still gets used once the weather turns.
Follow the trim running the outer edge, including around both of the wide, low steps down to the open dirt. That lighter band is what the trade calls a picture frame border, and it costs more than a plain squared-off edge, because every field board has to be cut precisely to meet it and the joists along that rim have to be doubled to carry the extra load. It is also the detail that keeps a deck from reading as a stack of lumber instead of a finished structure, and the wide, shallow steps do similar work, tying the deck down into the yard rather than leaving it stranded above it like a platform.
The four-post gazebo sitting on top, with dark mesh curtains gathered at its posts, carries its full weight straight down onto the deck rather than onto footings of its own, which means the joists below had to be sized for that load long before the first deck board went down. Sizing footings for a stepped, graded lot and sizing joists for a roof overhead both get decided the same way, underneath, long before anyone is looking at the finished surface.
There is no universally wrong choice here, only the one that fits how you want to spend your Saturdays. Cedar and pressure-treated wood cost less at the start and can be refinished again and again, but on a shaded, graded lot they only hold up if you stay on top of the washing and resealing. Composite costs more on day one and then asks nothing of you, ignoring the moss and gray that our climate works into bare wood over time. Either way, the surface matters less than the part neither choice touches: the frame underneath is wood no matter what, and on a deck built into a slope, it is the quality of the framing and the footings beneath it, far more than the brand of board on top, that determines how many years the thing actually stands.
Roughly four feet of rain falls here most years, and a good share of it lands in exactly the stretch when a bare patio would otherwise sit empty. A real roof overhead, bolted and flashed to the house wall and carried on posts bearing on footings sized for the lot, turns that space into something you actually use through the gray months instead of a place to store porch furniture. A cover like this ties directly into the home’s structure, so Happy Valley’s Building Division, part of the city’s Economic and Community Development Department, reviews it as a permit item in almost every case, and that review happens through HV Works, the city’s own online system, rather than a paper counter at city hall. One crew draws the plan, submits it through HV Works, and carries the build through to the final inspection.
On a graded lot, height and footing count add more to the final number than almost anything else, more even than square footage by itself. A deck that steps down the slope between the two buttes in two or three stages always costs more than a flat deck of the same size, because each stage needs its own run of footings and bracing. A straightforward re-board over a frame that is still sound sits at the low end. New footings, a multi-level stair run, or replacing a frame that has finally given out all push the number higher. Composite decking adds to the material cost and removes the yearly upkeep. Bring any written quote you already have, since we match or beat most written estimates by 10%, in writing.
Labor on the structure eats the largest share of the budget: cutting and hanging joists, setting posts and beams at two or three different heights where the lot steps down, and shaping a stair run, work that takes more hours than its footprint on paper would suggest. Then comes the cost of the footings and the digging to set them, which on a cut or stepped lot climbs faster than people expect, since reaching stable soil under a graded slope can mean deeper holes and extra bracing that a flat yard would never need. Decking material and hardware follow, and then the railing, a line item almost everyone guesses low on since it is priced out by the running length of the deck’s perimeter, and a deck this size has plenty of perimeter to price. Finish work closes it out: skirting to hide an open crawlspace under a stepped deck, lighting, a gate, and whatever millwork closes the gap under the rim so the framing disappears from view.
That is also why the quote for a deck tucked flat against a single graded pad will always undercut one that steps down the full slope between the two buttes to a lower stair landing, even when both cover identical square footage. If the number on the page has to stay fixed, trimming the height or simplifying how many levels the deck steps through saves far more than switching away from the decking you actually wanted.
10%
Snap a couple of photos of the area and tell us in a sentence what you are picturing there. Get it to us before 5pm and we will have an answer back to you the same day.
Almost none of this happens inside the house, which makes a deck one of the more livable projects to have underway while a graded yard gets dug into. Here is the order it usually runs.
We settle the footprint, how tall it finishes, where the stairs touch down on the slope, and the railing choice before a single drawing goes anywhere. On a stepped lot that step also means deciding how many separate footing depths the design actually needs. From there the plans route through HV Works, the online system Happy Valley built for exactly this, for review by the Building Division inside the Economic and Community Development Department. Any deck tied into the house, or any cover with a roof over it, has to clear that review, and it is the one part of the calendar that neither of us controls.
String lines mark out the footprint across the grade, then the footing holes get drilled to whatever depth the HV Works approved plan calls for, which on a stepped lot often means more than one depth on the same deck. Concrete goes in and the post bases get set into it while it is still workable. Rain heavy enough to leave standing water in the holes can push this particular day back, since concrete poured into a wet footing will not cure the way it should.
Posts and beams go up first here, cut to whatever height the stepped lot calls for and braced true, then the ledger gets lagged through and sealed tight against the house wall, and every joist drops into its hanger with a strip of tape run across the top. Nothing gets covered until the Building Division has looked at all of it in the open, which is the whole reason a deck goes together in stages instead of all at once.
Decking goes on board by board, a trim border wraps the outer edge, and the stair run gets cut and set last, sometimes as more than one flight where the slope calls for it. By the end of this stage, the frame on the hillside has stopped looking like scaffolding and reads, finally, as a finished deck.
Posts, top rail and infill go on first, then the smaller items: skirting to close off a stepped crawlspace, low-voltage lighting, a gate where the layout calls for one. None of it takes much time on its own, yet skip it and even a structurally finished deck will read as unfinished to anyone standing on it.
The crew does not leave debris behind: cutoffs, the soil that came out of the footing holes, and the dumpster itself all go when they do, usually the same day the last screw goes in. What is left is a walk-through together, checking the finished deck against the estimate stage by stage if it drops down the slope in levels, and for anyone who picked a wood surface, an honest number on how many weeks to wait before that first coat of sealer goes on.
Often, and keeping a sound frame is where the real money gets saved on a rebuild. What settles it is a hands-on look underneath, not a guess from the top: we check the ledger where it bolts to the house, work down through the beams and posts, and finish at the footings, feeling for any wood that has gone soft and watching for a lean or a shift. On a lot cut into the slope between the two buttes, the downhill posts usually tell the story first, since that is where runoff gathers after a storm. Once we have actually seen what is down there, you get a straight answer: keep the frame, replace the sections that failed, or start over at the footings.
Yes, in nearly every case. A deck bolted to the house, one that climbs any real height above the yard, or a patio cover with an actual roof on it all count as structural work that the city has to review. That review runs through HV Works, Happy Valley’s own online permitting and licensing portal, handled by the city’s Building Division inside the Economic and Community Development Department rather than through Clackamas County. We hold an Oregon CCB license, #262707, and we handle the design, the HV Works filing, and the framing and final inspections ourselves. A low platform sitting flat on the ground, not fastened to the house at all, is one of the few things that can skip this step.
Expect the crew on site anywhere from roughly three days up through two full weeks, driven mostly by the size of the deck, how many footings it needs, and what the sky decides to do that week. On a stepped lot, a design that calls for footings at two or three different depths typically adds a day or so over a flat deck the same size. The schedule comes written into your estimate up front, and a roofed cover lets work continue underneath through rain that would otherwise stall an open footing pour.
Worth checking rather than ignoring, especially on a deck this young. Noticeable flex almost always traces back to framing that was sized a little light for its span from the day it was built, which shows up more on tract-built decks than custom ones, though rot at the ledger or a post base should still get ruled out. Send a few clear photos of the joists and hangers if you can safely get underneath, and we will tell you honestly what we are seeing before anyone makes the drive out.
The frame decides that number, not the boards on top of it. Build the structure in treated lumber, bolt and flash the ledger correctly, cap every joist with tape, hang everything on hardware that will not corrode, and set each post clear of wherever runoff collects on a graded lot, and you have built something that will carry two or three different decking surfaces over the years rather than needing to be torn out itself. Composite decking outlives cedar or fir either way, but it still depends entirely on that same frame underneath, which is exactly why the framing matters more than the brand of board you choose.
Not necessarily, and most of the time it can stay right where it is. Given enough headroom above the slab and a surface that still sheds water away from the house, we anchor a low deck to sleepers resting on top of the existing concrete, which means no new holes and no poured footings at all. A pad that has cracked extensively, heaved, or now tips moisture back toward the house changes that plan, and it is worth a close look on a yard graded into a slope, where a pad can shift out of level over the years. We correct any drainage issue before framing goes down, rather than sealing a hidden problem underneath new boards.
If there is any chance you will want a cover eventually, say so before the deck is framed, not after. Whatever holds a roof up, extra beams tied into the deck itself or a second set of posts and footings built just for it, has to be sized into the structure from day one. Add that weight to a deck that already has its boards down and its railing finished, and the only way in is back through work you already paid to complete once. Planning both pieces as a single project the first time around is simply cheaper.
On a lot graded into the slope between Mount Scott and Scouters Mountain, runoff tends to collect at the downhill edge of the yard, and a deck sitting right there holds moisture long after the rest of it has dried out. That extra dampness is usually what darkens boards and grows moss first, and it works on the hardware just as hard as it works on the wood. Leaving a real gap between the boards so they can drain, running tape over the joists underneath, and giving the surface a good scrub once the wet season breaks will handle most of it. If the grading around your deck is simply funneling water into one corner, adding a drain near those footings does more good long term than any amount of extra sealing.
Our shop on SE 184th Avenue sits in east Vancouver, well north and west of Happy Valley, so a crew heading there follows I-205 across the Columbia and keeps going southeast through the Portland metro into Clackamas County, more time on the road than a job close to home but a drive the crew makes regularly. Once on site we build across the city: the newer master-planned streets of Rock Creek and Southgate, the Mount Hood view lots up in Ridgecrest, the Jackson Hills and West Mount Scott subdivisions cut into the slopes between the two buttes, and the Pleasant Valley area still filling in with fresh construction, plus the rest of Happy Valley.
Three of the 50 reviews on our Google profile, in the homeowners' own words.
Wow. Just Wow. Had the Evergreen crew replace existing fencing, put in a 33.5ft x 18.5ft multi-tiered deck, and assemble a 12ft x 16ft gazebo. Couldn't be happier with the results.
Anthony L.Deck, fence and gazebo
We talked to 4 different contractors and only David, of Evergreen, took the time to climb up to our roof to check out the job. The others gave us bids based upon a photo. Evergreen was not the cheapest but the extent of the work they did was worth every penny.
Steve K.Roof and exterior work
We had a small but very unique project and this team handled it with a great attitude. They were responsive, on time, and the finished work looks like it was always meant to be there.
Paige T.Small custom project
Send photos and a short description. If it arrives before 5pm you get an answer the same day.
Already have a written estimate from someone else? Send that too. We match or beat most estimates by 10%.
Built for the wet side of the river.

Licensed and insured remodeling contractor serving Vancouver, WA and the Portland metro.
Oregon CCB #262707 · WA Lic. #EVERGRS757MCEvergreen Renewal Services LLC
505 SE 184th Ave Unit 320
Vancouver, WA 98683
© 2026 Evergreen Remodeling. Oregon CCB #262707 · WA Lic. #EVERGRS757MC. Evergreen Renewal Services LLC. All rights reserved.
Same day response on anything sent before 5pm.