

A Beaverton bathroom tends to fail quietly. A shower pan with a hairline crack, or a toilet rocking on a worn wax ring, can push water into the subfloor for years while the tile overhead still looks fine. We see it most in the older single-family homes scattered through North Beaverton and in apartment units that have since converted to private ownership, where the original fixtures were never swapped out. Chasing that hidden moisture down is where we start on every job, and putting the damaged framing back together afterward is work we handle ourselves, not a call we make to another crew.
Licensed and insured. Oregon CCB #262707
On anything sent before 5pm
We match or beat most written estimates
Remodels completed
Old tile and fixtures come out, a sealed membrane goes in behind the walls, and everything visible comes back new.
Waterproofing behind the new pan gets its own inspection before tile or glass goes up, since flat Tualatin Plains ground gives water nowhere to drain.
Weakened subfloor and framing come out down to solid wood before anything else, a common need where flat ground keeps moisture sitting near the foundation.
Floor, walls and shower pan all get a continuous sealed barrier bonded on before a single tile is set, never tile resting straight on dry backer panels.
Because the air on this valley floor tends to sit still, the new fan is sized generously and vented straight outside instead of recirculated indoors.
Same room, same window. One side is the bathroom the owners lived with. The other is the one they have now.
Drag the handle. Left, the bathroom as we found it: a tub behind a curtain, a small vanity, shelves on the wall. Right, the same room finished: a glass shower, a soaking tub under the window, a wood vanity on a herringbone floor.
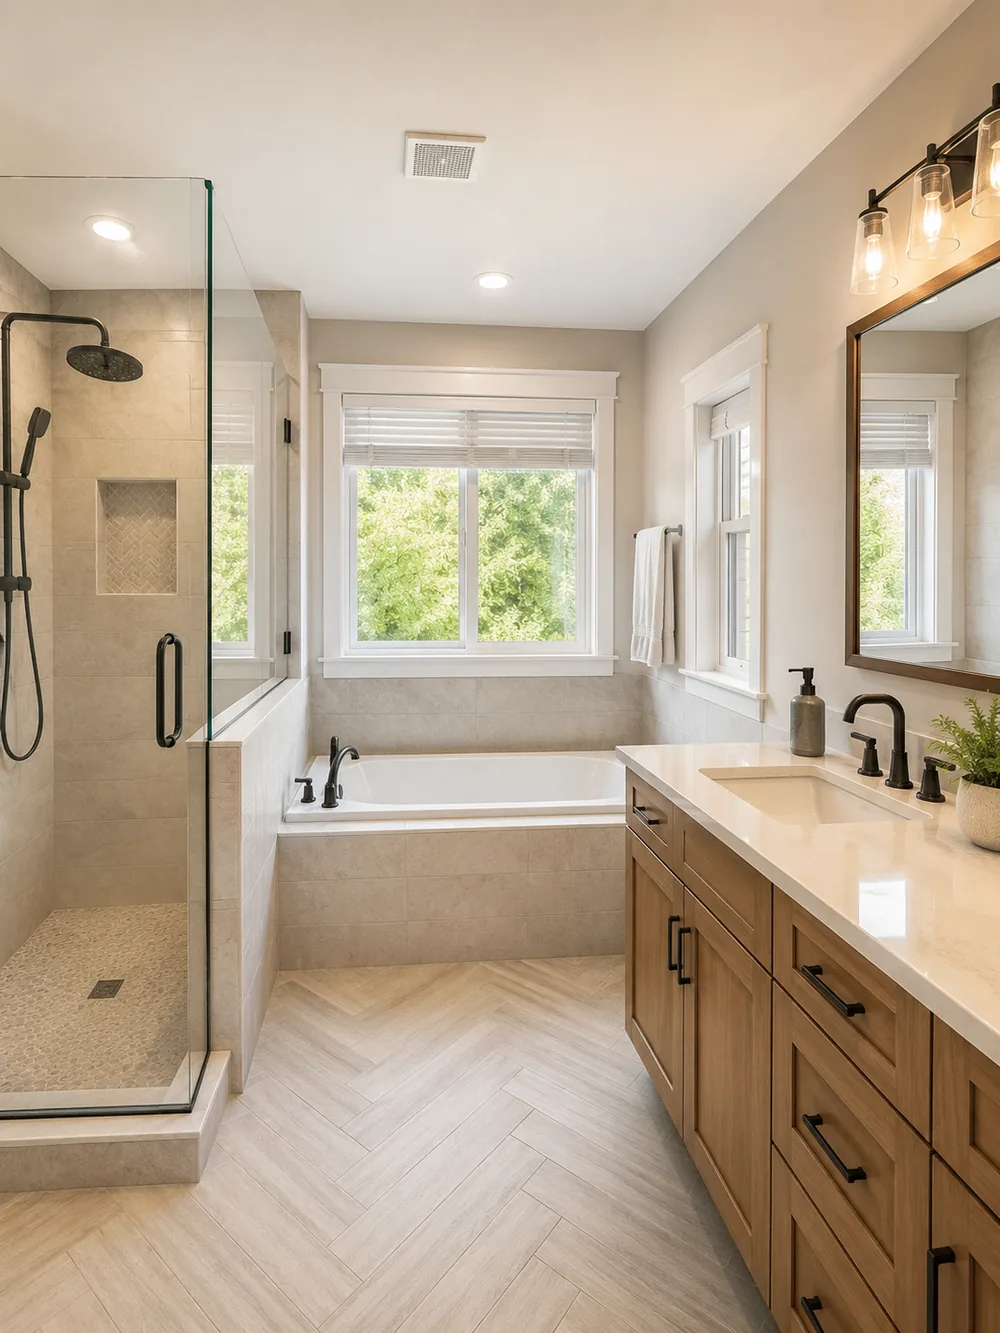
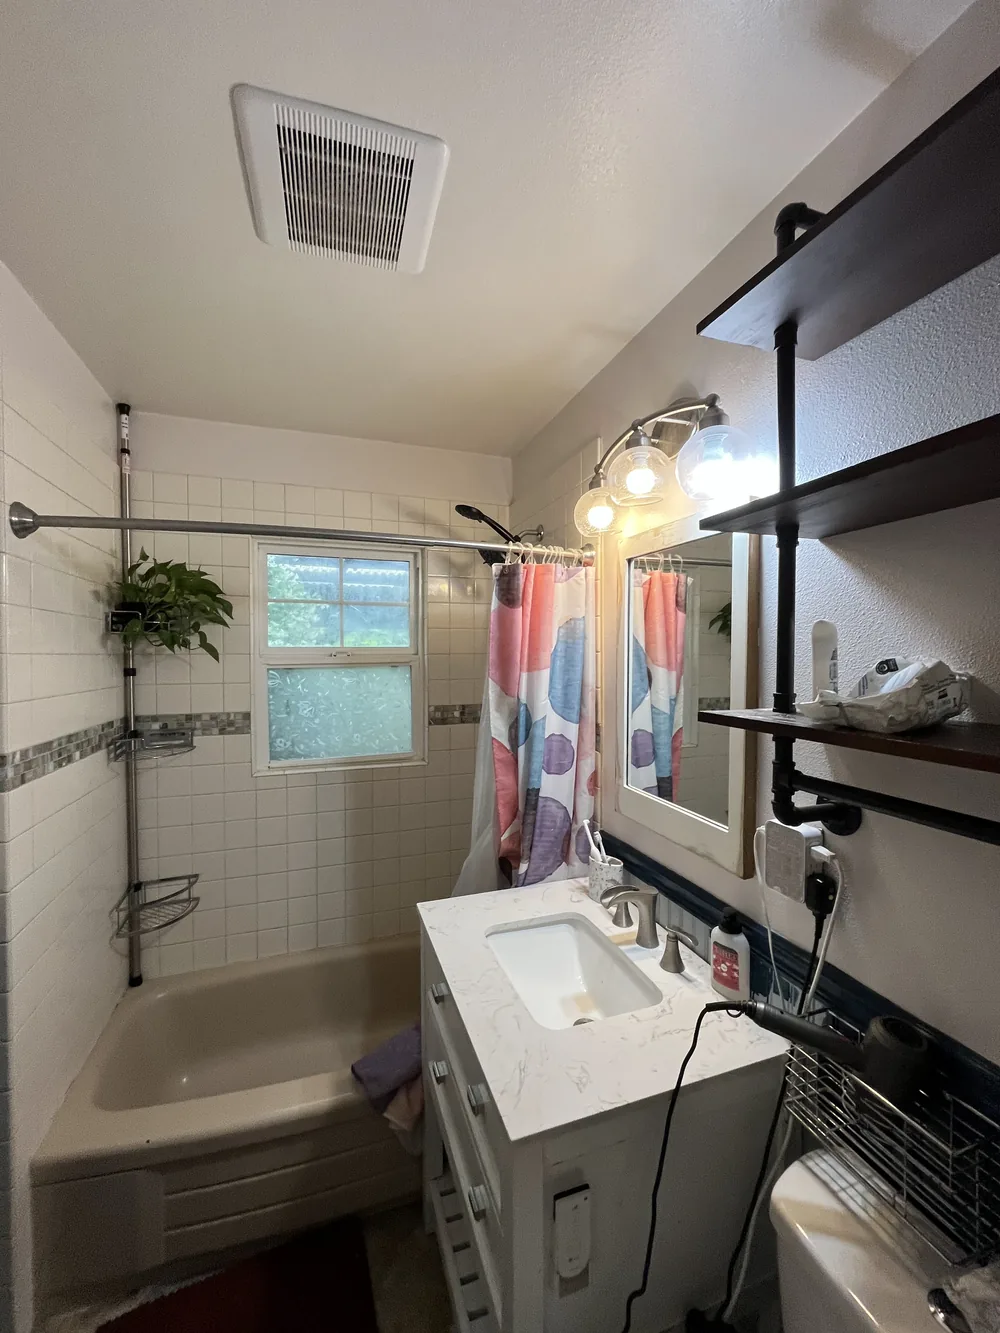 Before After
A bathroom’s real lifespan is decided behind the wall, not in front of it: the membrane bonded under the tile, a pan pitched to drain rather than pond, sealed corners, and a fan that actually pushes air outside the house. None of that shows up in a listing photo, and a rushed remodel skips all of it while still looking finished on day one. We build every wet area to current waterproofing standards and run every fan duct straight outside rather than into the attic, because on the flat valley floor here, water does not run off the way it would on a hillside. It lingers, and a bathroom fan that only empties into the attic leaves that moisture nowhere to go but into your framing.
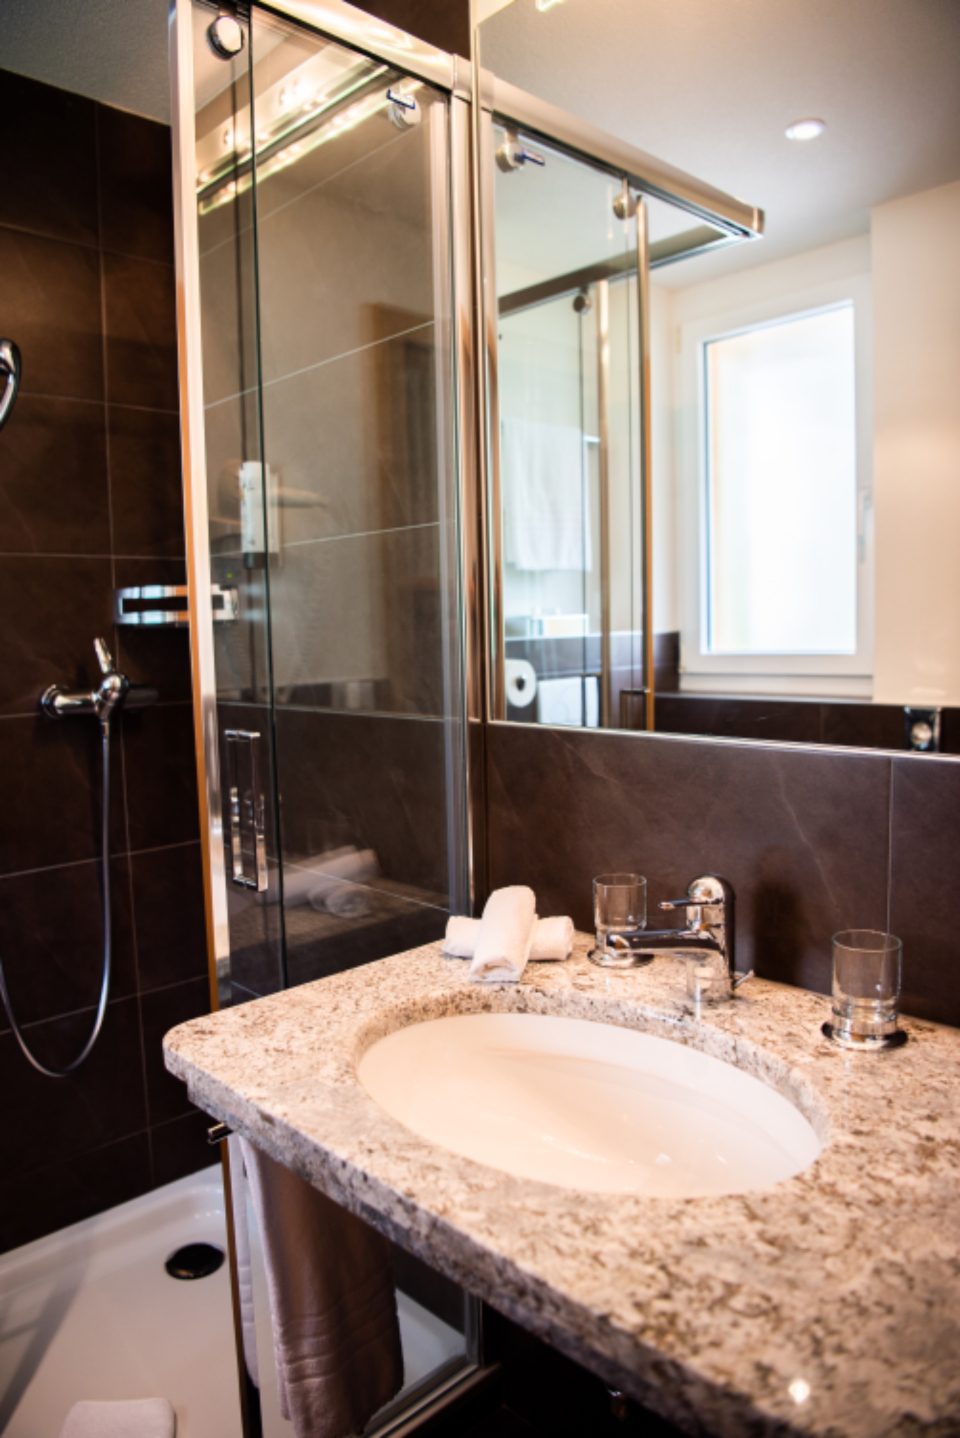
Underneath any tiled shower is one of three waterproofing builds, and which one you got matters far more for the room’s lifespan than whatever tile sits on the surface. We build with a bonded membrane, either a sheet product or a liquid coating, run over backer board and tied into one continuous barrier across every corner, seam and pipe penetration, with tile set directly on that skin. A foam board system gets to the same place by making the panel itself waterproof. The outdated method, cement board with mastic smeared at the seams, typically starts failing around its fifteenth year, and it is not a method this shop will install. Cutting corners on that single layer is the fastest way to turn a bathroom remodel into a second, far more expensive repair job.
Half of that waterproofing lives in the shower floor itself. A proper pan has to slope consistently toward the drain, and a curbless entry, the feature most homeowners request now, needs that slope to begin at a point lower than the rest of the bathroom floor. In a house that already exists, reaching that low point means notching down the joists across that bay or building the surrounding floor up instead, a framing call that gets made long before tile enters the conversation. That is the reason a flush shower adds noticeably to the bid inside an older North Beaverton house with its original joists still in place, while the same feature costs almost nothing extra in a South Beaverton townhome where the subfloor is being framed for the first time.
The tile itself usually comes down to a tradeoff between upkeep and look. Oversized porcelain planks keep grout lines to a minimum, which cuts down on scrubbing, but they need a wall surface flat enough to take them and more time on the trowel to set correctly. Go smaller, with a mosaic or pebble floor, and footing improves underfoot in a wet shower, though you take on far more grout to keep clean in return. Marble and other natural stones look striking and read as upscale, but they are porous enough that skipping a sealing routine will eventually show. For grout itself, we use epoxy in the wet zone where it gets scrubbed, standard cement grout on drier surfaces, and a flexible silicone bead rather than grout wherever two planes meet, since rigid grout in a moving joint is the first thing to crack.
Spend where you cannot see it and save where you can. The valve body, whether pressure-balanced or thermostatic, gets sealed inside the wall cavity once the tile goes up, so that is the part worth buying well the first time, since swapping it out later means opening the wall again. The handle, spout and showerhead attached to the front of it are a different story and can be changed on a whim years down the line. A floating, wall-mounted vanity reads larger in the tight footprints common to newer townhome bathrooms, but the wall needs blocking screwed into the studs before anyone hangs drywall, so that call gets made early, not after. Skip particleboard anywhere near a wet shower wall. It is cheap for a reason and it will not hold up.
Last is the exhaust fan, the cheapest line on the whole estimate and the one piece standing between a healthy room and a rotted one. Match it to the square footage, carry its duct the full way to open air rather than letting it dead-end in the attic, put it on a timer or a humidity sensor, and wrap the duct so condensation cannot drip back into the housing. On this flat stretch of valley floor, rain soaks in rather than running off the way it would downhill, so a bathroom that never fully dries between showers is working against the ground it sits on as much as against the weather. That one modest fan decides which way it goes.
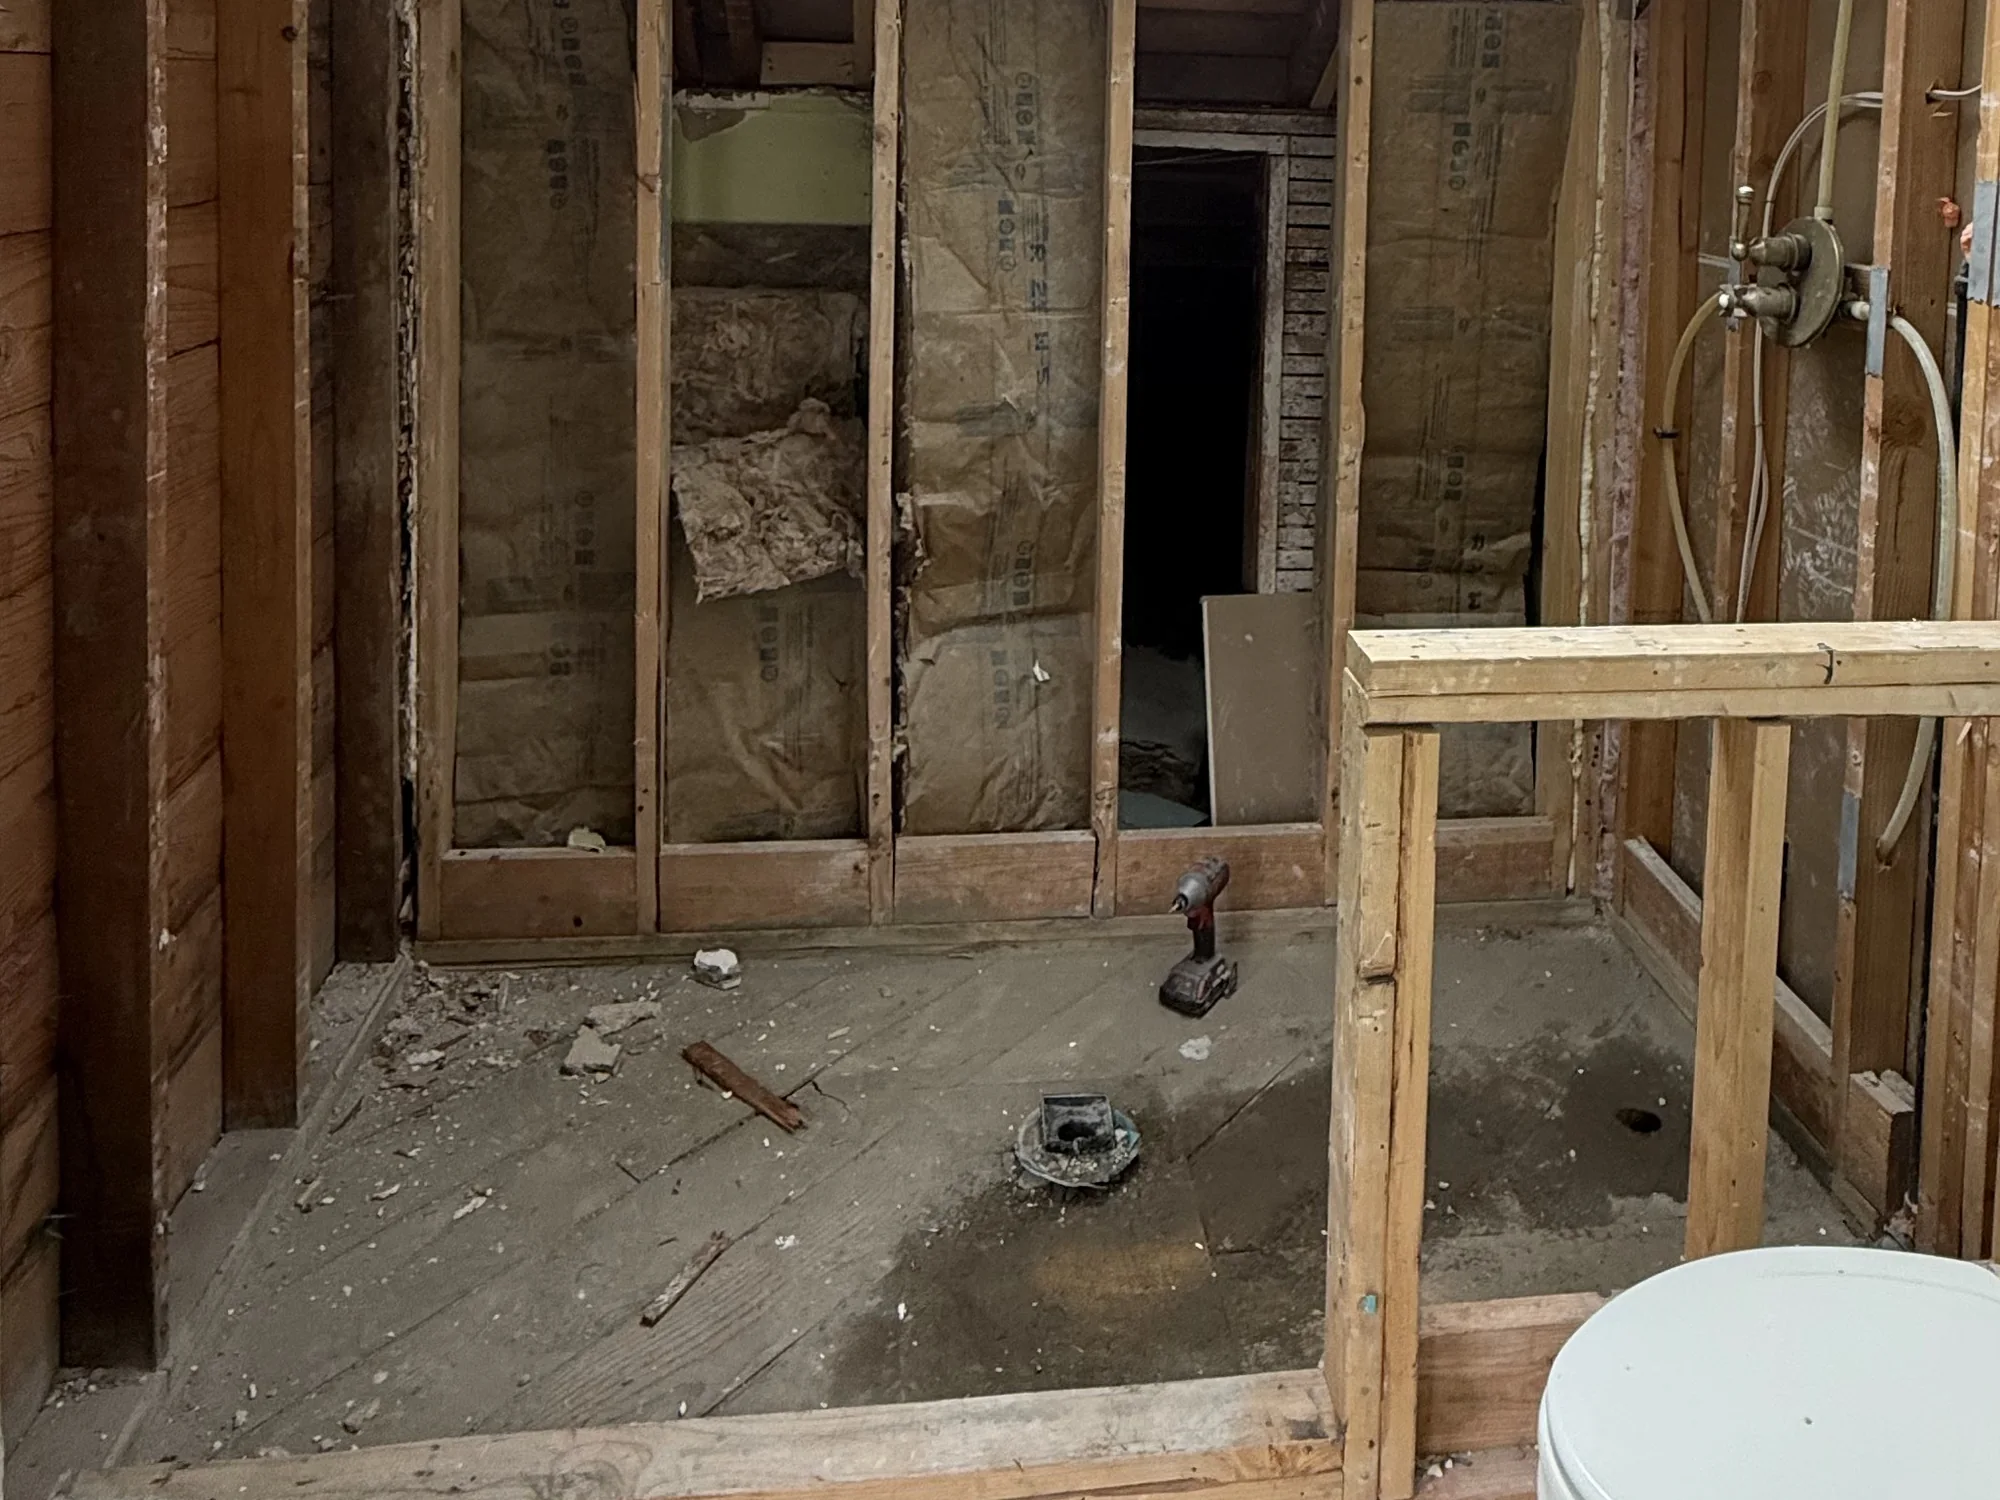
Here is a bathroom of ours caught at the one point a camera rarely visits. The tub, the tile, the vanity and the tired flooring are already gone, cleared out completely. What remains is a stretch of original wall sheathing, batts of insulation hanging loose from the stud bays, an open drain stub marking where the toilet once bolted down, and the toilet itself set off in the corner, waiting its turn since it is always the final piece reset.
The wall on the right has already been rebuilt, board by board rather than patched, which is what framing earns after a leaking shower has fed it water for years. You can see the capped supply stubs and the shower valve already fixed at its permanent height, a step that has to happen now, since the valve location sets the entire tile layout and the two of them vanish together the second the backer board is hung.
Nothing in the whole project carries more weight for the final cost or the room’s lifespan than this open window. While it is all still visible, we work out the decisions that matter: how steep the pan should fall, whether the shower sits flush with the floor, where the niche is cut into the wall, whether a soft joist needs a second one fastened beside it. Once the board covers it, each of those calls is permanent, which is the whole reason we bring you into the room at this stage instead of emailing a photo afterward.
We run into this often around Beaverton, especially beneath a shower that has run daily for twenty years or more in one of the area’s older single-family homes. What is different here is what happens next: putting rotted framing back together is work this crew does itself, never something farmed out to a second contractor. If we find a soft joist or a crumbling patch of subfloor, we rebuild it on the spot, priced from a number you already saw before demo day, so the job keeps moving instead of stalling while someone else gets lined up.
The same handful of culprits turns up again and again. The floor gives just in front of the toilet, where a wax ring failed quietly years ago. The joist directly under the shower drain has gone dark and soft to the touch. A stretch of rim joist has softened where an overflowing tub crept into the wall cavity, which we see often in the older apartment buildings near the commercial strips that have since converted to individual owners. And framing along an exterior wall gives out in any room where the fan never moved enough air, which shows up just as often in a cramped townhome bath as it does in an older house.
Three things move a Beaverton bathroom estimate more than anything else: whether a fixture is relocating to a new wall, how much square footage ends up tiled, and the grade of fixtures you choose. A straightforward refresh that leaves the toilet, shower and vanity exactly where they already sit lands toward the bottom of our range. Reworking the floor plan and running tile to the ceiling pushes it toward the top. Whatever the floor reveals once it is opened becomes its own line item, priced and sent to you for approval before we touch it. If another contractor already gave you a number in writing, bring it along. We match or beat most estimates by 10%.
What surprises most homeowners is how little of that number is materials. A bathroom this size still has to host plumbing, electrical, framing, a waterproofing membrane, tile setting and finish carpentry, one trade handing off to the next inside maybe forty square feet, and skilled labor billed by the hour is what actually fills most of the invoice. Tile and membrane costs track the square footage you cover rather than the room’s footprint, so a shower stall tiled to the ceiling costs meaningfully more than one stopped at shoulder height. The vanity and fixtures are the one part of the bill that is entirely your call, priced to whatever you choose. Plumbing stays cheap as long as nothing relocates, and it climbs the moment a fixture needs a new drain run.
There is exactly one place we refuse to cut, and it is also one of the smallest line items on the page: the waterproof membrane behind the tile. Leaving it out trims a couple hundred dollars off the quote today in exchange for a floor and framing repair running into the thousands a few years down the road. We would turn the job down entirely before pricing a shower built that way.
10%
A couple of close-up photos help most, especially of any spot that feels soft underfoot or shows a stain. Reach us before 5pm and expect an answer the same day.
Because a bathroom takes up so little square footage, the mess stays boxed into a short, predictable stretch rather than dragging across the whole house. Here is the sequence it follows, with the stages that matter most if yours is the only bathroom in the home.
Before we pull a single tile off the wall, every material for the new room, the tile, the vanity, the fixtures, is already ordered and physically on hand. Nothing stalls a bathroom job longer than a gutted room sitting empty while a backordered tile pattern makes its way across the country. The other thing we lock down before demo starts is logistics: where the plastic dust barrier gets hung and the exact route the crew will carry debris out through, so the rest of the house stays clean.
Plan on a single day, occasionally a second. The vanity, the tub, the wall tile and the old flooring all come out, bringing the room down to open framing and subfloor where everything the walls were hiding is visible together.
This is the point where the old plumbing, the subfloor and every stud are finally visible enough to inspect properly, not just guessed at. Anything that turns out damaged gets photographed right away and priced on the spot, so you see both the problem and the number before we close a single thing back up.
Plumbing and wiring get run to their new positions, blocking goes into the studs for the vanity and any grab bars, and then the City of Beaverton’s Building Division inspects the rough-in through its Electronic Permitting System before anything is closed up. Nothing gets covered until that approval is on file.
First comes the backer board, bonded over with a waterproof skin that gets locked down at every seam, corner and pipe before the pan goes in. Only once that is fully sealed does tile begin, working from the pan upward across the walls and floor. Nothing about this step moves faster for being rushed. Thinset and grout set on a clock neither we nor you control, and pushing tile onto a membrane that has not cured is exactly how a shower starts leaking in year three instead of year twenty.
Last comes the finish work: the vanity and toilet are set in place, the mirror and shower glass go up, the fan gets wired in, and paint along with trim carpentry rounds the room out. We then walk through the space together, checking it against the estimate you signed. Most households get the sink and toilet back in use several days before the shower is ready for its first run.
Most households in this situation worry about the shower, and rightly so: it is the one fixture that cannot come back online until the tile has fully cured. The toilet and sink are a different story. Once the new drain and supply lines pass inspection, we typically get both running again well before the shower is ready, often with enough lead time to work around a two-income household’s morning schedule. Mention upfront that it is your only bathroom and we will build that priority into the day-by-day plan from the start.
Yes, it is one of the most requested jobs we take on around Beaverton, especially in the older single-family homes of North Beaverton where the tub has been original to the house for decades. Expect new drain work, a fully waterproofed wet area, and in most cases fresh tile up the walls. Pulling the tub also opens up the floor it was sitting on, which is often where we find a soft patch of subfloor that years of a slow overflow left behind without anyone noticing.
That kind of give almost always comes down to one thing: a wax ring that failed quietly a while back and has been letting water reach the subfloor ever since. It is routine work to put right once we are in there, and it costs far less handled now than after it has had another year to spread. On the flat valley floor here, water that gets into a subfloor does not drain away on its own the way it might on a slope, so the damage tends to sit and spread rather than dry out. Send us a photo of the spot and we can give you a read on how far it has likely traveled.
It depends on what the work actually touches. Relocating a drain line, opening up wiring, or putting structural framing back after water damage all trigger a permit, filed with the City of Beaverton’s Building Division through the city’s Electronic Permitting System rather than through the county. Because we carry an Oregon contractor license, CCB #262707, we take care of that filing ourselves and show up for every inspection it requires. A straight swap of the same fixtures in the same locations, with nothing structural changing, typically clears without any permit at all.
In most homes it can be done, but what it costs depends entirely on how the floor underneath is framed. A step-free base has to start lower than the floor around it, so in a house that is already built, that means either cutting the joists down across that span or building up the surrounding floor to meet it. Which approach fits your situation depends on what we find, and in a lot of the older North Beaverton homes we can get a read on it from a crawlspace below, while in a newer townhome slab we may need to open a small section from above instead.
Working out from the studs: backer board goes on first, then a fully bonded waterproof layer sealed into every corner, seam and pipe penetration, and only after that do thinset and tile go on. That bonded layer is the part doing the real work of keeping water out, not the tile itself. Backer board left on its own will soak through just like any other board, regardless of what a lower bid promises you on the walkthrough, and skipping that waterproof layer is the shortcut we run into most once an older bathroom gets opened up.
It matters more than almost anything else in the room. With thirty-six to forty inches of rain falling most years and the valley floor draining slowly rather than shedding water the way a hillside would, a bathroom that cannot fully dry out between showers stays damp for hours longer than it should. An undersized fan, or one whose duct simply empties into the attic instead of outdoors, is exactly what lets that moisture settle into the framing and grow mold behind a vanity. Sizing the fan to the room, running its duct straight outside, and wiring it to a timer or humidity sensor costs very little while the walls are still open, and it is the cheapest insurance in the whole remodel.
Plan on measuring the job in weeks, not days, for a full gut and rebuild, and much of that calendar time is thinset and grout curing or the wait for the city inspector, not anyone standing idle in the room. Moving fixtures to a new wall or rebuilding framing the demo turns up will stretch the schedule further still. Every estimate comes with a day-by-day plan attached, and in a household with only one bathroom, we sequence the work so the toilet and sink are usable again well ahead of the shower.
Our shop sits on SE 184th Ave in east Vancouver, and getting to Beaverton means crossing the Columbia on the I-205 bridge and then continuing west through the Portland metro into Washington County, easily one of the longer drives on our schedule rather than one of the shortest. Licensed in Oregon, CCB #262707, we remodel bathrooms across the city: older single-family homes and aging apartment buildings around Old Town and through North Beaverton, the newer townhome infill and subdivisions spreading through South Beaverton and Progress Ridge, the streets near Cedar Hills close to the Nike campus, and the neighborhoods around Five Oaks and Raleigh Hills near the MAX Blue Line stations.
Three of the 50 reviews on our Google profile, in the homeowners' own words.
David's work was terrific. Repaired a rotted out structural framing issue in a bathroom and replaced (and resized!) a window in the same space. He initially quoted a two day job but was able to finish in a single day. Dedicated! Will be using him again.
Joe H.Bathroom framing repair
Evergreen crew installed three skylights for us. Once we opened the ceiling there was more to do than expected and they handled it without drama. Clean work, fair price, and they cleaned up after themselves.
Foad M.Three skylights
David the owner came by for a quote and was able to get us scheduled right away. The communication was great with his team and the guys were on time and very professional. Would highly recommend.
Scott G.Kitchen nook bench
Send photos and a short description. If it arrives before 5pm you get an answer the same day.
Already have a written estimate from someone else? Send that too. We match or beat most estimates by 10%.
Built for the wet side of the river.

Licensed and insured remodeling contractor serving Vancouver, WA and the Portland metro.
Oregon CCB #262707 · WA Lic. #EVERGRS757MCEvergreen Renewal Services LLC
505 SE 184th Ave Unit 320
Vancouver, WA 98683
© 2026 Evergreen Remodeling. Oregon CCB #262707 · WA Lic. #EVERGRS757MC. Evergreen Renewal Services LLC. All rights reserved.
Same day response on anything sent before 5pm.