

Our bread and butter repair
Rot rarely introduces itself before it ruins something. It turns up as a window sash that sticks on a damp morning, a baseboard that crumbles under a boot heel, a half-timbered gable end gone soft where the stucco meets the wood. Lake Oswego’s older streets sit close enough to Oswego Lake and the Willamette River that houses near the water carry more moisture than most towns ever deal with, on top of around 40 inches of rain across the region each year. We trace the path water took into the wall, cut back to solid fiber, and rebuild the framing underneath before anything new goes up. It is simply the repair this crew takes on most often here.
Licensed and insured. Oregon CCB #262707
On anything sent before 5pm
We match or beat most written estimates
Remodels completed
Lake Oswego homes near the water pick up extra humidity on top of the valley’s usual wet season, and over enough winters water finds its way into almost every exterior seam a house owns. These are the points we open up most often:
On Lake Oswego’s 1920s Tudor Revival and English Cottage homes, the decorative half-timbering, the tall narrow window casings, and the stucco-to-wood transitions are usually the first pieces to go soft, along with the sheathing hiding behind them once a board finally gives way.
Soft decking, tired joists and beams, and the ledger board bolting a deck back to the house are what we find most on lakefront properties. A sun deck or boathouse walkway sitting close to Oswego Lake holds humidity long after the water itself has calmed, and that dampness usually reaches the ledger first.
Sill plates, rim joists, studs and post bases that have spent years drawing dampness up out of the ground. We see it most in crawlspaces close to the lake and the river, where the soil underneath stays saturated long after a storm has passed.
Flashing above a window or door that quit doing its job years ago, quietly pushing rain in behind the trim ever since. On the tall, narrow window openings common to Lake Oswego’s English Cottage homes, there is little overhang to begin with, so that hidden cavity rarely gets a real chance to dry.
A shower pan or supply line seeping quietly for months inside an older First Addition bathroom, softening the subfloor and the joists beneath it long before a tile ever cracks or a floor feels spongy underfoot.
Snap two or three pictures of the spot that worries you and jot a sentence explaining what you noticed. Messages received during normal business hours typically get a reply before the day is out, and on the occasion the issue belongs to another trade altogether, we will tell you directly which kind of contractor to call instead.
On rot work this is the only proof that means anything. A finished photo shows a wall. A pair shows what was behind it.
Drag the handle. The left side shows where the water had been sitting, darkening the framing around the old shower. The right side shows the rebuilt shower after the damaged wood was replaced and the wall sealed.
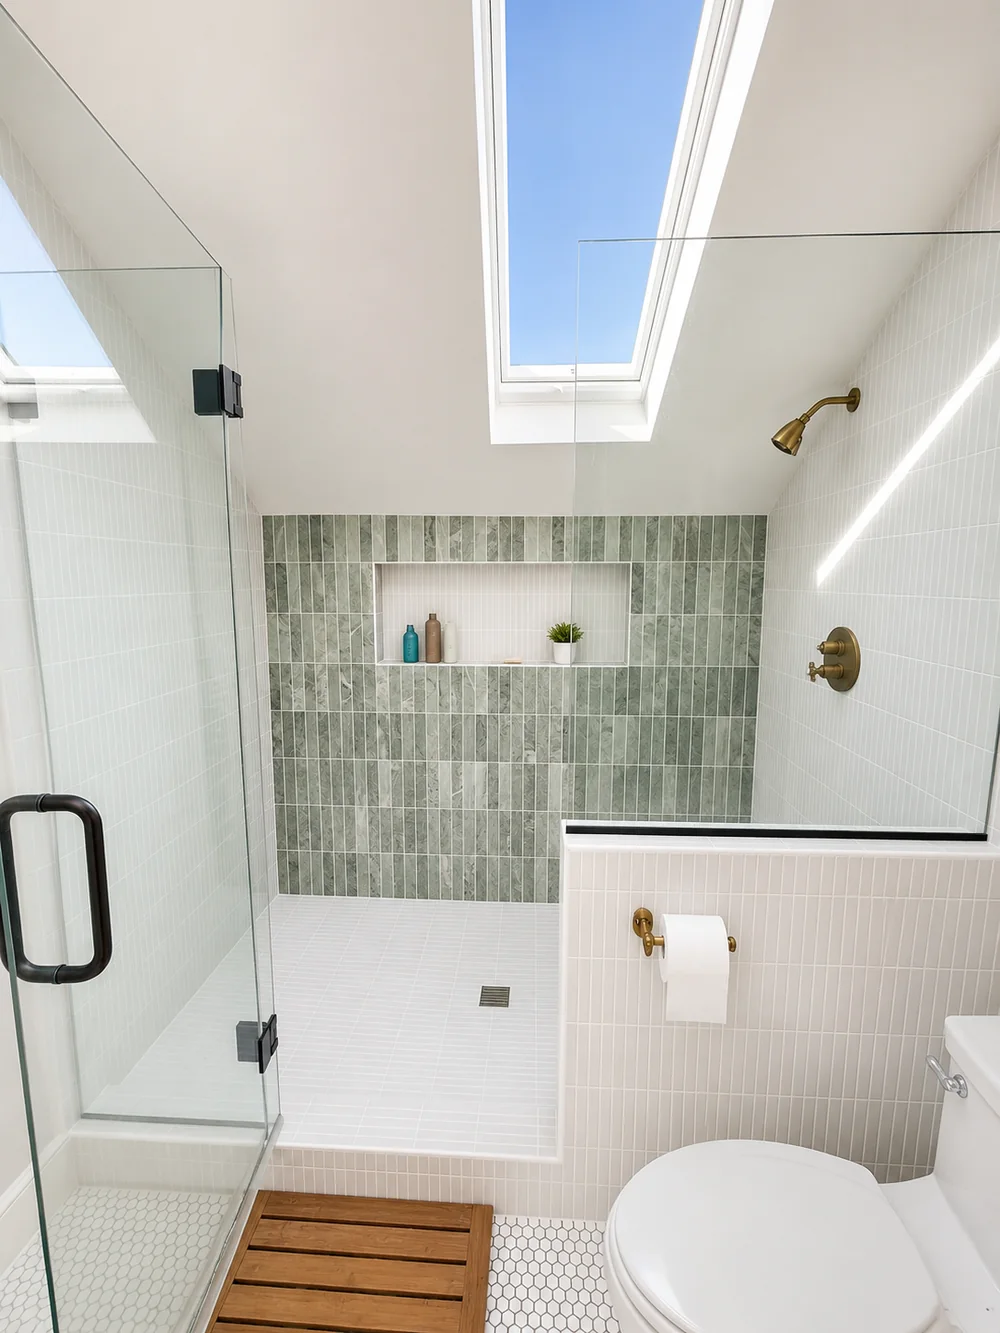
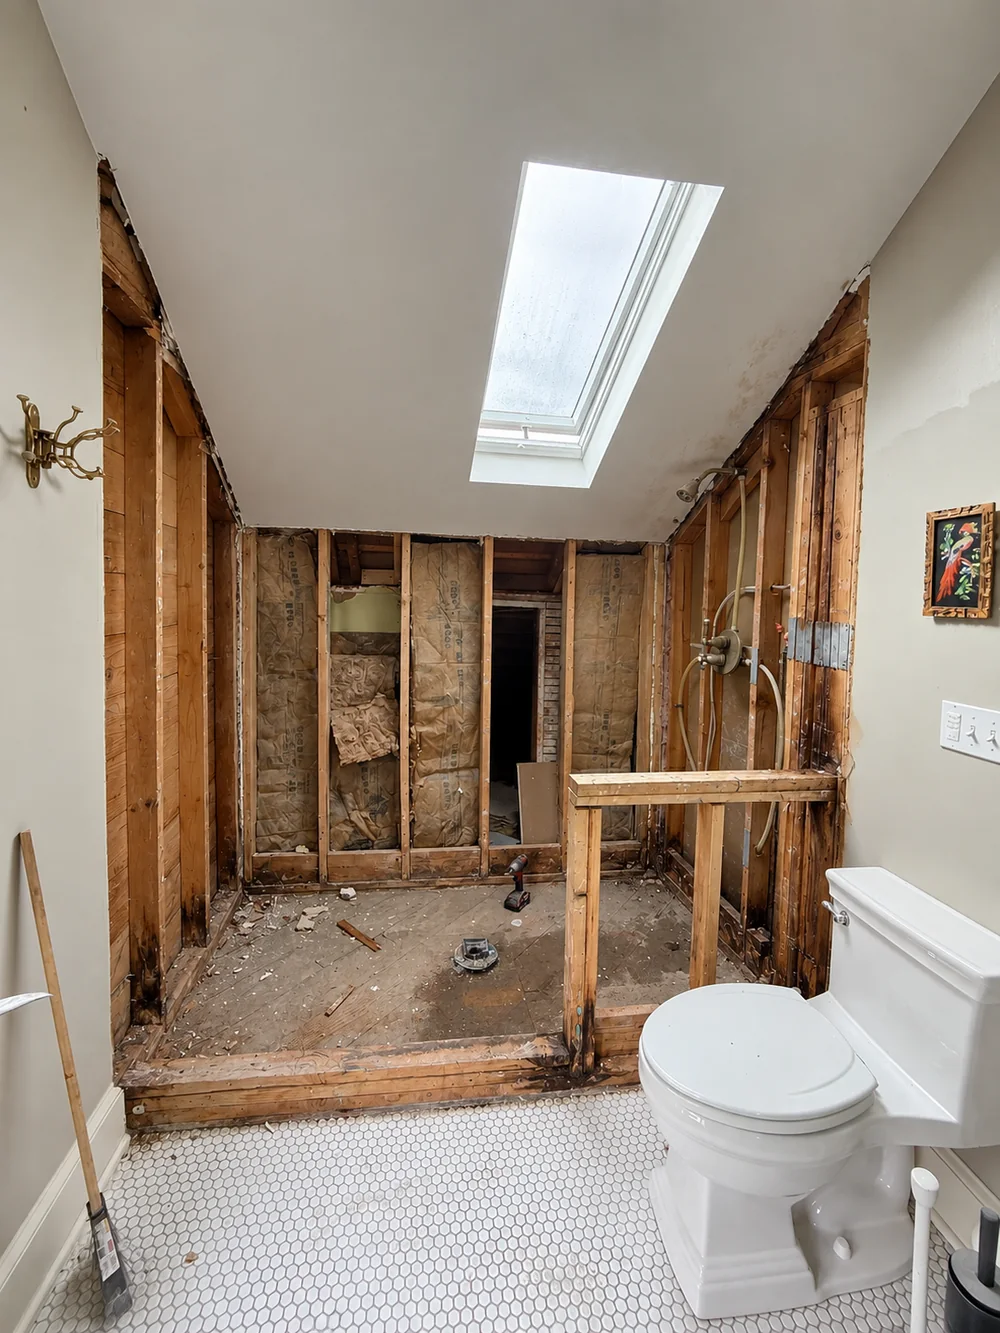 Before After
A homeowner walking the yard can usually spot where paint has failed or a windowsill has gone soft, but that visible patch is where the rot finally ran out of room, not where water first got past the wood. Inside the wall, decay travels along the grain beneath painted trim and old stucco infill, and near the lake the humidity means that hidden stretch is often longer than it looks from outside. Pricing the job from a snapshot means guessing at that hidden length, and guesses become change orders the moment the wall comes apart.
So before we write a number, someone from our crew stands at the wall and gets hands on it. The parts we can verify without opening anything are priced firm. Everything we can only confirm once the framing is exposed gets its own line on the estimate, clearly marked as a possibility, and nothing on that line gets touched until you have told us to proceed.
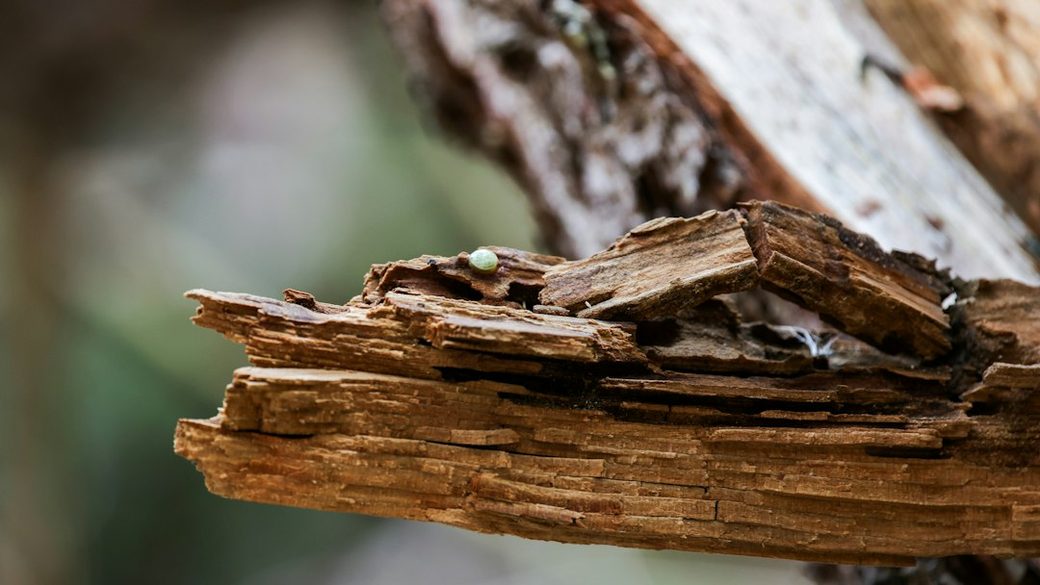
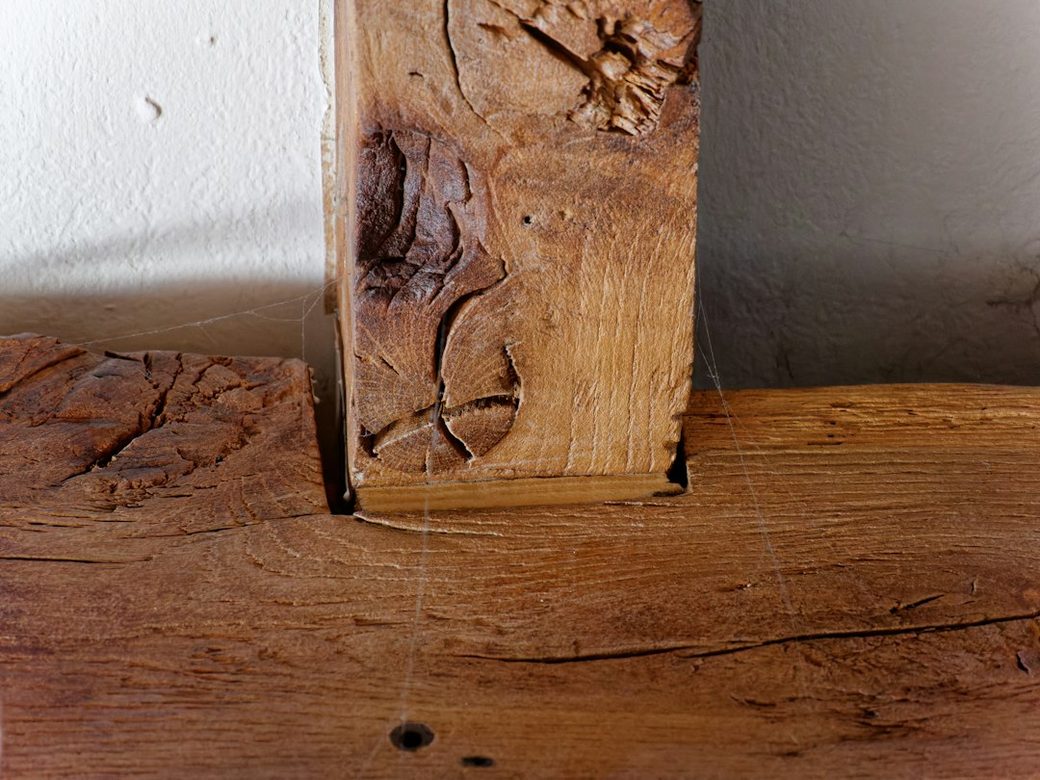
A house this close to the lake and the river deals with more ambient moisture year round than one a few miles inland, no matter how well it was built. On the 1920s homes with their original trim, decades of that humidity have had plenty of time to work on joints and sills that have never been replaced.
Cutting away the damaged wood is the quick half of the job. What actually determines whether this exact spot holds up for the next decade is the quality of the material we install in its place.
Matching the existing material is our starting point, not an afterthought, because mismatched wood is the one thing a rot repair should never leave behind. Many of Lake Oswego’s 1920s Tudor Revival and English Cottage homes still carry their original half-timbering and cedar trim, so cedar, cut to the same reveal and profile, is what goes back up. Where a profile has not been milled in decades, we build it up from plain stock until the shadow line lands exactly where the surrounding timber casts its own.
Cedar and redwood earn their reputation from the oils stored in the heartwood, though the sapwood sold today carries far less of that protection than the old growth it is replacing. Primed finger-jointed pine costs less and takes paint well, yet it softens quickly in any spot that stays damp, which near the water here is more of the wall than most people expect, so it stays clear of grade and off the lowest run of trim. Cellular PVC and fiber cement never rot at all, which is why we reach for them at the chronic failure points: the base of a corner board, a window sill with no drip edge, the trim beneath an opening that was never properly flashed.
Framing is judged by a different rule than trim. Anything resting on concrete or sitting within a few inches of grade always comes back pressure-treated, because untreated fir set against a damp foundation is precisely what let the original sill plate fail. When a joist gets sistered or a stud gets replaced, it is cut from Douglas fir, sized to bear the same weight the damaged member once carried rather than simply to patch the opening.
Fasteners matter more than most people assume. Copper in today’s treated lumber eats through plain galvanized steel in a single wet season, so every screw and nail going into cedar or treated stock is stainless or hot-dipped galvanized. Skip that step and the evidence shows up fast, as rust-colored streaks bleeding straight down the face of an otherwise brand-new board.
The last habit matters more than the brand of paint on the can: every new piece is primed on all six faces, including the cut ends, before it is ever fastened into place. Bare end grain takes on water faster than any other part of the board, and whether that single step gets done is the real predictor of how long a repair holds up near the lake.
There are four factors that set the real size of a rot repair, not the two or three most homeowners assume. The first pair you can check for yourself, any afternoon, using only a screwdriver.
First, ask whether the piece carries any weight. Window casing, a water table, or the lowest band of siding holds nothing up, so a rotten stretch of it is inconvenient but not urgent. A sill plate, a joist, a post footing, or the ledger connecting a deck to the house is a different story, since the building leans on it, which brings shoring, graded lumber, and a permit filed with the City of Lake Oswego’s Planning and Building Services Department rather than Clackamas County. The board itself rarely moves the price. What costs money is pulling a load-bearing piece free without letting anything above it settle.
Second, figure out how far the soft wood actually runs. Push a screwdriver into the board every couple of inches, moving outward from the obvious trouble spot, until it meets real resistance again, and then keep testing another twelve inches beyond that point just to be sure. Decay spreads inside the fiber long before anything shows on the surface, and the single biggest reason a repair comes undone is stopping the cut exactly where the visible damage ends.
Third, consider whether epoxy actually applies here, which is less often than people assume. A good consolidant can save an ornamental piece that is simply not available anymore, a curved window mullion, an old porch bracket, a run of decorative trim, but only when the decay is a shallow pocket rather than a full breakthrough. It has no place on anything that bears weight, and it is not a way to skip opening a wall. Watch for any contractor willing to trowel filler into a soft sill plate. That is a sign they expect to be back for a second job.
Fourth, look at what sits above or beside the damaged area, because that is what actually determines whether a repair holds. Near the water, the culprit is often a kickout that was left out where a roofline meets a sidewall, a gutter overwhelmed during a heavy winter storm, a dock or boathouse roof draining straight onto the wall below it, or a deck ledger lacking any cap flashing whatsoever. Once we track that source down and seal it, the repair gets written on the same invoice as the wood itself, since new lumber installed under a leak that is still active just means paying twice.
Nobody, including us, can hand you one tidy number before the wall or deck is actually open, because the price is a direct function of how much hidden rot is back there. A few things are nonetheless predictable ahead of time. Trim-only work or a handful of soft deck boards sits near the floor of any quote we write. Bring a sill, a joist, or a post footing into the job and the number rises, since anything load-bearing drags shoring and a city inspection along with it. More than any other single factor, the length of time a leak has been running determines the final cost, which is exactly why, with this much rain falling near the lake each year, postponing a known problem into next season almost never saves money.
What actually drives the number up tends to catch people off guard: it is rarely the wood. Material costs are typically the cheapest line on the whole estimate. The expensive part is reaching the damage and putting things back the way they were, renting scaffolding or sorting out a safe ladder setup, peeling back siding or stucco far enough to work behind it, reproducing decorative half-timbering that no supplier stocks anymore, and bracing a load on temporary posts while a failed member comes out. A wall accessible only through a narrow side yard, or one tucked behind a dock or boathouse, almost always costs more to repair than an identical problem on a wall anyone can simply walk up to.
If you want the pieces in order, here is roughly how they stack: the crew’s time first, then everything that seals the repair against weather for good, flashing, house wrap, siding or stucco patching, primer, and a topcoat, then the replacement lumber, and only at the very end, when the work is load-bearing, a permit and its city inspection. Separately, anything that has to be taken down and put back, a downspout, an exterior light, a stretch of railing, a cleat on a dock, gets its own entry on the invoice, so you can tell which dollars paid for wood and which paid for access.
Hold onto any written number another company already gave you and send it our way with your photos. We generally match a competing estimate or come in 10% under it, in writing.
10%
Send it over with a photo or two of what has you concerned, and we will compare it against what we find. Anything that reaches us before 5pm gets an honest answer that same day.
Nearly everything involved in a rot repair takes place against the exterior wall, never inside the rooms where your family actually spends the day, so it ranks among the calmer remodels to have scheduled, lakefront lot or not. Here is generally how the days play out.
Before a single board comes off, we do a walkthrough with you, point out every section slated for removal, and figure out together where equipment, lumber, and debris will sit for the length of the job. On a lot that backs up to the lake or a boathouse, that conversation usually takes longer than on a typical lot, since there is less room to stage anything. Whatever could be damaged near that wall gets relocated first, either by you or by the crew.
The morning your crew arrives is the loud part of the whole project. Old siding and trim come off piece by piece, and by midday the bare framing is sitting out in plain view. Whatever that framing actually looks like settles the question the estimate could only guess at beforehand, not whatever number happened to be written down in advance.
If the open wall turns out worse than what the estimate allowed for, you will hear from us that same afternoon, photos included, before we make another cut. Nothing listed as a possibility on your estimate moves forward until you have given us the go-ahead.
New framing and sheathing go up first, and we do not leave for the day until flashing and house wrap are both in place, because an open stud bay left bare overnight this close to the water is asking for the same leak to start over. On the rare day a storm beats us to the finish, the opening gets wrapped, taped, and left watertight until it clears.
The wall gets its siding back first, then trim, then a run of caulk along every seam before the first protective coat goes on. By this point a passerby on the sidewalk would assume the whole job was already finished, and more than once that is exactly the moment a neighbor wanders over wanting our contact information.
The final coat of paint goes on last, the site gets swept clean, and we walk the finished repair with you against the estimate, item by item. Every offcut, the old rotted wood, and the dumpster itself leave with the crew before we call the job done.
Press into the suspect area with a key or a screwdriver tip. Wood that’s still solid pushes back and barely takes a mark. Wood that has actually rotted lets the tool sink in with little effort, feels soft or crumbly, and sometimes sheds small damp flakes instead of splintering. The paint sitting over it is often the tell, since it tends to bubble or lift in one isolated patch rather than failing evenly across the whole board. Either way, a photo settles most of the guessing before we even arrive, so send one over and expect a straight answer well within the same business day.
Sometimes that genuinely is the entire scope, and we will tell you so without padding the job. What we will not do is nail new material over wood that is still soft just past the spot you flagged. Hidden decay does not pause just because new siding sits on top of it. It keeps traveling through whatever wood is still touching it, and the repair that follows later typically runs well past what finishing the job completely now would have cost.
This is common enough that we never treat it as a surprise. Before any cutting starts, the bid is split into two pieces: the portion we can already see and stand behind, and a flagged allowance for whatever else the opening might expose. We will not spend a cent of that second piece without walking you through photos first and getting a yes from you.
Whether a claim gets paid rests on the fine print of your particular policy and on what actually caused the water intrusion, a question only your insurance company can answer. Our role, if you decide to pursue a claim, is simpler: we keep dated photos and written notes of everything hidden inside the wall as we uncover it, so you are walking into that conversation with real evidence instead of just a description of what you saw.
We do, whenever the scope of work actually calls for one. Any job that touches load-bearing wood, a sill, a joist, a support post base, or the connection point where a deck ties into the house, needs a permit on file before we start cutting. Inside Lake Oswego, that permit and its inspection come from the City of Lake Oswego’s Planning and Building Services Department at City Hall, not from Clackamas County. A particularly wide span may require engineered plans carrying a professional stamp. Holding an Oregon contractor license, CCB #262707, means we file that paperwork and schedule every inspection ourselves. A repair confined to cosmetic trim or siding, with nothing structural involved, typically needs no permit at all.
Timeline depends entirely on what we are actually touching. A job that is purely cosmetic, trim or a stretch of siding, is usually wrapped inside one or two days. The moment structural framing enters the picture, the schedule extends, because propping the load, waiting on the city inspector, and getting the opening weathertight again all have to happen in that exact order, not whichever is convenient. We write an expected number of days into every estimate up front. Most of the job does not require you to be present, but plan to be reachable on the day we actually open the wall, since any surprises tend to surface right then.
In nearly every case, yes. The decorative half-timbering, the steep gable trim, and the tall narrow window casings common to Lake Oswego’s 1920s Tudor Revival and English Cottage homes can usually be reproduced from solid stock, shaped until the reveal and shadow line disappear into the surrounding timber. Where stucco meets wood, we feather the patch in so the transition does not read as new work. Paint color is the simpler half of the match: hand us the old can or its formula and it goes quickly, and lacking either, we pull a sample chip and match straight to that.
Our crews work through every month here, so there is no single required season, but late spring into early fall is genuinely the easiest window, since the framing sits open for less time before it gets covered back up. Homes right along the shoreline do not get a break from the added humidity even in the drier months, which is exactly why we weatherproof each section the moment it is finished rather than waiting until the whole job wraps. Pushing a repair into next winter rarely saves money, because the leak behind the wall keeps feeding on whatever rain reaches it in the meantime.
Our base of operations is 505 SE 184th Avenue in east Vancouver. Getting from there to Lake Oswego means crossing the Columbia at I-205 and then driving south well past downtown Portland, more road time than most of our calls but still just another stop on a normal week for the crew. Once here, we take on rot work across First Addition’s tree-lined streets, the Tudor and English Cottage blocks near downtown, Lake Grove and its village center, the Palisades neighborhood near the swim park, and the Country Club and North Shore area closest to the lake itself. Licensed in Oregon, CCB #262707.
Three of the 50 reviews on our Google profile, in the homeowners' own words.
David's work was terrific. Repaired a rotted out structural framing issue in a bathroom and replaced (and resized!) a window in the same space. He initially quoted a two day job but was able to finish in a single day. Dedicated! Will be using him again.
Joe H.Bathroom framing repair
We talked to 4 different contractors and only David, of Evergreen, took the time to climb up to our roof to check out the job. The others gave us bids based upon a photo. Evergreen was not the cheapest but the extent of the work they did was worth every penny.
Steve K.Roof and exterior work
Evergreen crew installed three skylights for us. Once we opened the ceiling there was more to do than expected and they handled it without drama. Clean work, fair price, and they cleaned up after themselves.
Foad M.Three skylights
Send photos and a short description. If it arrives before 5pm you get an answer the same day.
Already have a written estimate from someone else? Send that too. We match or beat most estimates by 10%.
Built for the wet side of the river.

Licensed and insured remodeling contractor serving Vancouver, WA and the Portland metro.
Oregon CCB #262707 · WA Lic. #EVERGRS757MCEvergreen Renewal Services LLC
505 SE 184th Ave Unit 320
Vancouver, WA 98683
© 2026 Evergreen Remodeling. Oregon CCB #262707 · WA Lic. #EVERGRS757MC. Evergreen Renewal Services LLC. All rights reserved.
Same day response on anything sent before 5pm.