

A Milwaukie bathroom almost never shows its real problem on the surface. A shower pan that weeps at one corner, or a toilet rocking on a wax ring long past its life, can feed water into the subfloor for years before a single tile lets go. That hidden soak is what we trace first, whether the house sits in Ardenwald, Island Station, or anywhere along Lake Road. Rebuilding what that water ruined is the job this crew is built around, so a punky joist under your shower is never a surprise we hand off to someone else.
Licensed and insured. Oregon CCB #262707
On anything sent before 5pm
We match or beat most written estimates
Remodels completed
Every old finish comes out, the wet walls get sealed to current code, and new fixtures go in throughout.
Many of Milwaukie’s older homes never had a curb-free option, so waterproofing and slope get built in before any tile goes down.
Rotted joists and subfloor come out down to solid wood, a common fix in homes built close to the Willamette and Kellogg Creek.
Every wet wall and floor gets a fully bonded waterproofing membrane first, never tile set straight onto dry backer board.
Vanity, toilet and lighting go in level and plumb, with the exhaust fan rated to handle Milwaukie’s wet fall and winter stretch.
Same room, same window. One side is the bathroom the owners lived with. The other is the one they have now.
Drag the handle. Left, the bathroom as we found it: a tub behind a curtain, a small vanity, shelves on the wall. Right, the same room finished: a glass shower, a soaking tub under the window, a wood vanity on a herringbone floor.
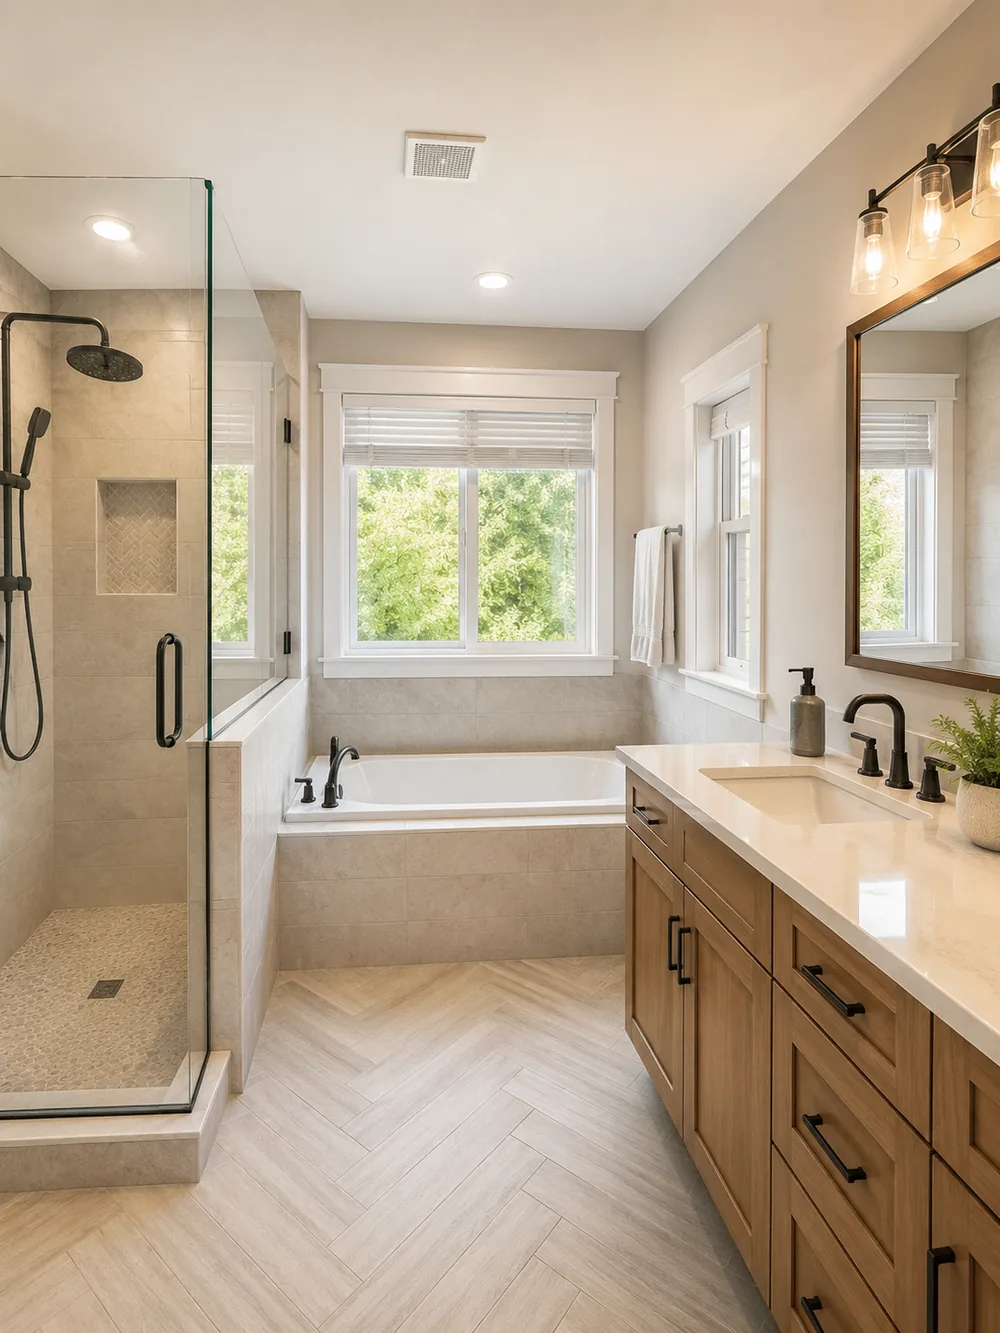
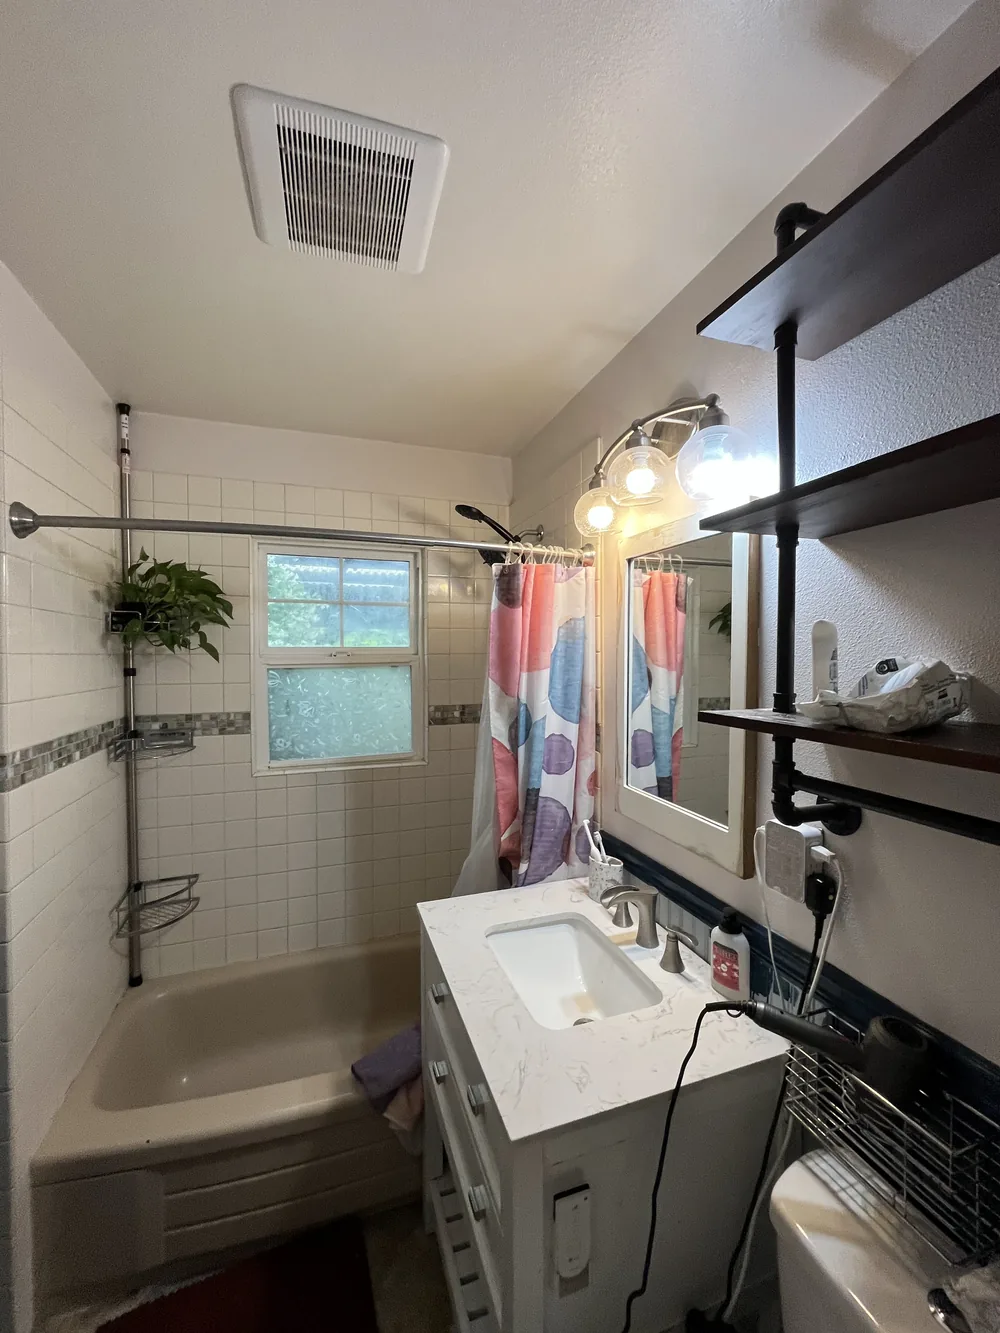 Before After
A bathroom here rarely fails at the tile you can see every morning. It fails behind it, where nobody photographs: a membrane bonded flat against the wall, a shower base pitched to carry water to the drain instead of letting it sit, corners that hold their seal year after year, and a fan with enough pull to actually push wet air outside. A corner-cutting remodel skips every one of those and still looks finished on handoff day. We build every wet area to current code and run each fan duct straight through a sidewall or the roof, because Milwaukie’s wettest stretch runs from November through December, and a fan that only empties into the attic during those months is simply a rot repair you haven’t scheduled yet.
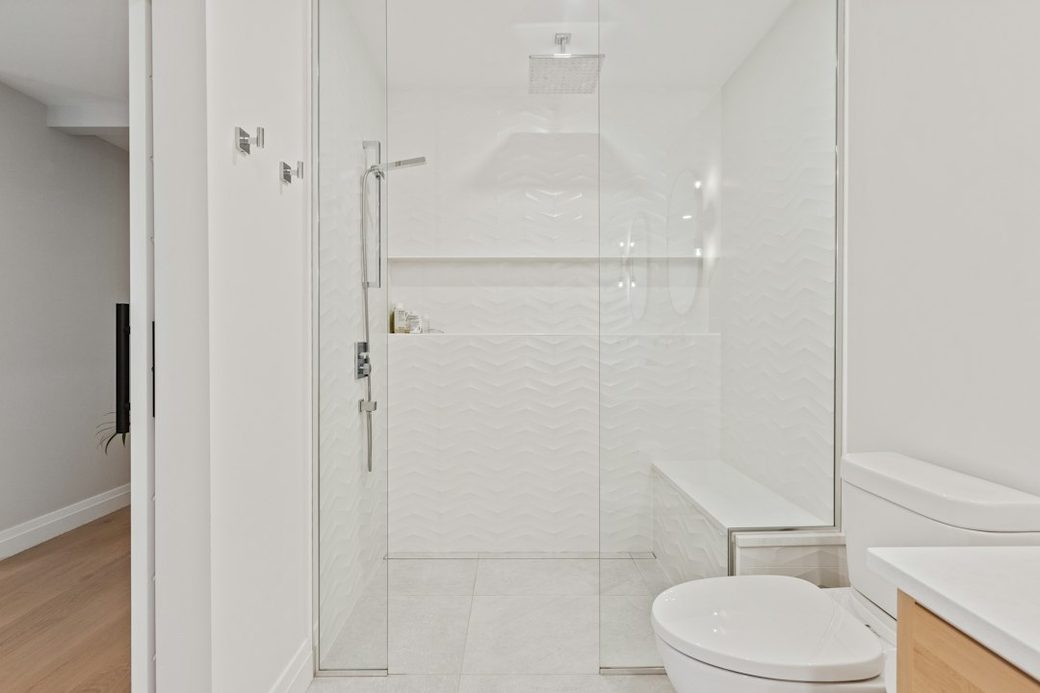
Behind the tile in any shower there are really only three ways to build it, and which one you get determines how many years pass before moisture reaches the wood. Our standard is a continuous bonded membrane, sheet or liquid, carried over backer board and tied together at every seam, corner and pipe penetration before a single tile goes down. A rigid waterproof foam panel reaches the same result from the opposite direction, building the barrier into the board itself rather than coating it afterward. The remaining option, backer board alone with mastic smoothed over the seams, is the version that starts failing around its fifteenth year, and it is not one we will install. Cut that membrane from the budget and the only thing standing between your shower pan and the floor joists below it is gone.
Half of that waterproofing job actually lives in the floor of the shower, not the walls. A pan has to pitch evenly toward the drain, and a curbless or low-threshold entry, which is what nearly every homeowner asks for today, needs that pitch to begin from a point lower than the surrounding floor. In a house already standing, that usually means notching the floor joists down across the width of the shower or hanging new ones at a lower height altogether, and that call has to be made at the framing stage, long before anyone thinks about grout. It is also why a flush entry costs noticeably more to retrofit into one of the older homes near Historic Milwaukie or Ardenwald than it does to build into a floor that is being framed brand new.
Picking the tile itself mostly comes down to how much upkeep you want later. Oversized porcelain panels leave almost no grout lines, which means less scrubbing and fewer joints that can eventually fail, though the wall behind them needs to be nearly flat and the labor to set them runs higher. A smaller mosaic on the shower floor grips better under wet feet, at the cost of all those extra seams to maintain. Natural stone looks expensive because it is, and it drinks in water just as readily, so putting marble in a shower means committing to a resealing schedule you actually keep. Epoxy grout belongs anywhere water and a scrub brush meet regularly, standard grout is fine everywhere else, and every inside corner gets a flexible sealant instead of grout, because a corner flexes slightly over time and grout in that spot cracks on schedule.
On the fittings themselves, the only place worth spending extra is the valve, since the rest comes down to taste. A pressure-balanced or thermostatic mixing valve gets buried inside the wall, so it is the one part you never want to open the wall back up to reach, while the handle and spout bolted onto its face can be swapped out on an ordinary afternoon years later. A wall-hung vanity can make a tight bathroom feel noticeably larger, but it needs solid blocking fastened into the studs before the drywall closes, which means deciding on it early rather than after the fact. And next to a shower, in a room that never fully dries out between uses, a particleboard cabinet base is a problem waiting a few years to happen.
Last on the list, and the cheapest line item on the whole estimate, is the exhaust fan, and it is the single part that keeps everything else in the room sound. It needs to be sized to the square footage of the room, ducted all the way outdoors through a sidewall or the roof rather than dumped into the attic, switched on a countdown timer or a humidity sensor, and insulated along its full run so it doesn’t drip condensation back down into the housing. Milwaukie sees its wettest stretch across November and December, and a bathroom that never gets a real chance to dry out between showers during those months will rot right on schedule. That one fan is the entire difference between the two outcomes.
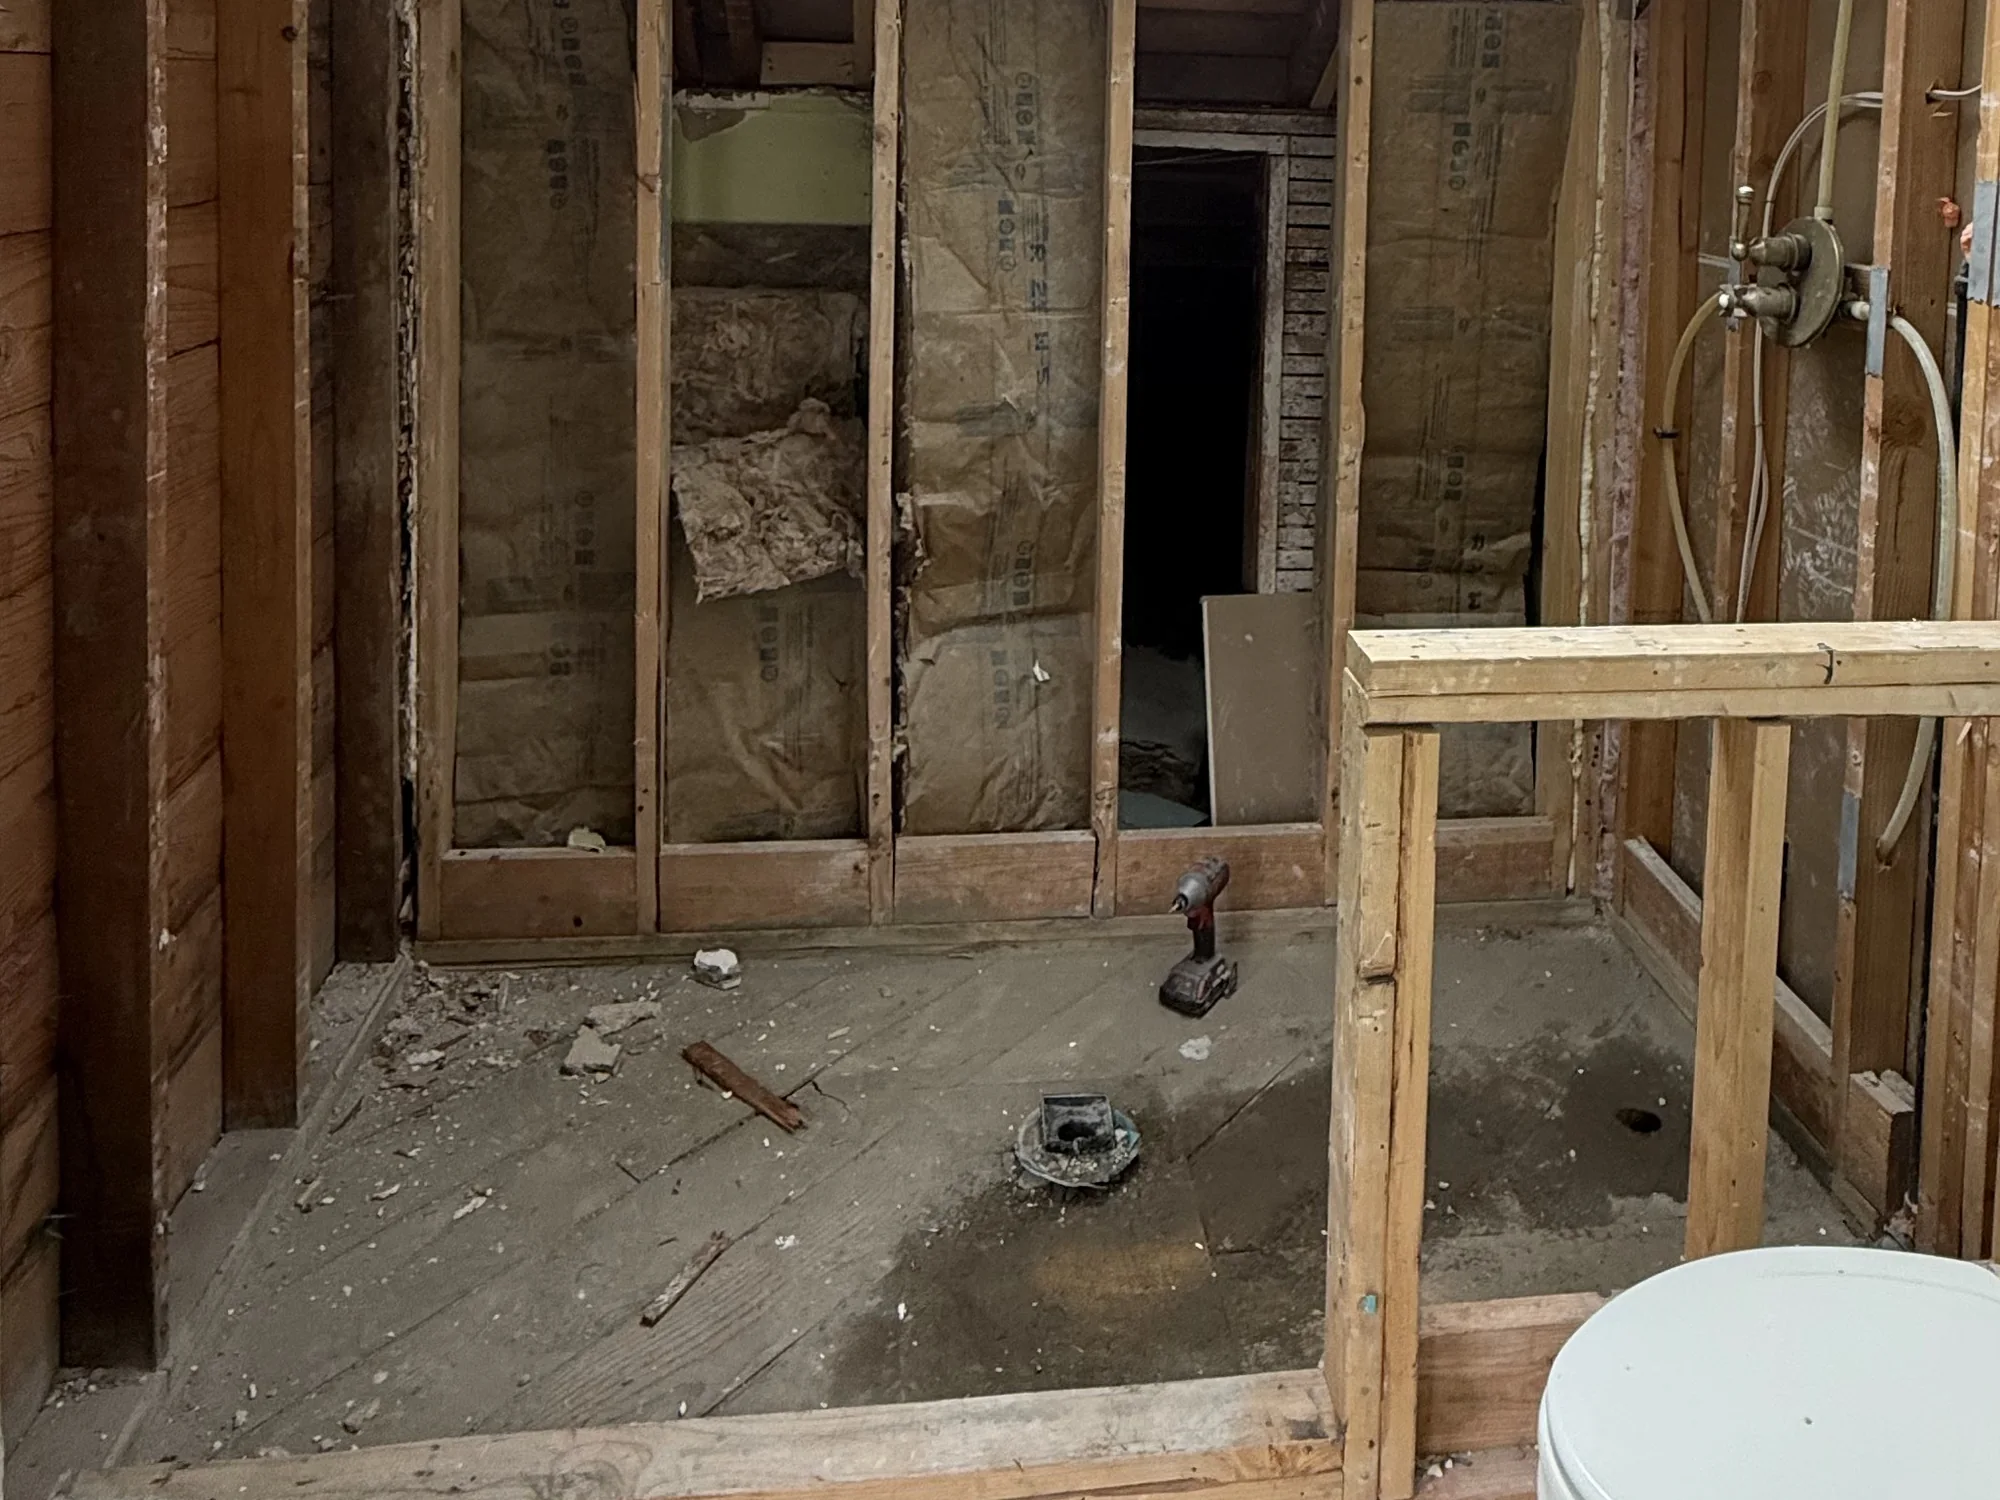
This is a bathroom caught at the one stage most homeowners never see photographed. Every finish is already gone, with the tile, tub, vanity and flooring hauled out, leaving bare plank sheathing on the left wall, insulation visible between open studs, a drain stub standing alone where the toilet once sat, and the toilet itself pushed aside until it is ready to go back in last.
The framing on the right has already been replaced outright, not patched over. That is what happens to studs once a shower has been leaking into them season after season, which is common enough in older homes. New supply lines are capped off and waiting, and the shower valve is already set at its finished height, because that measurement cannot be guessed at later. Once backer board covers the wall, both the valve and the tile line it controls are gone from view for good.
No other point in the job carries more weight for the final price or how long the room lasts. With the walls still open, every real decision gets made: how the pan slopes to the drain, whether the shower entry sits flush with the floor, where a recessed niche lands, whether a weakened joist gets reinforced before it closes up. Once the board goes on, those decisions are locked in place. That is why we walk you through the room at exactly this point rather than sending a photo after the fact.
We run into this often enough in Milwaukie, especially beneath showers that have seen twenty-plus years of daily use in the older homes close to Kellogg Creek and the river. What matters most is what happens right after we find it: putting rotted framing back together is work we do ourselves, never a scope we hand off to another trade. Turn up a soft joist or a punky stretch of subfloor and it gets rebuilt at the number already sitting on your estimate, so the schedule keeps moving instead of stalling while we track down a second crew.
The same handful of culprits show up house after house. A soft spot in the floor just in front of the toilet is often left behind by a wax ring that failed years before anyone noticed. A shower drain joist can go dark and spongy underneath. A section of rim joist has turned soft where overflow from a tub crept behind the wall and never fully dried out. And framing along an exterior wall begins to rot wherever the old fan barely moved any air at all. We open up enough of the floor to find every one of these while it is already exposed, since that is the only point where fixing a joist stays affordable.
A handful of factors move the number, usually in this order. First is whether anything relocates, since moving a toilet or shower to a new spot means running new drain lines. Next comes how much tile goes on the walls and floor, which tier of fixtures you choose, and whatever turns up once the floor is opened. Keep everything in its current spot and refresh the surfaces, and you land near the lower end of the range. Rearrange the layout and carry tile to the ceiling, and you land near the top. Every estimate we write is itemized, and if the floor hides damage, that repair appears as its own line you approve before any work on it begins. If you’re holding a written quote from someone else, we’ll match or beat most of them by ten percent.
Where that money actually goes tends to surprise people, since a bathroom packs an unusual number of trades into a small footprint. Labor takes the largest share: tile setting is slow, precise work billed by the square foot, and even a room of thirty or forty square feet still needs electrical, plumbing, framing, membrane, tile, paint and trim carpentry run through it in sequence. After labor comes tile and waterproofing, both priced by the area they cover rather than the size of the room, which explains why running tile to the ceiling costs so much more than stopping it at shoulder height. Fixtures and the vanity come next, and those are entirely up to you. The plumbing rough-in lands last on the list, cheap when nothing moves and expensive the moment a toilet or shower changes location.
The one number we will never shave down is the waterproofing hidden behind the tile, even though it happens to be one of the least expensive items on the whole estimate. Skip that membrane and you save maybe a couple hundred dollars today against a repair that runs into the thousands later, so we price it accordingly every time, and we would turn down the job entirely before building a shower that way.
10%
A picture of any soft or stained patch of flooring, sent before 5pm, gets you an answer that same day.
A bathroom remodel only touches one small room, so you won’t be living in a construction zone for months the way a kitchen project drags on. Below is the sequence we follow, and the part that stings most if this is the only bathroom you’ve got.
We place the order for tile, vanity and every fixture well before demo begins, since nothing stalls a one-bathroom household longer than a backordered box of tile. We also settle where to hang the dust barrier and which path the crew uses getting in and out of the house.
Demo runs one day, occasionally two. The tub, old tile, vanity and flooring all come out, dropping the room down to open framing and bare subfloor so every issue hiding behind them is visible at once.
With the walls and floor open, we go through the framing, check the subfloor, and look over the plumbing for age-related wear. Anything damaged gets photographed right away, with a price ready before we cut into anything further.
New plumbing and wiring reach their fixture locations, solid blocking goes into the studs ahead of the vanity and any grab bar, and the rough-in then gets inspected through the state’s BuildingPermits.Oregon.gov portal, administered by the City of Milwaukie Building Division. Nothing closes up until that sign-off comes back.
Backer board goes up first, then the membrane, sealed tight at each seam, corner and pipe, followed by the pan, then the walls, then out across the floor. Setting tile is the slow part nobody can rush, since thinset and grout cure on their own schedule, not ours.
Final fixtures go in last: the vanity and toilet set in place, mirror and shower trim mounted, the exhaust fan connected, paint touched up and trim nailed back on. From there we walk the finished room together and check it against your signed scope. Most households get the sink and toilet running again well before the shower itself is cleared for use.
The shower is out of commission for most of the job, since demo, waterproofing, tile and curing all need their own stretch of time. The toilet and sink go back in much sooner. Tell us up front that it’s your only bathroom and we’ll order the work so those two fixtures return first, before the shower is anywhere close to finished.
It’s one of the most common calls we get here, especially in the older homes around Ardenwald and Hector Campbell. Count on new drain work, a fully waterproofed wet area, and usually new wall tile. Pulling that old tub is also the moment we find whatever it’s been hiding underneath, often a soft patch of subfloor from years of splashed water nobody wiped up.
Almost always, yes. A flexing floor at the base of a toilet usually means the wax ring gave out a while ago and water has been reaching the subfloor ever since. It’s a straightforward repair, and far cheaper to handle now than after another wet winter adds to it. Send us a photo of the spot and we can give you a read on how far it’s likely spread.
If the work relocates plumbing, opens up wiring, or rebuilds structural framing under the floor, then yes. That permit is filed through the state’s BuildingPermits.Oregon.gov portal, administered by the City of Milwaukie Building Division, not a county office. We hold Oregon CCB #262707, so pulling the permit and standing for every inspection it calls for is on us, not you. Replace fixtures in their existing spots with nothing structural touched, and most of the time no permit is needed at all.
In most of the Milwaukie houses we work on, yes, though what a curbless shower costs depends heavily on the floor structure already in place. Getting the base down to the right height usually means one of two paths: cutting the existing floor joists lower through that section, or building up the floor surrounding the shower to meet a dropped pan instead. A quick look from underneath, or a small inspection hole cut from above, tells us which path your particular floor calls for.
Moving out from the framing, it’s backer board, then a bonded waterproofing layer carried across every corner, seam and pipe penetration, and only after that do thinset and tile go on. That waterproofing layer is the part doing the real work. Backer board by itself will eventually soak through no matter what a cut-rate bid claims, and skipping that layer is the shortcut we run into most in homes we’re asked to repair.
Yes, and it’s not a minor detail here. A fan that’s undersized, or ducted into the attic rather than outside, lets humidity sit in the room long after the shower has stopped running, and that lingering moisture is exactly how framing rot and mildew behind the vanity get started in the first place. Getting the fan size right for the room, routing its duct all the way through the roof or a sidewall, and putting it on a humidity sensor rather than a basic switch adds almost nothing to the job while the studs are still exposed.
A full teardown and rebuild typically runs several weeks, not a handful of days, and the bulk of that calendar time is tile adhesive and grout curing properly plus inspector scheduling, rather than the crew actually being idle on site. Expect that timeline to stretch further if we’re also rebuilding framing an old leak compromised, or moving the layout around. We attach a day estimate to every quote, and for a single-bathroom household, we front-load the schedule so the toilet and sink are back in service well before the shower is finished.
Reaching Milwaukie from the shop in east Vancouver starts with the Columbia crossing at I-205, then continues south through Portland on I-5 or McLoughlin Blvd into the city. We remodel bathrooms across Milwaukie, from the pre-1900s homes of Historic Milwaukie along SE Main Street, to the older houses of Ardenwald and Hector Campbell, the riverfront properties of Island Station, and on through Lake Road, Lewelling and Linwood.
Three of the 50 reviews on our Google profile, in the homeowners' own words.
David's work was terrific. Repaired a rotted out structural framing issue in a bathroom and replaced (and resized!) a window in the same space. He initially quoted a two day job but was able to finish in a single day. Dedicated! Will be using him again.
Joe H.Bathroom framing repair
Evergreen crew installed three skylights for us. Once we opened the ceiling there was more to do than expected and they handled it without drama. Clean work, fair price, and they cleaned up after themselves.
Foad M.Three skylights
David the owner came by for a quote and was able to get us scheduled right away. The communication was great with his team and the guys were on time and very professional. Would highly recommend.
Scott G.Kitchen nook bench
Send photos and a short description. If it arrives before 5pm you get an answer the same day.
Already have a written estimate from someone else? Send that too. We match or beat most estimates by 10%.
Built for the wet side of the river.

Licensed and insured remodeling contractor serving Vancouver, WA and the Portland metro.
Oregon CCB #262707 · WA Lic. #EVERGRS757MCEvergreen Renewal Services LLC
505 SE 184th Ave Unit 320
Vancouver, WA 98683
© 2026 Evergreen Remodeling. Oregon CCB #262707 · WA Lic. #EVERGRS757MC. Evergreen Renewal Services LLC. All rights reserved.
Same day response on anything sent before 5pm.