

The work we are known for
Wood Rot Repair in Washougal, WA
Wood rot starts as a water problem, and Washougal sits where the water gets help. The town opens right onto the mouth of the Columbia Gorge, so the east wind here blows harder and steadier than almost anywhere in the county, and it drives rain flat into any wall standing in its path. The exposed faces on the hill lots north of town and the newer places along the Columbia waterfront are the ones we find soft first. Fixing rot so it stays fixed means chasing the water back to where it got in, cutting the wood a foot past the last soft fiber, and rebuilding whatever carries load before any siding goes back. It is the bulk of what we do here, and the work people call us for by name.
Licensed and insured. WA Lic. #EVERGRS757MC
On anything sent before 5pm
We match or beat most written estimates
Remodels completed
The rot we cut out most
A damp season that stretches from fall into spring gives water a long run at every seam and joint a house has. Around Washougal, these are the first places it gets into, and the ones we most often end up opening up:
Trim, corners and siding
The wood that meets the weather before anything else. Corner boards soft at the base, casing around windows and doors, belly bands and water tables, and the sheathing waiting behind all of it.
Deck boards and ledgers
Decking that gives underfoot, the joists and beams below it, and the ledger that pins the deck back to the house framing. On a hillside deck north of town, or one out over the Washougal River, that ledger takes the most weather and goes first.
Framing under load
Post bases, wall studs, sill plates and rim joists that have spent years drawing damp up out of wet ground, which we see most in the crawlspaces of riverside homes down the Washougal River valley.
Window and door openings
Flashing that gave out years back, feeding water into the wall behind the trim ever since. The Gorge wind, driving rain flat at the glass, only fills that cavity faster.
Bath and kitchen subfloors
A supply line, toilet seal or shower pan seeping for months, softening the subfloor and framing beneath it well before a tile moves or the floor feels soft.
Still not sure?
Grab a couple of photos and a quick note on what you are seeing, and send it our way. Anything that reaches us from Washougal before 5pm gets a reply that same day. If it turns out to be something we should leave alone, we will say so and tell you why.
A wall taken apart and rebuilt
On rot work this is the only proof that means anything. A finished photo shows a wall. A pair shows what was behind it.
Drag the handle. A shower alcove from our own rot work, opened to the studs where water had darkened the framing, and the same alcove finished in green and white tile under its original skylight.
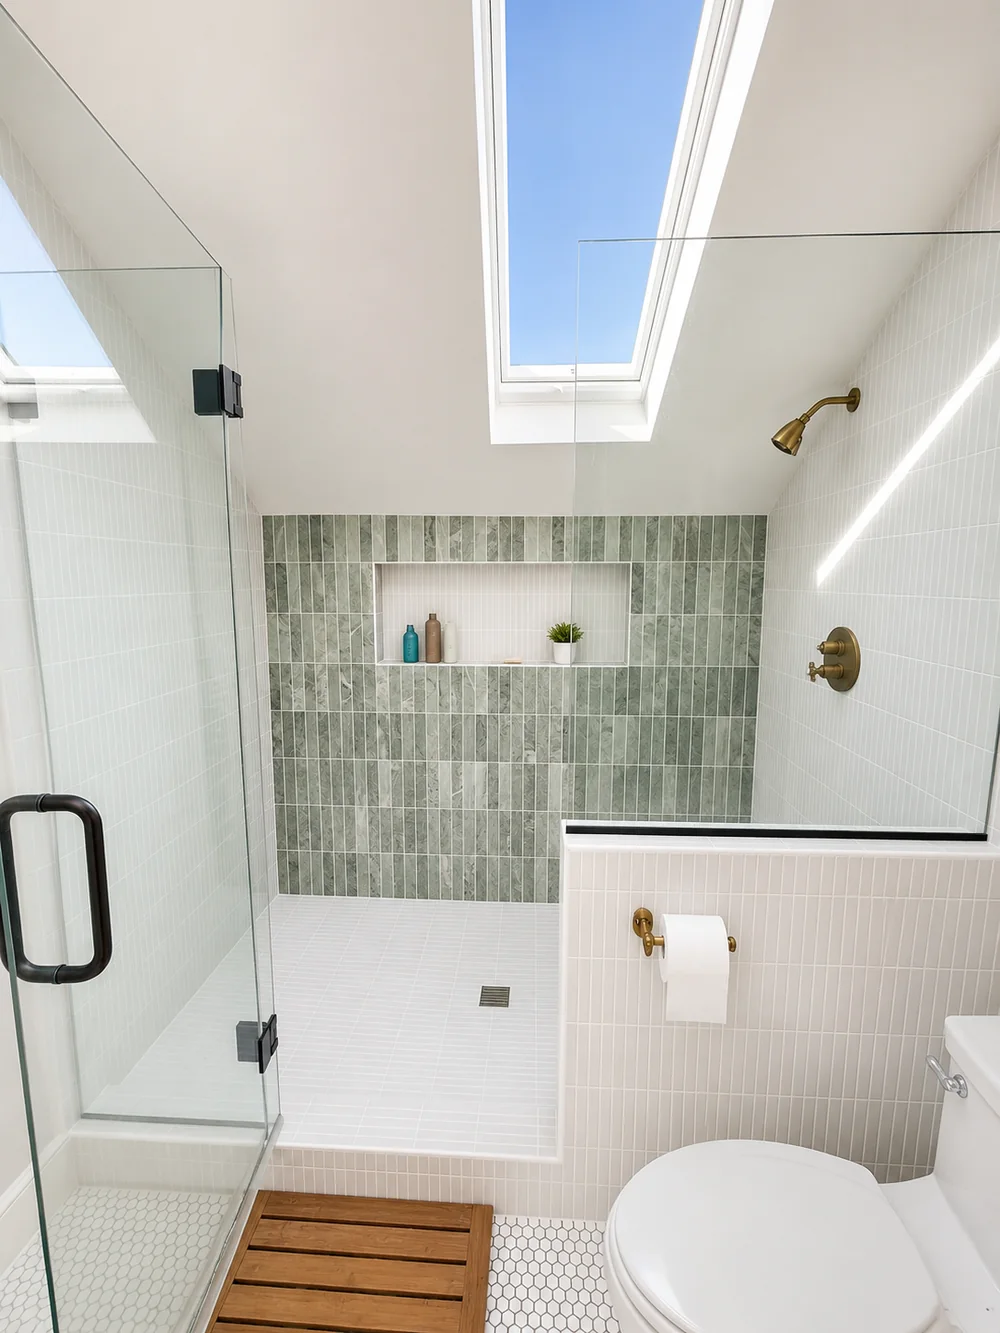
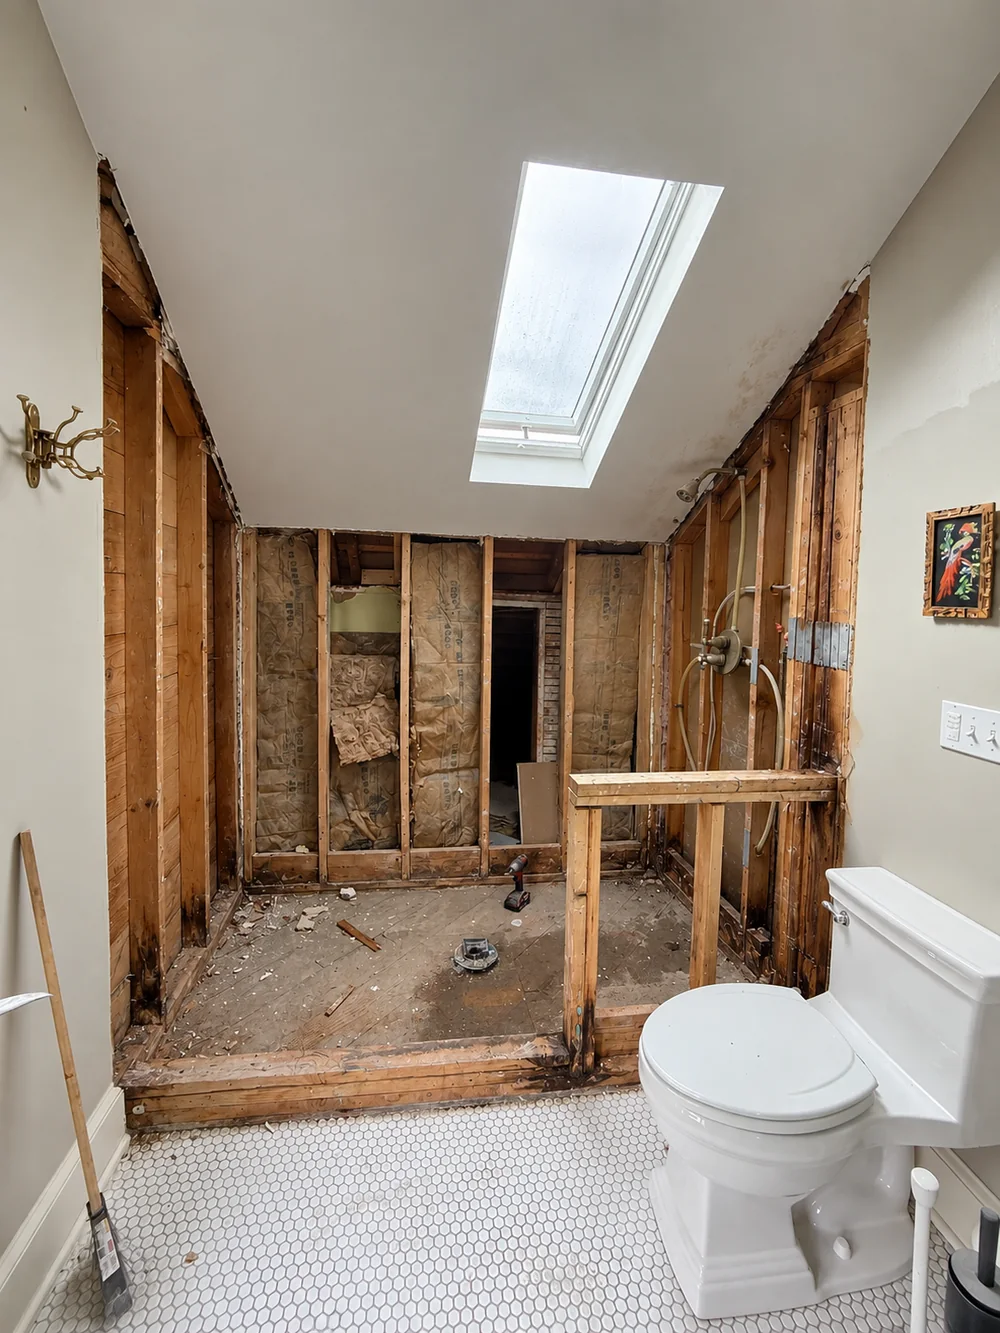 Before After
What a photo cannot show
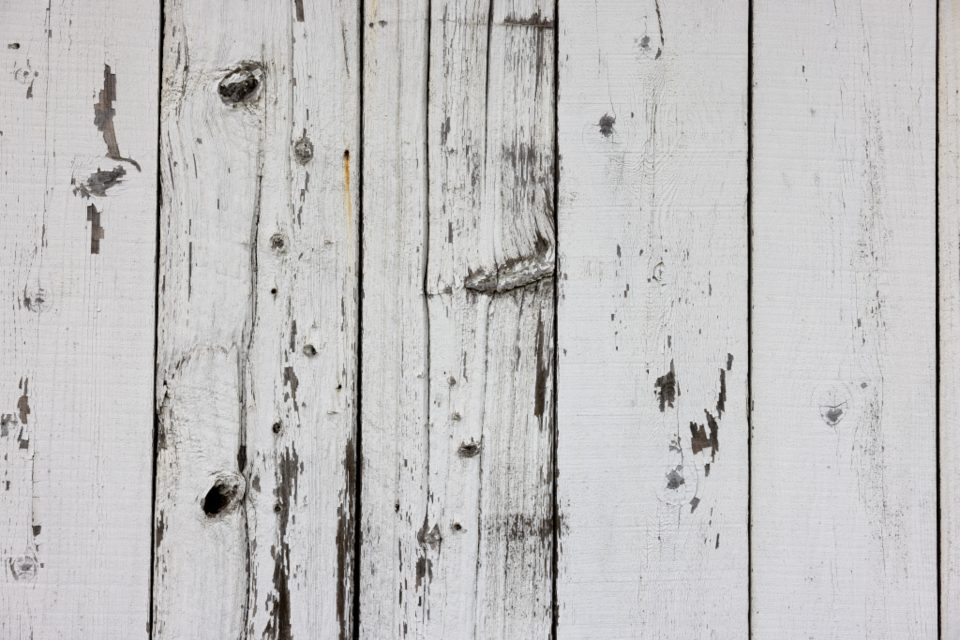
Whatever shows on the surface is the last chapter of the damage, not the first. Rot creeps along the grain beneath the paint and inside the siding, so the stain or the give you can feel with a thumb marks the far end of it, not the source. On a wall that has stood in years of Gorge wind and sideways rain, the distance between those two points can be surprising. Price that from a photo and you are really pricing a hope, and that hope becomes a change order on day one.
That is the reason we show up and get our hands on the wall. We draw a clear line between what we can be sure of from the outside and what only the open wall will tell us, and the estimate is laid out the same way: the certain work at a firm number, the rest set apart as its own item for you to approve before any wood is cut. You are never left guessing which figure is locked in, because it says so right on the page.

What wind off the Gorge adds up to
Washougal sits right where the Gorge opens onto the Columbia, and the wind that funnels through here drives rain sideways into siding for days at a time. Mill-town homes built close to the waterfront take the worst of it on their river-facing walls, where paint fails first and water finds its way in behind.
The wood that goes back on
Cutting the bad wood away is the easy half. The half that counts is putting back material that will not rot out at the very same corner ten years from now.
The first move is to match what the house already wears, because a rot repair you can pick out later is a repair done wrong. If a historic home in downtown Washougal still carries its original cedar corner boards, cedar is what goes back, milled to the same profile. When that profile stopped being made years ago, we build it up out of stock lumber until its reveal and shadow line drop right in with the courses on either side.
Cedar and redwood hold up because of the oil in the heartwood, though the sapwood in today’s boards is far softer than the old growth it stands in for. Primed finger-jointed pine is the cheap pick and it takes paint well, but it rots fast anywhere it stays damp, which here is most of the year, so we keep it up off the soil and off the foot of any trim run. Cellular PVC and fiber cement do not rot at all, which makes them the smart call for the spots that keep failing: the base of a corner board, a water table, the casing under a window left with no head flashing. They cost more per foot, and they buy you out of a third trip to the same corner.
Framing is its own call. Anything bearing on concrete or sitting close to grade goes back pressure-treated, since untreated fir against a damp foundation is exactly how the first sill plate rotted through. Where we sister a joist or set a fresh stud, it is Douglas fir, sized and nailed to carry the load the old member carried, not just to fill the gap.
Fasteners get overlooked. The copper in modern treated lumber eats ordinary galvanized steel alive, so the screws and nails heading into treated wood or cedar are hot-dipped galvanized or stainless. Sink a plain screw into a cedar board and black streaks bleed down the face inside a season, and no coat of paint hides that afterward.
Every board gets primed on all six faces before it goes up, ends and all. Bare end grain pulls water in like a straw, and whether that one step gets done or skipped tells you more about how long the repair holds than any name on the paint can.
One board or the whole wall
Four questions decide how big a rot repair really gets. The first two you can check off yourself in well under an hour, with nothing more than a screwdriver.
Does it carry weight? A piece of trim, a water table, the lowest run of siding: none of those hold the house up, so a rotten one is an afternoon lost and not much else. Change the answer to a rim joist, a sill plate, a post base or a deck ledger and everything shifts, because now the building is leaning on it. Those get temporary posts holding the load, solid new material, and a permit and inspection from the City of Washougal Building Division at City Hall, 1701 C Street, not from Clark County. The number is never really about the board. It is about getting it out from under a load without anything moving.
How far does the rot reach? Run the screwdriver down the board at intervals of a few inches until it stops biting in, then keep testing a full foot beyond the last place it gave. The rot has already run inside the grain past anything the surface lets on, and quitting at the edge of the visible damage is the top reason a repair fails and has to be done over.
Is epoxy the right tool? Sometimes it genuinely is, and we will say when. Consolidant and filler do honest work on a milled piece you can no longer source, a window sash, a porch post, an old run of trim, provided the rot is a contained pocket and not a failure straight through the member. On anything that carries load they are useless, and they are not a trick for avoiding an open wall. Anyone selling you epoxy for a mushy sill plate is lining up the same repair twice.
And what is directly above it? That answer decides whether any of this holds. The water entered higher up: a kickout flashing never installed where a roof meets a wall, a gutter spilling over its lip in a hard Gorge downpour, siding stuffed down into a planting bed, a deck ledger with no cap flashing lapped over it. We hunt that source down and close it before touching the wood, billed on the same sheet, since new lumber sitting under a live leak just gets paid for a second time.
Where the cost lands
The straight answer is that the bill tracks how much rot there is, and no one can pin that down until the wall or the deck is open. A few things are true ahead of that: a small job kept to one spot, a short length of trim or a handful of soft deck boards, stays cheap; the moment joists, sills or post bases enter the picture it climbs, since structural work drags shoring and an inspection along with it; and what swings it hardest is the number of seasons the leak has been fed. In a place that draws rain the better part of the year, the least expensive repair is always the one you deal with this season instead of next.
The part that surprises people is where the dollars actually land. Wood is the cheap end of a rot bill. The expense is in the labor and the reach: building staging or planning a ladder, peeling siding off well past the damage to work behind it, carrying a load on temporary posts while a rotten one comes out, then sealing everything back so it disappears. The same ten feet of trim costs well over twice as much up under the eaves as it does within arm’s reach, and two separate patches on opposite ends of a house run higher than a single bigger one.
The order of the bill, roughly, is this: labor first, then the weather sealing that makes the repair permanent, which means house wrap and flashing, siding, then primer and paint, then the lumber, and a permit and inspection last if the work is structural. Each thing that has to come off and get rehung lands on its own line, a gutter, a downspout, a light, a stretch of deck rail, a dish bolted to the eave, so you can read straight off the sheet how much is the wood and how much is reaching it.
Got a written bid from another outfit already? Send it with the rest. On most written estimates we will either match that number or come in 10% under it, and we put that in writing.
10%
Already have a quote?
Attach it alongside a photo or two of the bad spot. Get it in before 5pm and you have your answer that day.
What the job is like to live with
Most of this work takes place outside the walls, not inside your rooms, so it is one of the easier remodels to have running while you go about your week. Here is the shape it usually takes.
Before the siding comes off
First we walk the house and mark what is coming off. Then we settle where the staging, the lumber and the dumpster will go, which on a cramped downtown lot or a hillside one north of town takes some planning. We move anything breakable away from that wall first, you or us.
The day the wall opens
Count on a noisy day. The siding and trim come off through the morning, and the wall is standing open by midafternoon. That open stretch is what finally shows whether the possible-extent line on your estimate gets touched at all.
When there is more than we priced
If what is behind the siding runs worse than what we quoted, you get a call that same day, with photos, before the next cut goes in. Nothing in the possible column moves an inch until you tell us to go ahead.
New framing, then weathered in
New framing and fresh sheathing go up, with the flashing and house wrap right behind them the same day we reach that point, so no opening is ever left bare through a wet night. If weather moves in before we are ready, we skin the wall over and tape it tight until things clear.
Closing the wall back up
Up goes the siding, then the trim, then the sealant and the first coat of primer. Seen from the street the house already looks done, and this tends to be the stage where a neighbor drifts over wanting to know who we are.
Paint, then the final walk
The finish coat goes on last, the yard gets swept clean, and we take a turn around the work with you, ticking it against the estimate one item at a time. The offcuts, the old rotten wood and the dumpster: we take all of that with us when we leave.
What Washougal homeowners ask
How can I tell rot from failing paint?
Lean on it with a screwdriver, or the edge of a house key. Good wood pushes back; rotted wood sinks, feels spongy, or comes away in damp crumbs, and the paint over it tends to blister in patches before anything else gives. If the tip goes in with almost no push, the wood under there is already spent. Send a photo and a line about what you are seeing, and if it lands before 5pm we answer the same day.
Do you have to go past the board I can see?
Now and then it truly is the whole of it, and if so, that is what you will hear from us. But when the softness carries on past the board you flagged, we are not about to skin over it and pretend the job is done. Fresh siding does not kill rot; it keeps chewing through the wood behind the cover, and coming back to fix it a second time costs more than handling it properly at the start.
What happens if it is worse than it looked?
We see it enough that it is built into how we quote, not sprung on you halfway through. On the estimate, the work we can confirm from outside sits apart from whatever extra the open wall might reveal, and that unknown gets its own separate figure. We do not start on any of it until you have looked at the photos and given us the word.
Will insurance pick up a rot repair?
It depends on the wording of your own policy and on what caused the leak, and that is a question for your insurance company, not for a contractor. Our part is to document the damage as we expose it, with photos and notes, so if you do file, you have solid evidence to hand an adjuster.
Who handles the permit, you or me?
That is on us, whenever a job needs it. Putting new structural framing back, or rebuilding the load path beneath a deck, is work that requires a permit, and inside the city that is pulled from the City of Washougal Building Division at City Hall, 1701 C Street, not from the county. We hold a Washington contractor license, WA Lic. #EVERGRS757MC, so filing the application and lining up the inspections is ours to handle. Cosmetic siding and trim, on its own, usually needs no permit.
How long will my house be torn up?
Count on a day, maybe two, for a contained trim or siding repair. Structural jobs stretch out, because the temporary support, the inspection and drying the wall back in all have to happen in sequence, and the finish paint needs a dry stretch to cure. Your estimate spells out the number of days. For most of it you can come and go, but keep your phone on the day we open the wall, because that is when any call on the extra work lands with you.
Can you match trim that is no longer sold?
Just about always. Clapboard, shingle courses and the standard trim profiles are either on the shelf still or can be milled to order, and for something that has genuinely dropped out of production we laminate it from stock so its reveal sits flush with the courses next to it. Matching paint is quick if you kept the can or the code, and if not, we lift a color match from a chip taken off the wall.
Should I wait for dry weather?
Summer makes it easier, roughly late June into September, and the opening stays exposed for the shortest time in that stretch. Even so, we run these jobs in every month and weather each section back in as we finish it, rather than leaving it all for the end of the week. Holding off for clear skies usually costs you, because the leak keeps running the whole time you wait and a small soft spot only grows.
Where we work
We run out of a shop at 505 SE 184th Avenue in east Vancouver. From there it is a clean shot east along SR-14 into Washougal with no river to cross, so a job here does not cost us half a day stuck in traffic. The whole city is our ground, from the historic mill-town houses and their original siding downtown, through the older streets around Hathaway, up to the view lots on the hills north of town, and down to the Columbia waterfront and the homes along the Washougal River valley, out as far as Fern Prairie and the rest of east Clark County. Licensed in Washington, WA Lic. #EVERGRS757MC.
The rest of what we do
What homeowners say
Three of the 50 reviews on our Google profile, in the homeowners' own words.
David's work was terrific. Repaired a rotted out structural framing issue in a bathroom and replaced (and resized!) a window in the same space. He initially quoted a two day job but was able to finish in a single day. Dedicated! Will be using him again.
Joe H.Bathroom framing repair
We talked to 4 different contractors and only David, of Evergreen, took the time to climb up to our roof to check out the job. The others gave us bids based upon a photo. Evergreen was not the cheapest but the extent of the work they did was worth every penny.
Steve K.Roof and exterior work
Evergreen crew installed three skylights for us. Once we opened the ceiling there was more to do than expected and they handled it without drama. Clean work, fair price, and they cleaned up after themselves.
Foad M.Three skylights
Tell us what needs fixing
Send photos and a short description. If it arrives before 5pm you get an answer the same day.
Already have a written estimate from someone else? Send that too. We match or beat most estimates by 10%.
- Call(971) 715-0673
- Emaildavid@evergreenremodeling.co
- Office505 SE 184th Ave Unit 320, Vancouver, WA 98683
- LicenseWA Lic. #EVERGRS757MC