

Swap a 1970s ranch’s back wall for a twelve-foot slider and the door itself is the cheap part. What actually decides whether that wall functions is the engineered header spanning the gap, the posts carrying its load to the footings below, and flashing built for a town that gets noticeably wetter than Portland. That structural work is ours to plan and build, start to finish.
Licensed and insured. Oregon CCB #262707
On anything sent before 5pm
We match or beat most written estimates
Remodels completed
We frame the new opening with a header sized to the span, then set the door unit, shim it and fasten it square. Rain falls heavier out here near the foothills, so a sill pan, flashing tape and head flashing are lapped in before siding is reinstalled and trimmed out. Inside, casing, drywall finishing and paint complete the job.
We cut out the load-bearing wall, size an engineered beam or header to the new span, and carry that weight down through posts and footings poured to reach firm soil.
Taking a narrow window out to full door width, shifting an opening a few feet down the same wall, or breaking through solid framing where nothing existed before.
A header drooping under decades of load gets jacked level and replaced with one actually sized for the span, and we tear out whatever a previous remodel improvised behind the drywall to make it look finished.
Exterior siding and trim, interior drywall, casing and paint, all handled by the same crew that cut the opening so nothing falls through the cracks between contractors.
The wall came out, the beam went in, and two rooms became one. Same footprint on both sides of the line.
Drag the handle. Left, the wall between the kitchen and the next room opened up: studs exposed, the ladder standing in the opening, the floor covered. Right, the same footprint finished: a long island under pendants, and the two rooms reading as one.
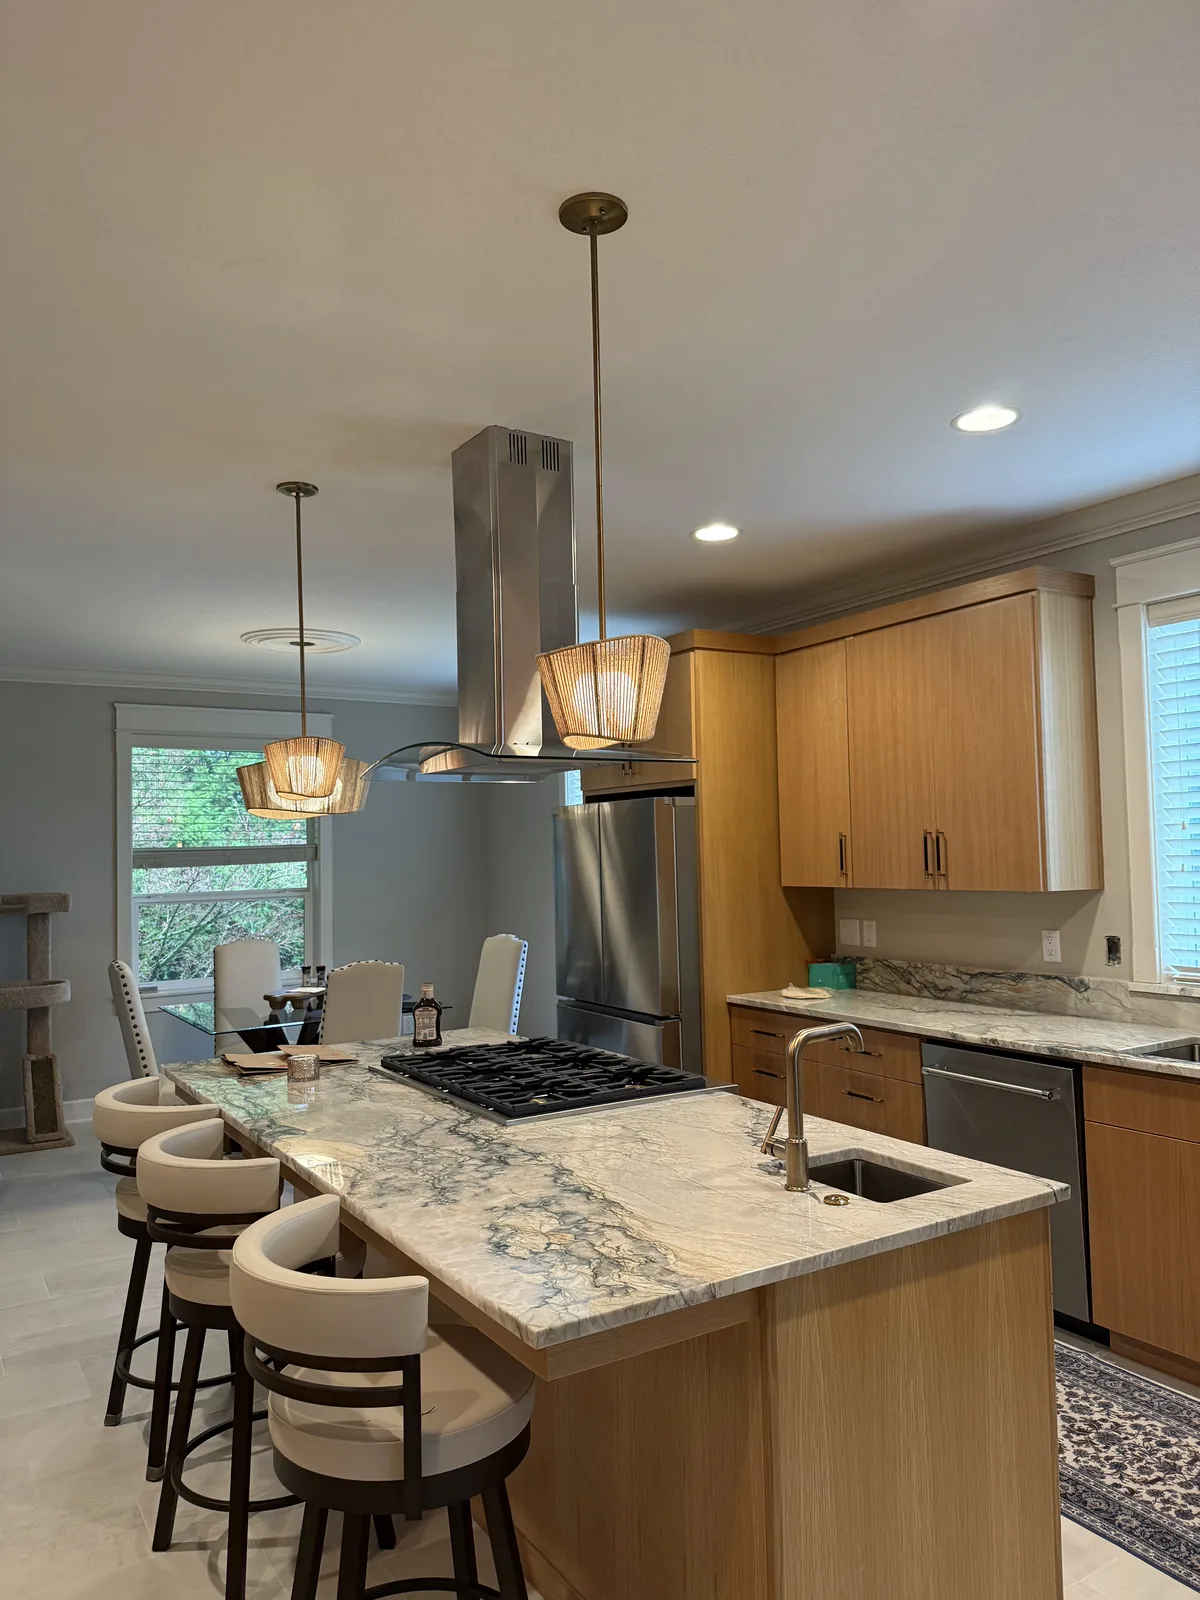
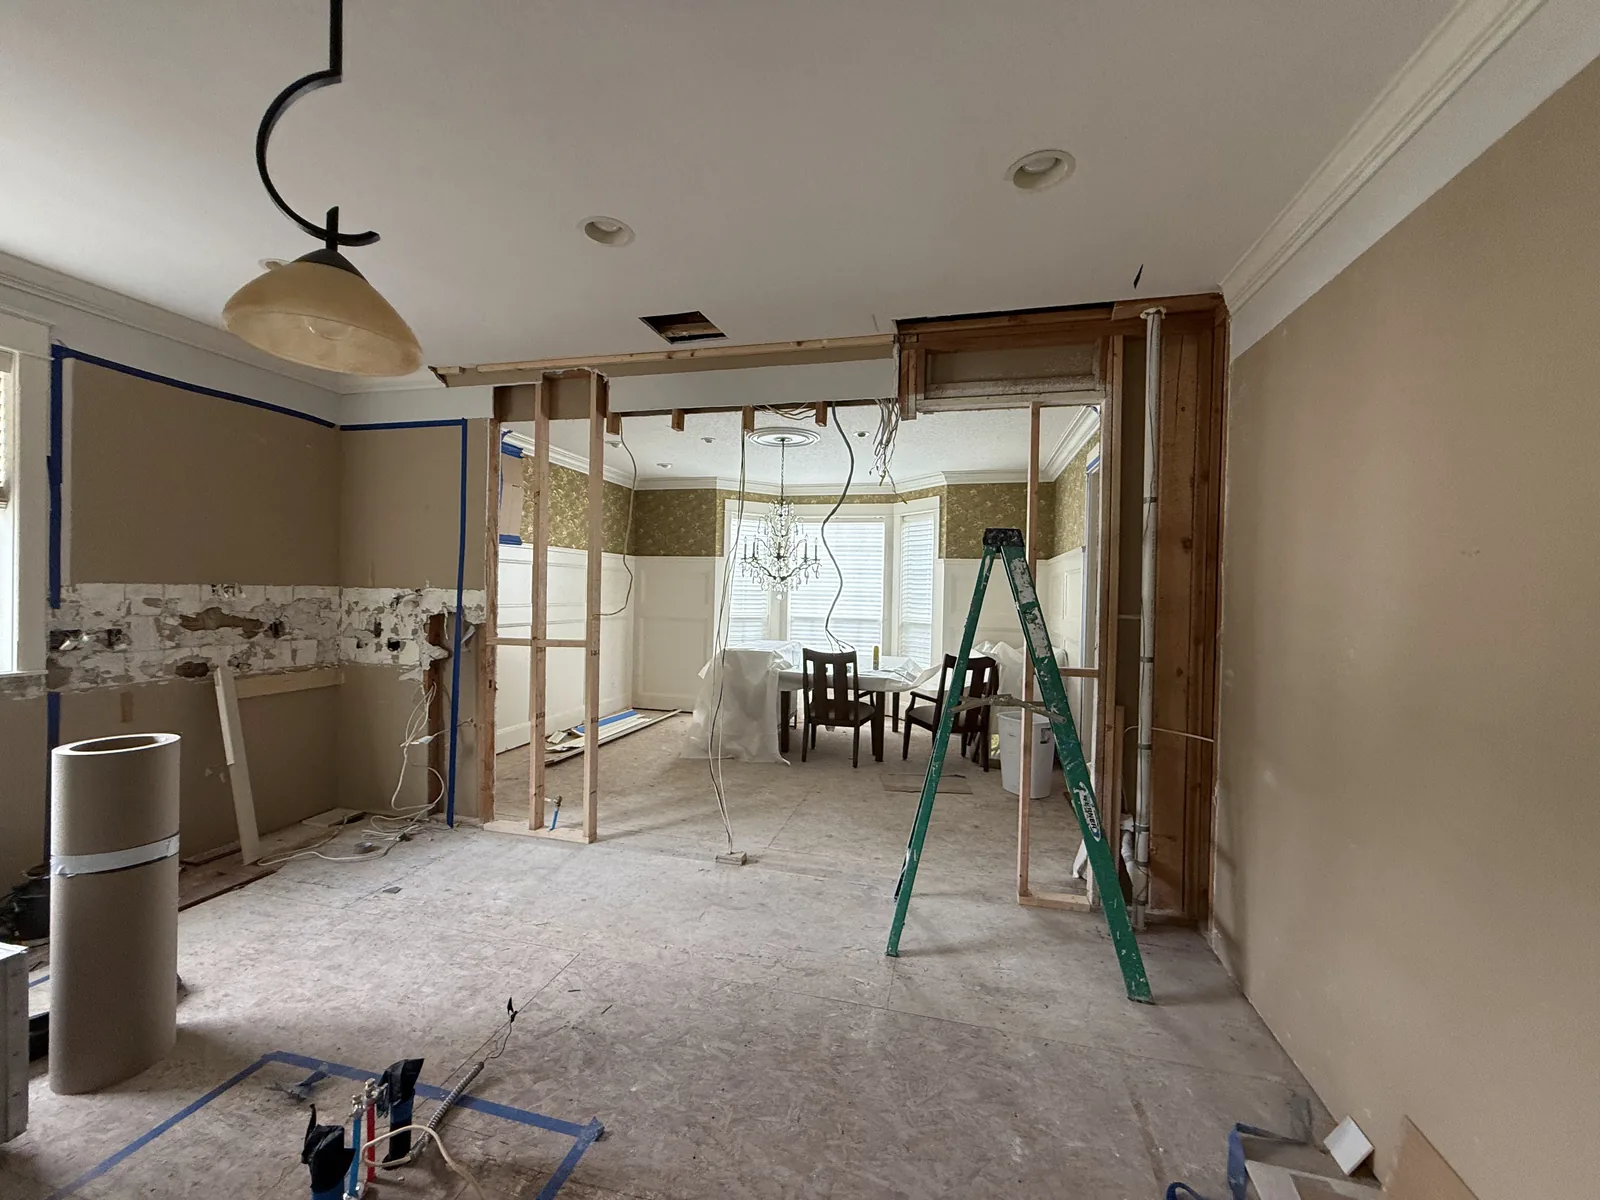 Before After
Cut twelve feet out of an exterior wall and you’ve removed the one thing holding up everything the roof used to rest on. From that point forward, the weight above travels through an engineered header into a post at each end, and those posts need a clear path to a footing below. Skip a step and the new door becomes the evidence: panels that won’t glide, a frame pulled out of square, hairline cracks fanning away from the drywall corners. On these 1960s and 70s Gresham ranch homes, where the original framing was never built with a twelve-foot gap in mind, we treat the engineering, the City of Gresham permit and the framing itself as one job, not three separate headaches.
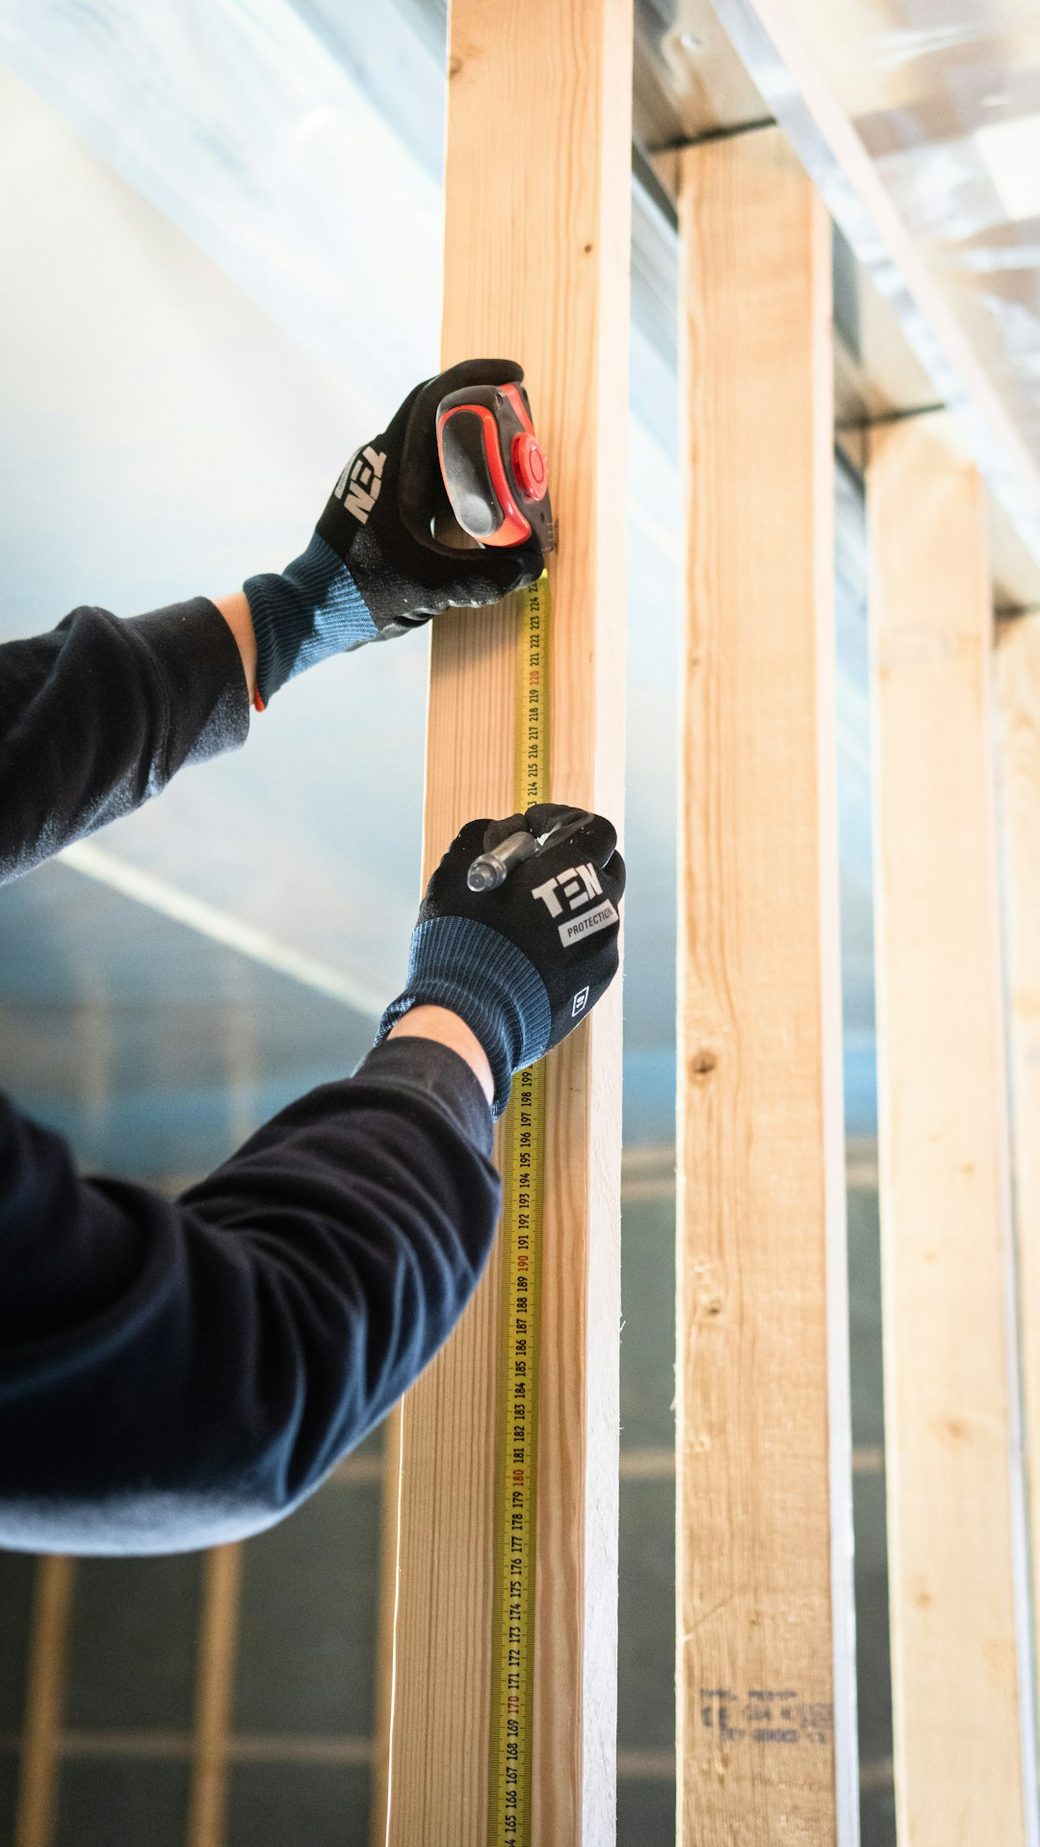
Here’s where we help you decide. The door itself takes the biggest bite out of the budget, but the opening you cut for it is what you’ll live with for as long as you own the house.
Door type comes down to motion, and three families handle it differently. A multi-slide rides a track and pushes its panels sideways, banking them against open wall or into a pocket if you build the wall out for one, and skipping that pocket means accepting a single leaf that never moves. A bifold hinges its whole run to one end and clears the gap completely, asking considerably more of the header, the track and the rollers carrying all that glass, at a real cost premium. A big lift-slide or oversized French set lands in between the two. More often than not, it’s the floor plan itself that rules certain options out before you even compare prices: a typical Gresham split-level often has a stairwell eating into that wall, and a ranch living room just as often has the fireplace sitting exactly where a sliding panel would need to travel.
Material changes what you’re looking at every single day, since a frame this size isn’t a thin accent; it’s a real visual element. Vinyl sits at the bottom of the price range and shows it, with the thickest profile of any option here. Step up to aluminum-clad wood and you get a warm, paintable face on the inside with a tough weatherproof skin facing outward, which is where the bulk of our Gresham installs end up. Thermally broken aluminum narrows the frame down to almost nothing and lets in the most glass, for the highest number on the invoice. Fiberglass sits quietly in the middle of all of this, holding its shape and its size through temperature changes better than any of the others, which counts for more across a twelve-foot span than most people expect.
Low-E glass and an argon-filled unit aren’t really a choice anymore; they’re just what goes into one of these now, and they pay for themselves fastest on a west- or south-facing wall catching long summer afternoons. The real decision sits at your feet: a flush threshold erases the step between the room and the patio and looks fantastic doing it, but it’s the single trickiest spot on the entire opening to keep water out of, which means it only gets built over a dedicated drainage pan with somewhere for moisture to escape. Gresham’s close to 48 inches of rain a year, more than falls on Portland just down the hill, makes this a real consideration rather than a theoretical one. Under a patio roof, flush is a safe call every time. If it faces open sky, we’ll walk you through exactly what you’re trading for that clean line before you decide.
Everything about the structure gets decided by a calculation, never by what you’d prefer. Measure the opening, add up what the roof, the floor above and the wall itself are putting on that span, and the sum tells you whether a stock piece of lumber handles it, or whether you need an engineered beam or actual steel, and how much post that translates to at each end. The part people rarely think to ask about is what’s under those posts. On a lot near the Johnson Creek drainage where the crawlspace can stay soft into late spring, perching a post on bare subfloor and hoping is not an option, so we’re often pouring a dedicated footing before the frame goes up. It’s also usually the first thing missing from a quote that looks a little too good.
Trim, siding, drywall, flooring and paint close the loop, and this step decides more than people expect about whether the finished opening looks like it belongs or looks tacked on. Fifty-year-old lap siding doesn’t match a fresh sample off the shelf without some real skill in blending it, and neither does flooring that’s been down since the Ford administration. Handling the structure and the finish with one crew, instead of passing the job to a separate finish contractor, is what actually closes that gap.
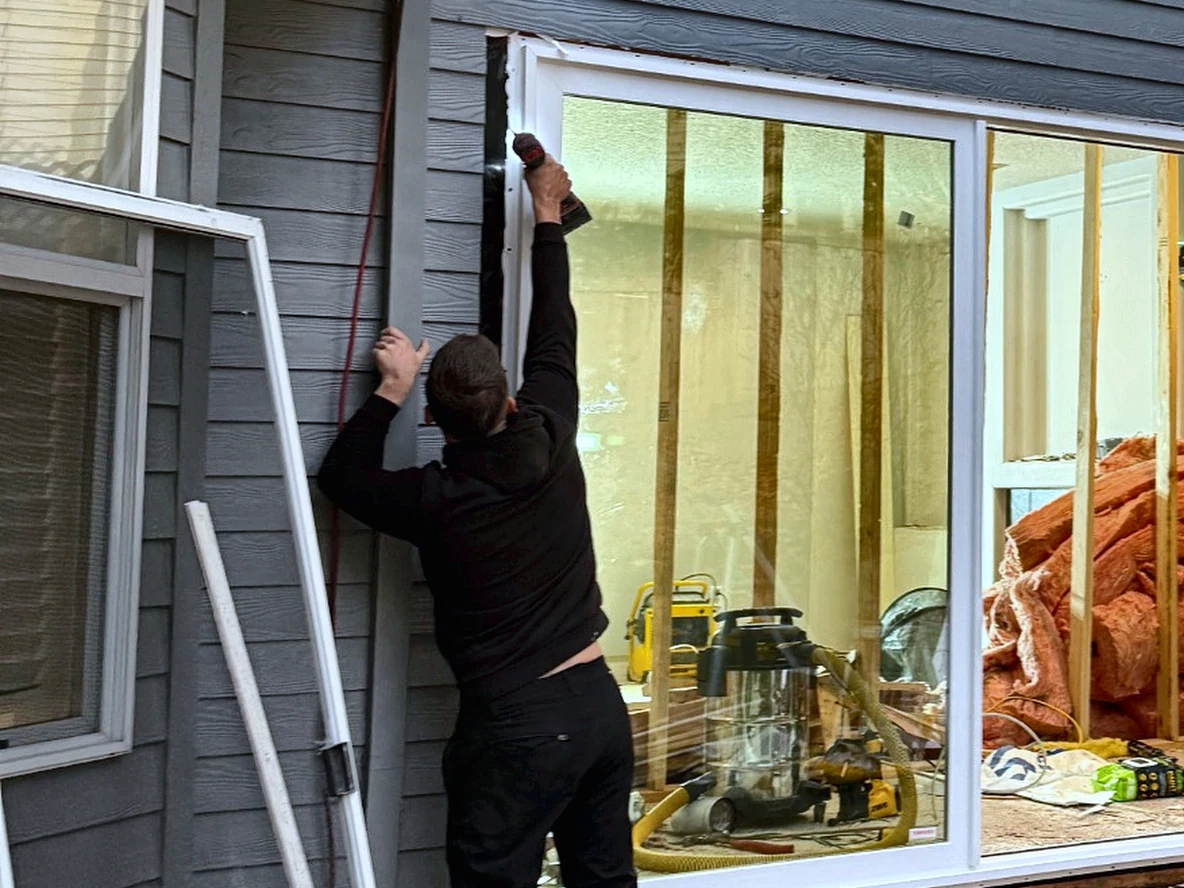
Here’s a real install paused exactly where the whole thing either works or doesn’t. The home’s existing lap siding has been cut back square to a brand-new opening, a wide slider already stands inside it, and a worker reaching high is driving a screw through the nailing fin that rings the unit’s edge.
That dark strip running up the jamb is flashing membrane, and it only works if gravity is doing the job for you, meaning everything above has to drain onto everything below rather than the reverse. We start down at the sill, lapping that first piece out across the siding so water rides over it and away from the framing, then build upward, jamb before head, with the exterior weather barrier folding down last to cap the whole assembly. Install one piece out of that order and moisture works behind the trim for years before it ever shows.
We’d rather show you this moment than a tidy finished photo, because once the casing and siding go back on, none of it is visible again and you’re trusting whoever did the work. Wood rot is our bread and butter here, where groundwater near the Johnson Creek drainage keeps crawlspaces damp well past the rainy season, and plenty of our repair calls trace back to exactly this step getting rushed. Better to watch the layers go on now than take our word for it once they’re buried.
A door the width of a wall is, to the rain, simply a seam the width of a wall, and Gresham sees something on the order of 47 to 48 inches of it most years, noticeably more than Portland collects a few miles downhill, since this is roughly where the ground begins climbing toward the Cascade foothills. Keeping that much water out of the framing comes down to unglamorous layering at the sill, the jambs and the head, each piece sending moisture back outside instead of in. We treat every one of these details as a permanent decision rather than a guess, because the alternative is tearing out good drywall years later to fix something that should have been right the first time.
The physics doesn’t care which side of the exterior wall you’re on. More than anything else, Gresham homeowners call us wanting the wall gone between a tight original kitchen and the living room, a layout almost every 1960s and 70s ranch and split-level around here was built with. Before we quote anything, we answer one question: does that wall carry weight? We expose enough of it to be certain, give you the honest answer either way, and when it does bear load, the number you get already includes the beam, the posts and the City of Gresham permit rolled into one figure, not a lowball that grows once the drywall is already down.
Nearly every dollar on this quote splits into four buckets, and one of them dwarfs the rest. The door itself, picked by brand, frame and glass package, is almost always the biggest line by a wide margin, which means your choices in the showroom set the ceiling on the whole number. Structure, labor and finish make up the rest, and we keep each one on its own line of the estimate rather than folding everything into a single total. Already have a bid from someone else in hand? Pass it along. We’ll match it or beat it by 10%.
Below that headline door cost sits the part most quotes gloss over: the beam and posts that carry the load once the wall is gone, plus whatever has to happen beneath the floor to land that weight on firm ground. Add the labor of cutting a true opening and setting a heavy unit plumb and square, the siding, drywall and paint that close it back up, and finally the engineering fee and the City of Gresham permit, both small line items that are never optional.
What actually moves this number has nothing to do with the showroom. On almost any exterior wall in one of these 1960s or 70s ranch houses, that wall is carrying weight, so the beam and posts aren’t optional add-ons; they’re the real cost hiding under the glass. And if those posts end up over a crawlspace with nothing solid beneath them, especially on the lower lots nearer Johnson Creek where the ground holds moisture well into spring, we’re down there pouring new footings before the door ever gets hung. That’s the piece a bargain bid quietly skips.
10%
Even a single clear picture of the wall gets things moving, though a shot from both the inside and outside helps us scope it faster. Get it to us ahead of 5pm and expect a response before the day is out.
Most people picture their whole house sitting open to the weather for weeks on end. In reality, across the entire project, the wall is exposed for a matter of hours within a single day, scheduled tight enough that we know which hour we’re cutting in before we ever show up. Here’s how the job actually unfolds.
It starts with a site visit and real tape-measure numbers, tracing the path of the roof load from above down to whatever’s waiting under the floor at each end of the proposed opening. Spans that call for it get handed off for engineered beam and post sizing, stamped and signed. That stamped page is exactly what the City of Gresham Building Division needs in hand before any permit gets issued.
Next, paperwork and ordering happen at the same time: the application heads to the City of Gresham Building Division while the door itself gets placed on order that same week. Nothing about the house changes during this stretch, so disruption is zero; it’s pure patience. These units are built to order, and the factory’s production queue, more than our own schedule, is usually what sets the actual start date.
Day one is entirely setup. Floors and anything staying in the room get covered over, and we frame temporary stud walls to take the roof’s weight off the section of wall about to disappear. Not one original board comes out until two things are both true: the door has physically arrived and that temporary bracing is doing its job.
Once the bracing is carrying the load, out comes the old wall, up goes the new beam onto its posts, and we have everything dried in and weathertight before the crew clocks out that evening. This is the single stretch the house is genuinely exposed to the sky, so we pick the date off the forecast and steer clear of the wettest days of the season.
The unit gets shimmed dead plumb and square and fastened into place. Then come the weatherproofing layers, applied low to high so each one drains onto what’s beneath it rather than the reverse. A City of Gresham inspector reviews all of it before a single piece of trim or siding covers any part of what’s now hidden.
Exterior work closes the house back up first, siding and trim matched to what’s already there, followed by interior drywall, casing, flooring and paint. We walk the finished space with you, and once the new framing has had a few weeks to settle into the rest of the house, we return to fine-tune the door until it glides and latches exactly right.
Depends on what your wall can actually give you. A slider keeps one panel permanently fixed and seals better than any folding option, which works well in plenty of these older Gresham ranch floor plans that don’t offer much blank wall for panels to travel across. A bifold folds completely out of the way for an unobstructed opening, at the cost of a beefier header, track and hardware to support all that moving glass. Bring us the real measurements and your budget, and we’ll tell you honestly which one fits, since the markup to us is identical either way.
It does, without exception. Here, that permit runs through the City of Gresham Building Division and Development Services rather than any county office, since Gresham issues and inspects its own structural permits inside the city limits. Spans past a certain width also need a stamped engineer’s drawing in the file before the city will sign off. Our Oregon CCB #262707 covers this work, and the entire process, application, stamped drawings and inspections, is ours to manage, not something you have to chase down yourself.
Shorter than most people assume. We hold off on any cutting until the header stock and the door unit are both physically on site, which means the exposed window is measured in hours, not days, and it closes up weathertight before anyone goes home. All the trim, paint and siding work that follows happens with the house already buttoned against the weather, worth noting given how much more rain Gresham pulls in than Portland does a few miles west.
Regularly, actually. It’s rarely the door that’s at fault; it’s almost always the opening underneath it, usually because whoever framed it originally didn’t size the header for the real span, or because the flashing got rushed or skipped outright. Our fix starts by opening the surround back up, correcting whatever is actually supposed to carry the load, redoing the weatherproofing properly this time, and rehanging the same door so it finally operates the way it should have from day one.
Width is really a question for the framing crew, not the door catalog. Openings up to twelve feet are standard for us, and wider ones are possible once engineering for that particular wall confirms it. What changes as the gap grows is the beam spanning it, moving from ordinary dimensional lumber up through an engineered member and eventually steel, with the posts and footings at each end scaling right along with it. The City of Gresham won’t permit any of this without stamped engineering behind it, and neither will we cut it without that math done first, regardless of what the door showroom tells you is possible.
Only if the flashing goes on wrong, and that’s a separate craft from hanging the door itself. Water has to be directed outward at every layer, starting at the sill and working upward so each piece sheds onto what’s below it. Nearly every wide door we’re called out to fix for leaking turns out to be a sound unit sitting in an opening that was flashed out of sequence, and with Gresham’s wetter, foothill-adjacent climate, that sequence is not something we leave to chance.
You can stay, and most clients do. A set of temporary walls takes over the roof’s weight before we touch anything original, so the actual opening is exposed for hours within a single day rather than any extended stretch, and it’s closed back in before the crew packs up. Empty out the room ahead of time and expect one genuinely loud stretch while the saws and the beam are going in. Everywhere else in the house, life goes on as normal.
Often, and when it works it’s a genuinely clean look, floor and patio reading as one continuous surface. Whether we can pull it off comes down entirely to the threshold. A flush or low-profile sill is the hardest point on the whole opening to keep watertight, so it only gets built over a proper drainage pan with somewhere for water to go. Sheltered beneath a patio cover, that’s an easy yes every time. If it stands open to a wet Gresham winter with nothing overhead, we’ll lay out exactly what you’re trading for that look before you commit to it.
Our shop sits at 505 SE 184th Ave in east Vancouver, and reaching Gresham means crossing the Columbia on I-205 and continuing east through the Portland metro before Powell Boulevard turns into the Mount Hood Highway at the city’s edge. It’s a real commute, not a short hop, and we make it often.
Inside Gresham we take on framing and wide-door work across the full range of housing stock: the 1960s and 70s ranch and split-level homes thick through northwest Gresham, the older, denser streets of Rockwood that got annexed into the city back in the mid-1980s, and the newer Pleasant Valley and Springwater subdivisions on the southeast side where builder-grade finishes are now old enough to want replacing. Downtown Gresham and the streets near Gresham Butte and the Springwater Corridor Trail fall in the same territory.
We’re licensed as Oregon CCB #262707, and that license carries just as far east: Troutdale, Boring, Damascus and Happy Valley all fall under the same stamped engineering and the same crew. If your street isn’t named here, ask anyway.
Three of the 50 reviews on our Google profile, in the homeowners' own words.
David's work was terrific. Repaired a rotted out structural framing issue in a bathroom and replaced (and resized!) a window in the same space. He initially quoted a two day job but was able to finish in a single day. Dedicated! Will be using him again.
Joe H.Bathroom framing repair
Evergreen crew installed three skylights for us. Once we opened the ceiling there was more to do than expected and they handled it without drama. Clean work, fair price, and they cleaned up after themselves.
Foad M.Three skylights
Wow. Just Wow. Had the Evergreen crew replace existing fencing, put in a 33.5ft x 18.5ft multi-tiered deck, and assemble a 12ft x 16ft gazebo. Couldn't be happier with the results.
Anthony L.Deck, fence and gazebo
Send photos and a short description. If it arrives before 5pm you get an answer the same day.
Already have a written estimate from someone else? Send that too. We match or beat most estimates by 10%.
Built for the wet side of the river.

Licensed and insured remodeling contractor serving Vancouver, WA and the Portland metro.
Oregon CCB #262707 · WA Lic. #EVERGRS757MCEvergreen Renewal Services LLC
505 SE 184th Ave Unit 320
Vancouver, WA 98683
© 2026 Evergreen Remodeling. Oregon CCB #262707 · WA Lic. #EVERGRS757MC. Evergreen Renewal Services LLC. All rights reserved.
Same day response on anything sent before 5pm.